Friday, August 30, 2024

Wealthy Walmart $10 Gift Cards Instant Win

If you enjoy nice things and being a bit comfortable with your money, we’ve got something special for you. Welcome to our newest Walmart $10 Gift Card Instant Win wherein TEN lucky participants will get a chance to win a little bonus to make your day. Whether it’s getting yourself a yummy treat, or just making life a bit more comfy, a Walmart $10 Gift Card can add a little extra fun to your day!

Read more and spin to win below.

wealthy walmart $10 gift cards instant win

Here are some tips on how you could spend your $10 Walmart Gift Card:
  1. Treat Yourself: Use your gift card to splurge on a guilty pleasure, be it a gourmet snack, a beauty product, or a cozy blanket for those luxurious Netflix nights.
  2. Gadget Fun: Check out cool gadgets at Walmart. Get a new phone accessory or a nifty tool for the kitchen!
  3. Practical Essentials: Stock up on everyday essentials like toiletries, cleaning supplies, or pantry staples. Your gift card can go a long way in making these necessary purchases a bit more enjoyable.
 

How would you spend your $10 Walmart Gift Card? Let us know in the comments.

Don’t miss out on your chance to add a little extra to your life. Enter now, spin below and see if you’re the lucky one!

Having some extra cash is fun, and winning a $10 Walmart Gift Card makes it even better. Take a chance and see if you’ll be the winner. Good luck!

Wealthy Walmart $10 Gift Cards Instant Win


The post Wealthy Walmart $10 Gift Cards Instant Win appeared first on Steamy Kitchen Recipes Giveaways.


from Steamy Kitchen Recipes Giveaways https://ift.tt/p0nTl4X
via New Kitchen Special

Thursday, August 29, 2024

Easy Beef Ramen Noodle Bowl Recipe

If you’re craving something warm and hearty, we’ve got just the thing for you. This Beef Ramen Noodle Bowl is the ultimate comfort dish! Imagine tender, slow-braised beef with a rich umami-packed broth and chewy ramen noodles. 

This Japanese-inspired easy recipe is perfect for anyone, whether you’re new to making ramen at home or you’ve done it a million times. It’s also wildly customizable! You can add soft-boiled eggs, green onions, sesame seeds, or whatever you enjoy. And, bonus, it’s a quick family favorite for busy weeknights. Ready to make your own steaming bowl of ramen?

Why This Beef Ramen Noodle Bowl Recipe Works

  • An Umami-Rich Broth: With a combination of miso paste, soy sauce, and beef broth, you get a savory noodle broth that’s both flavorful and true to Japanese cuisine.
  • Tender Beef: When you slow-braise the beef chuck roast, it becomes melt-in-your-mouth tender and soaks up all the savory broth flavors. If you’re a fan of juicy shredded beef, you’re gonna love this dish.
  • A Mosaic of Texture & Flavor: You’ve got the semi-firm ramen noodles, snappy corn, and soft boiled eggs, which also add sweetness and richness. All of this is submerged in a rich broth that you can complement with sesame seeds and green onions, or whatever you enjoy.
  • It’s Customizable: Speaking of whatever you enjoy, did we mention that this easy beef ramen recipe is super customizable? Don’t hesitate to add bok choy, bean sprouts, or even snow peas for a little extra crunch. Trying to consume less salt? Opt for a low sodium soy sauce to throw in. Like your ramen a little spicy? Drizzle in some hot sauce to add a bit of kick!
  • It’s Like A Warm Blanket in a Bowl: Had a rough day and need the food version of a hug? We’ve all been there. This is a great recipe for those who need to be comforted, and the best way to warm up during the late fall and winter months. It’s hot, cozy, and deeply satisfying.


Ingredients For This Beef Ramen Noodle Bowl

  • Beef Chuck Roast: A tender cut that’s perfect for slow-braising.
    • You Can Also Use: Boneless short ribs or brisket. These work just as well if you don’t have a beef chuck roast. For an even quicker option, you can replace slow-cooked meat with juicy ground beef for this dish.
  • Onions & Shiitake Mushrooms: Onions add sweetness, while the mushrooms supply it with earthy, umami flavors.
    • You Can Also Use: Don’t have shiitake mushrooms? Try cremini or portobello mushrooms. Forgot onions? Shallots or leeks can easily replace them. If you’re looking to up your veggies, throw in some red bell pepper or snow peas.
  • Ginger & Garlic: These additions work to add depth to the broth.
    • You Can Also Use: If you don’t have the real thing, no worries. Use ground ginger or garlic powder in a pinch. If you like more mild flavors, use roasted garlic.
  • Miso Paste & Soy Sauce: Think of these as the heart of your ramen broth. They’re going to supply it with a deep umami flavor.
    • You Can Also Use: If you don’t currently have miso paste in your cupboard, try a combo of soy sauce and a little tahini. Tamari or coconut aminos can also be used to replace soy sauce. Add a little rice vinegar for a touch of tang.
  • Ramen Noodles: Chewy noodles are there to absorb all that yummy broth.
    • You Can Also Use: Out of ramen noodles? Try udon, soba, or even spaghetti noodles to change up the texture. You can also use instant ramen noodles and just leave the seasoning packet out for another time.
  • Soft-Boiled Eggs & Corn Kernels: These are classic ramen toppings that add some richness and a whole lot of texture.
    • You Can Also Use: Poached eggs or even lightly scrambled eggs can be used to replace soft-boiled eggs. Don’t have corn? Try some fresh peas or edamame.
  • For Serving: Don’t forget those final touches! Fresh green onions, toasted sesame seeds, and a sprinkle of chili flakes are great additions to add some color and crunch.
    • You Can Also Use: You can get pretty creative with the toppings. No green onions? Grab some chives or thinly sliced leeks. No sesame seeds? Time to use those crushed peanuts or cashews that have been sitting in your pantry.


How To Make This Beef Ramen Noodle Bowl – Step By Step

Step 1: Preheat the Oven
To braise your beef slowly, set your oven to 325°F (163°C). This will help you achieve tender, delicious meat for this comfort bowl.

Step 2: Brown the Beef
In a large Dutch oven, heat up 1 tablespoon of neutral oil (like vegetable, canola, or avocado oil) over medium-high heat. Add in your beef chuck roast and brown it on all sides (about 2 to 3 minutes per side). You basically want to sear in all the juices so they can’t escape in the oven. Once browned, remove the beef from the pot and set it aside.

Step 3: Sauté the Vegetables
In that same pot, you’re now going to add in the diced onions and shiitake mushrooms. Sauté them over medium heat for about 5 minutes, until they become soft and aromatic.

Quick Tip: Scrape up all the browned bits from the bottom of your pot as you sauté the vegetables. They’ll add some extra flavor to your broth!

Step 4: Build the Broth
Throw in the minced ginger, whole garlic cloves, 2 tablespoons of miso paste, ¼ cup of soy sauce, 4 cups of beef broth, and 1 teaspoon of white pepper to the pot. Stir it all together until the miso paste is fully dissolved. Throw the beef back into the pot and cover with a lid, then and place it in your preheated oven. Braise the beef for 2½–3 hours, or until it’s tender and easily shredable with a fork.

Step 5: Shred the Beef
Once the beef is done, remove it from the pot and place it in a large bowl. Use two forks to shred the beef into bite-sized chunks, then set it aside while you finish the broth and noodles.

Step 6: Cook the Ramen and Toppings
Place the pot back on the stovetop and add in 4 cups of water. Bring the broth to a boil over medium-high heat. Once you’re at a boil, toss in the corn kernels, whole eggs (still in their shells), and ramen noodles. Boil everything together for about 6 minutes, or until the noodles are tender and the corn is cooked through.

Step 7: Prepare the Eggs
While the noodles are cooking, at the 4 minute mark, remove the eggs from the pot and place them in a bowl of ice water to stop the cooking process. This will ensure that the yolks stay soft and creamy. Once cool, peel the eggs. Don’t slice your eggs in half until just before you place them in the finished bowl.

Step 8: Assemble the Bowls
Divide your cooked noodles among four bowls. Label some hot broth and corn over the noodles and add in some shredded beef to each bowl, followed by half an egg. Finish each bowl with a garnish of your choice, with options like green onions, toasted sesame seeds, chili flakes, and cilantro.

Step 9: Serve and Enjoy
Serve your beef ramen noodles immediately while they’re hot and steamy!

FAQ

Can I use a different cut of meat for this recipe? Definitely! Boneless short ribs, brisket, or even top sirloin work well for this recipe. If you’re looking for a faster option, make yourself some ground beef ramen bowls.

How can I make this simple recipe gluten-free? Use tamari or coconut aminos instead of soy sauce, and opt for gluten-free ramen or soba noodles. 

Can I make this dish vegetarian? Yup! Just substitute the cooked beef with tofu or mushrooms. Use vegetable broth instead of beef broth, and remember that adding liquid aminos or a bit of rice vinegar can help to boost the umami flavor!

How long do leftovers last? Store the broth and noodles separately, each in an airtight container in the fridge for up to 3 days. To prevent the noodles from getting soggy, be sure to reheat the broth and add the noodles in just before serving. 

Can I cook the beef in an Instant Pot? Definitely! Brown the beef and sauté the vegetables, then pressure cook them on high for 45 minutes. Follow the same steps to finish the ramen.

Can I customize the toppings? Yes! Get creative! Throw in any veggies or proteins you have on hand, like spinach, bok choy, poached eggs, or even leftover grilled or ground chicken. If you want to boost the flavor, try out lime wedges, red pepper flakes, or a drizzle of hot sesame oil!

You’re ready to make your very own beef ramen bowl!

What do you like to add your own ramen bowls? Let us know in the comments. We love to hear it!

Other Favorite Asian Soup Recipes

Beef Ramen Noodle Bowl
Print

Easy Beef Ramen Noodle Bowl Recipe

Enjoy a comforting bowl of this rich Beef Ramen Noodle Bowl with tender, slow-braised beef, shiitake mushrooms, and ramen noodles in a flavorful miso broth. Topped with green onions, sesame seeds, and a hint of chili, this dish is hearty, satisfying, and perfect for a cozy night in.
Course dinner
Cuisine Asian
Keyword beef, noodle bowl, ramen
Prep Time 15 minutes
Cook Time 3 hours
Total Time 3 hours 15 minutes
Servings 4
Calories 638kcal

Ingredients

  • 1.5 lb Beef Chuck Roast
  • 1 Tbsp Neutral Oil such as Canola, Vegetable, or Avocado Oil
  • ½ Medium Onion diced
  • 3 oz Shiitake Mushrooms sliced
  • 1 Tbsp Ginger minced
  • 4 cloves Garlic whole
  • 2 Tbsp Miso Paste
  • ¼ cup Soy Sauce
  • 4 cups Low Sodium Beef Broth
  • ½ tsp Black Pepper
  • 4 cups Water
  • 1 cup Fresh or Frozen Corn Kernels
  • 4 Eggs
  • 250 g Dried Ramen Noodles

For Serving

  • Toasted Black and White Sesame Seeds
  • Green Onion
  • Crunchy Garlic Topping or Chili Flakes
  • Cilantro

Instructions

  • Preheat the oven to 325°F.
  • Heat a large Dutch oven over medium-high heat and add in the oil and beef chuck. Brown the roast on all sides, 2–3 minutes per side. Remove the beef and set it aside.
  • Reduce the heat to medium. Add the onions and mushrooms to the pot and sauté for 5 minutes.
  • Add the ginger, garlic, miso paste, beef broth, and black pepper into the pot. Add in the beef chuck roast Stir, then cover with the lid and place into the oven to braise for 2½–3 hours or until the meat is falling apart.
  • Remove the meat from the pot and place it into a large bowl or pan. Use two forks to shred the beef (if necessary, use a knife to chop it into smaller pieces).
  • Add another 4 cups of water into the leftover broth, then add in the corn, eggs, and noodles. Boil for 6 minutes.
  • Remove the pot from the heat. Take the eggs out and place them into a bowl of ice water. Peel them and slice them in half.
  • Divide the noodles between four bowls. Scoop over the broth and corn, and add a portion of shredded beef and an egg to each bowl. Top with green onions, sesame seeds, chili flakes, cilantro, and a drizzle of sesame oil.

Notes

Note: To ensure the beef is fork-tender and easy to shred, you may need to adjust the cooking time based on the size and thickness of the roast. Check the roast after 2½ hours of braising—if it's not yet tender, continue cooking in 30-minute increments until the beef easily pulls apart with a fork. For larger or tougher cuts, total cooking time may extend up to 4 hours.

Nutrition

Calories: 638kcal | Carbohydrates: 49g | Protein: 40g | Fat: 32g | Saturated Fat: 12g | Polyunsaturated Fat: 4g | Monounsaturated Fat: 15g | Trans Fat: 1g | Cholesterol: 242mg | Sodium: 3462mg | Potassium: 852mg | Fiber: 3g | Sugar: 4g | Vitamin A: 268IU | Vitamin C: 3mg | Calcium: 105mg | Iron: 7mg

The post Easy Beef Ramen Noodle Bowl Recipe appeared first on Steamy Kitchen Recipes Giveaways.


from Steamy Kitchen Recipes Giveaways https://ift.tt/ApGcTqK
via New Kitchen Special

Thursday, August 22, 2024

How Long Does Loose Leaf Tea Last Before It Goes Bad?

If you’re anything like us here at Steamy Kitchen, you probably love tea too. In fact, you might have a whole stash of bagged teas in a cupboard or maybe jars of loose leaf teas proudly displayed on your counter. And though you often enjoy them, you can’t help but wonder about ultimate question: How long do these lovely little leaves actually last? 

Know that you’re not alone. No matter if you’re a tea lover who’s amassed a collection that would make the Queen of England jealous, or a casual sipper with a couple of tins, it’s crucial that you know the shelf life of your tea. So, grab your favorite cup of tea (ours is a peachy blend, but you do you), and let’s dive into the leafy mysteries of tea storage.

chamomile tea

How Long Do Tea Leaves Last?

The Short Answer

The lifespan of tea leaves depends on the type of tea and how you store them. As a general rule of thumb, most loose tea leaves can last from 6 months to 3 years if stored properly. That’s a big range, we know, but different teas have different shelf lives. Let’s break down the lifespan of each tea, shall we?

The Long Answer

Here’s the info on how long each type of tea lasts:

  • White Tea and Green Tea: These teas are rather delicate divas, because they have a shorter shelf life than most teas. White tea and green tea is best enjoyed the first year that you have them, though some claim aged white tea to last up to 24 months, while properly-stored green tea can last up to 18 months.
  • Oolong Teas: Oolong teas last about 6 months to 2 years, depending on the type. Less oxidized oolong teas like Ali Shan should be enjoyed sooner, while heavier oxidized teas like Bai Hao can last a bit longer.
  • Black Tea: Black tea leaves, with their full oxidation, can last for 2 to 3 years.
  • Pu-erh Teas: The fine wine of the tea world, Pu-erh only gets better with age! They can last for decades, and in rare cases, even centuries! Some pu-erh drinkers buy young, raw pu-erh and leave it in their pantry for many years. 
  • Herbal Teas: While herbal teas are technically not considered “tea” since they don’t come from the Camellia sinensis plant, they’ll generally last about 1 to 2 years. This shelf life can vary depending on the specific herbs and flowers they contain.


teas in jars

Factors That Affect the Life of Tea Leaves

Proper Storage

To make sure your tea leaves last as long as possible, be sure to store them properly. Keep them in an airtight container, such as a tea tin or a mason jar, and put them in a cool, dark place. Avoid keeping them around high temperatures and direct sunlight, as well as any strong odors that could affect their flavor.

Air Exposure and Oxidation

Fresh tea’s greatest enemy? Air. The more air your tea is exposed to, the faster it will lose its essential oils and its flavor. This is why airtight containers are the way to go. Delay the oxidation process to keep your tea lasting longer. 

Type of Tea

As we talked about earlier, the type of tea you have plays a big role in how long your tea leaves will stay fresh.

Temperature and Humidity

Tea leaves should be stored at room temperature and kept in a dry place. High temps and humidity can lead to mold and spoilage.

Quality of Tea

Of course, the initial quality of your tea leaves will affect how long they last. High-quality tea leaves have more natural oils and robust flavors, which means they’ll have a longer shelf life than lower-quality teas.


nirvana herbal tea

How to Tell if Tea Leaves Have Gone Bad

Find a forgotten tea bag at the back of your pantry? Wondering if it’s still good? Don’t worry, it happens to the best of us. Though drinking expired tea isn’t necessarily harmful, here’s how to determine if your tea leaves have gone bad:

Check the Smell

Give it the ol’ sniff test. Fresh tea, especially loose-leaf, should have a strong scent. If it smells stale, musty, or has no scent at all, the essential oils have left the building and the tea has lost its potency. This goes for all types of tea. 

Take a Look at the Color and Texture

Time to use your peepers. Fresh tea leaves usually have a vibrant color. If they’re discolored, faded, or appear to have white spots (a sure sign of mold), we recommend you toss them.

Taste Test

Good tea should have its original flavor. If your tea tastes flat, bitter, or weird in any way, it’s past its prime. Over time, aged tea like raw pu’erh can develop more complex flavors, but old tea that wasn’t meant to age is just expired tea.

Check for Pests

If your storage conditions were compromised, then you might find some unwanted guests in your tea leaves. Look for any insects or droppings in your tea, and if you see any, it’s definitely time to toss it.

Look at the Expiration Date

While most teas don’t have an expiration date, checking for any date on the packaging will give you an idea of how long you’ve had it.

Signs of Moisture

Moisture is another arch-nemesis to tea, so if you notice any signs of moisture in your tea leaves, spot clumping or smell a wet smell, toss immediately.


teas in jars

More Tips for Tea Drinkers

  • Smaller Quantities: If you’re worried about your tea lasting, or if you only drink tea sporadically, be sure to buy your tea in smaller quantities so you’ll be more likely to use it up before it goes bad.
  • Surface Area: Loose-leaf tea has a greater surface area that’s exposed to air than tea in tea bags, and that can affect shelf life. Be sure to keep your loose leaves in an airtight container.
  • Health Benefits: Fresh tea means more health benefits. The older your tea, the less beneficial properties, so drink up! 


butterfly pea flower tea

It’s Tea Time!

All this talk of tea has made us thirsty. We’re gonna go enjoy a cuppa right now!

There are 2 types of people in the world: those who get tea, and those who don’t. For those of us who do, we understand that it’s more than just a beverage. It’s a ritual. A moment of peace. An invitation of calm. It’s an opportunity for mindfulness, maybe gratitude, or perhaps just quiet. Whatever it is for you, I think we can all agree that tea is an experience and a chance to savor the moment. 

What about you? What do you love about tea? Do you have a favorite tea? Do you enjoy loose leaf or bags? Is herbal your go-to, or are you a connoisseur of finer black or pu-erh teas?

Whatever you enjoy, tell us in the comments! Be sure to include any tips for tea additions that you find yummy and what foods you enjoy with tea (if any). We always love to hear about it. 

The post How Long Does Loose Leaf Tea Last Before It Goes Bad? appeared first on Steamy Kitchen Recipes Giveaways.


from Steamy Kitchen Recipes Giveaways https://ift.tt/yjL1N5z
via New Kitchen Special

Wednesday, August 21, 2024

How Long Does Salmon Last In The Fridge?

We’ve all been there. Standing at the fridge, giving the side eye to that salmon filet (or whole fish!), wondering just how long salmon can hang out until it’s no longer a viable meal option. 

We’re definitely no stranger to this dilemma. And it’s not JUST about the possibility of food poisoning. Knowing the lifespan of salmon, whether it’s fresh, cooked, or leftovers, can help you reduce food waste (and keep your fridge from becoming a science lab, because no one wants that).

So let’s dive into it with the short and long of salmon’s freshness timeline, and how you can make sure to maximize it.

The Short & Simple Answer

Let’s get right into it. How long does salmon last in the fridge? When properly stored, raw salmon can play nice in your fridge for 1-2 days before you absolutely HAVE to cook or freeze it. When it comes to cooked salmon, that timeline extends to 3-4 days. But the shelf life of your salmon can vary based on certain factors, so it’s good to have ALL the information. For the sake of food safety, let’s chat about those factors, as well as some salmon storage tips to make sure you get the most out of your fish.

Factors that Affect the Shelf Life of Salmon

The longevity of your salmon is determined by a few different factors:

  • Type of Salmon: Smoked salmon lasts longer than raw salmon due to the smoking process.
  • The Way You Store It: Salmon should be kept at 40°F or below, and wrapped tightly in plastic wrap. You can put it in an airtight container, but the less air exposure, the better.
  • Room Temp Roulette: Salmon should NEVER be left out at room temperature longer than 2 hours, as this encourages bacterial growth. And if your salmon is out for a couple hours, you’re going to want to cook it rather than put it back in the fridge. Once it’s exposed to the “danger zone” (between 40°F and 135°F), if it’s not cooked shortly thereafter, you may risk getting food poisoning.

Storing Different Types of Salmon

Raw/Fresh Salmon: There’s not much one can do to extend raw salmon’s short refrigerator shelf life of 1 to 2 days, but you CAN make sure you’re storing it right. To preserve the freshness, make sure your fridge is set to 40°F or below, and keep your salmon in the coldest part of the fridge (the lower, the better–bottom drawer is best!). Also, make sure you’ve wrapped it tightly in plastic wrap, a sealed freezer bag, or an airtight container to protect it from air and moisture. (Though, the less air with it, the better.)

Cooked Salmon: Once you’ve cooked your salmon, it can last 3 to 4 days in the fridge. If you’re refrigerating it shortly after cooking, make sure that it’s cooled to room temperature before refrigerating, BUT not left out longer than 2 hours. Place it in an airtight container to prevent it from drying out and absorbing other fridge odors.

Smoked Salmon: The smoking process of smoked salmon not only adds flavor, but also gives salmon a longer shelf life. In its unopened package, smoked salmon can last up to 2 weeks in the fridge. Once opened, you’ll want to enjoy your smoked salmon within 7 days (of course, within that initial 2 week timeline, not added onto it). Keeping it in its original packaging is your best bet, but if the open packaging exposes it to air, wrapping it tightly in plastic wrap is the way to go.

Thawed or Defrosted Salmon: Salmon that’s gone from the freezer to the fridge to thaw can hang out for an additional 1-2 days in the fridge before needing to be cooked. That being said, if you’ve expedited the thawing process by using the cold water method or a microwave, you’re going to want to cook it immediately. Thawing salmon with these quicker methods can put your fish in temps that present the risk of bacterial growth, and it’s better to be safe than sorry!

Signs That Your Salmon Has Gone Bad:

If your salmon has been properly kept within the timeline and temps we listed above, and you’re still finding its freshness questionable, let your senses be your guide to the signs of spoilage: 

  • Smell Test: Fresh salmon has a mild, oceany scent. If you sense a sour smell, a strong fishy smell, or if it stinks at all like ammonia, it’s time to let it go.
  • Touch Test: Your fish should feel firm to the touch, not a slimy or sticky mess. If your salmon feels like it’s leaving a residue on your fingers, it’s way past its prime.
  • Visual Cues: The color of the salmon should be bright throughout. If you see any discoloration, dark spots, or signs of mold, it’s a no-go.

The freshness of fish is something you don’t want to gamble with due to the risk of scombroid poisoning, which comes with a wealth of terrible side effects beyond the normal “food poisoning” ones you’d expect, including itchy rashes, dizziness, headache, and difficulty breathing. So, when in doubt, throw it out!!

How to Maximize Salmon’s Shelf Life by Freezing

Freezing salmon is great way to go if you want to extend its shelf life for longer periods of time. The best way to keep it from getting freezer burn and to preserve the freshness of the salmon is to double layer it. Wrap your salmon tightly in plastic wrap and then put in a heavy-duty freezer bag. To maintain the best quality, make sure to squeeze as much air out of the freezer-safe bag as possible. You can keep salmon in the freezer for up to 3 months. 

When thawing, opt for the fridge for the safest bet. If you need to thaw it faster, use a microwave or the cold water method (and change that cold water out every 30 minutes). Never use hot water to thaw your salmon. And if you are using a faster method, make sure to cook it immediately after.

Creative Ways To Use Up Salmon Before It Goes Bad

Forgot that you needed to cook that fresh salmon filet until JUST THIS MOMENT? Here are some recipe ideas to make sure that beautiful piece of fresh fish doesn’t go to waste:

  1. Salmon & Creamy Spinach with Mushroom Sauce: Imagine tender salmon nestled in the most amazing creamy sauce, mingling with fresh spinach and earthy mushrooms. Packed with vitamins and amino acids, it’s also a mood booster!
  2. Seared Salmon with Magical Butter Sauce: An easy recipe with crispy edges, slathered in a sweet and savory butter sauce. And it only takes a few ingredients!
  3. Miso Salmon: An easy, no fuss, full-flavored dish to pair with rice, quinoa or even on top of mashed potatoes. Also, the marinade and sauce for this Miso Salmon dish is made of 3 easy-to-find Japanese ingredients available at most supermarkets: Miso, Mirin, Saké.
  4. Seared Salmon Salad with Baked Crispy Chickpeas & Fresh Strawberry Vinaigrette: The crispy chickpeas in this are SO easy to make and really give this salad a nice crunch. The fresh strawberry vinaigrette also adds a slight sweetness that makes it irresistible!
  5. Open Faced Salmon Sandwich with Sweet Mustard Sauce: What could make salmon even more perfect than a 15-second Dijon mustard sauce, accompanied with egg, avocado, tomato, and greens over seedy bread (or grainy grains!)?

FAQs

Can I vacuum seal salmon to extend its shelf life?

Vacuum sealing is a great way to extend the shelf life of salmon because it removes the air that can speed up spoilage, but it won’t extend the life of raw salmon in your fridge, so it’s best to vacuum seal salmon when you need to freeze it, where it can be stored for up to 3 months.

What are the health benefits of salmon?

Salmon is rich in omega-3 fatty acids, which are beneficial to your heart health and can reduce your risk of heart disease. It’s also packed with the protein, vitamins, and minerals that your body needs. 

What’s the safest way to thaw frozen salmon?

Salmon is best thawed in the refrigerator. If you need a faster way, in the original salmon package (or a resealable plastic bag), place the salmon in a bowl of cold water, and change the water every 30 minutes to keep it cold and from growing bacteria. Avoid thawing salmon in hot water or at room temperature.

How should I repurpose salmon leftovers?

You can re-love your salmon leftovers by turning them into salmon cakes, adding them to pasta dishes, or mixing them into salads.

What should I do if my salmon smells a bit off but looks okay?

Trust your nose. If your salmon has an off smell, it’s best to err on the side of caution and throw it out. The smell of salmon is a reliable way to tell if it may be spoiled, and risking foodborne illness just isn’t worth it.

Swim On, Salmon Lovers!

Now that you know how to properly store your salmon and how to check it’s freshness, you have everything you need to ensure that you and your family stay safe when consuming this delectable little fish. 

And now, we want to hear from you! What’s your favorite salmon dish? Do you have a favorite family recipe? What’s the best salmon dish you’ve ever tried? Was it homemade or from a restaurant? (And if it was from a restaurant, I need to know the name! I love a good salmon dish!)

Leave us a comment! We always love hearing from you. 


Other Helpful Food Storage Tips

The post How Long Does Salmon Last In The Fridge? appeared first on Steamy Kitchen Recipes Giveaways.


from Steamy Kitchen Recipes Giveaways https://ift.tt/9Y2b6GM
via New Kitchen Special

Monday, August 19, 2024

What is 3x3x3 Meal Planning? Not Just Another Diet

With so many diets and meals plans out there, it’s hard to know which one works best, and due to bio-individuality, there’s no one-size-fits-all approach. What may work for one person might not work for others. That’s why we’re talking today about the 3x3x3 Meal Plan, a simple approach to eating that anyone can master. 

We’re here to fill you in on all the details regards this uber-easy meal plan system, so you can make an informed choice on if this particular way of eating is right for you. 

salad salmon baked crispy chickpeas fresh strawberry vinaigrette

What is the 3x3x3 Meal Plan?

The 3x3x3 Meal Plan (also known as the 3-3-3 Method) is all about balance and simplicity, and it’s pretty straightforward: 3 meals a day, and each meal includes three parts—a protein, a fruit or vegetable, and a source of carbohydrates, and you’ll aim for those portions to be equal. It also includes 2 snacks per day, each of which consists of 2 items from the same list. The whole point of this meal plan is to nourish your body without the complication of complex diets, extensive restriction, or counting calories.


all the fixings for this pineapple chicken buddha bowl

Why It Works

The 3x3x3 Meal Plan adheres to some important dietary principles. It’s balanced, yet still offers variety, 2 critical aspects of maintaining a healthy diet. By including proteins, fruits or vegetables, and carbohydrates in every meal, you get a great mix of macronutrients that support your energy levels, repair your muscles, and improve your overall health.

3x3x3 was inspired by a meal plan built by Journal of the Pakistan Medical Association in response to growing trends of obesity and diabetes, and as a means to relieve the heavy patient load on overworked global health care systems. It works by ensuring the intake of healthy macronutrients (through limiting carbs and encouraging protein consumption), as well as micronutrients (through the intake of fruits and veggies). According to their clinical practice guidelines, with just these simple lifestyle changes, most individuals can achieve an improvement in their health-related quality of life. 

The 3x3x3 Meal Plan is also commonly used by healthcare professionals as a dietary prescription for people in early stages of eating disorder recovery. It works by decreasing their preoccupation with food, restoring fullness and hunger cues, and decreasing over and under-eating while still following the most important dietary principles. By introducing a more open meal plan, and not a diet, 3x3x3 encourages people to become more in tune with their bodies. 


vegetable quinoa pilaf honey mustard chicken recipe

How to Build Your 3x3x3 Meal

The 3x3x3 meal plan is kind of like a nutrition goal cheat sheet. Here’s how to put it into practice:

  1. Choose a protein: Opting for a lean protein is encouraged, like chicken, fish, tofu, beans, or even eggs. The goal is to get enough protein to support your muscles and fill you up.
  2. Choose some veggies (or fruits!): Aim for a variety of colors on your plate to make sure you’re getting a range of nutrients. Think leafy greens, bell peppers, carrots, and broccoli. Salads are also a great choice, just be sure to keep additions, like crouton and heavy dressings, to a minimum.
  3. Choose a source of carbohydrates: We recommend complex carbs like brown rice, quinoa, sweet potatoes, or whole-grain bread. These will provide you with enough energy to fuel your day and they’re a great source of fiber.
  4. Optional: Include fats as part of your 2-item snack times. Unsaturated is best, such as olive oil or nuts, but dairy is permitted as well. Fats are a small but important part of a complete diet.


Korean Beef Rice Bowl

An Example of a 3x3x3 Day

Here’s an example of what your day might look like on the 3x3x3 Meal Plan:

Breakfast: Eggs and toast with sliced apples on the side.

Snack: Celery and peanut butter.

Lunch: A Buddha Bowl with chicken, veggies, and rice.

Snack: Peaches and cottage cheese

Dinner: Salmon, quinoa and a nice side salad.

This isn’t the standard order of meal and snack times. For those of you who prefer an after-dinner snack, feel free to enjoy your second snack as an evening food. The main focus is to eat small meals multiple times throughout the day rather than large meals three times a day.


beef and noodles on plate

Other Benefits of the 3x3x3 Meal Plan

The 3x3x3 Meal Plan offers a whole lot more than just nutritional benefits.

It’s Makes Time Management Easy: By limiting your options just slightly, it takes a lot of the guesswork out of what to eat and when to eat, and also allows you to easily plan your meals in advance. It’s a great way to save yourself a ton of time throughout the week. 

It Reduces Stress: This is one of the best meal plans for those who suffer from decision fatigue or have trouble figuring out what to eat everyday. It approaches food from a much simpler place, and offers you a healthy way to nourish yourself without the complication of counting calories or getting super restrictive, no matter if you’re looking to achieve weight loss or just improve your health.

It Makes Budgeting Easier: By having a clear idea of each meal’s components, you’ll know exactly what you need to get from grocery stores, and you’ll be less likely to get caught in an in-the-moment “should I get this?” scenario. 

It’s a Safe Place: In the confusing world of dietary advice, the 3x3x3 Meal Plan is a safe and easy plan to stick to. These days, it’s way too easy to feel overwhelmed with the plethora of fad diets and their conflicting information. This plan strips away the noise and focuses on what’s of the utmost importance: nutrients, balance and variety.


chicken skewers on plate

Challenges and Considerations

Every meal plan comes with its challenges. The 3x3x3 might require some adjustments, especially for those who are on specific dietary restrictions for medical reasons. Be sure to speak to your healthcare provider before starting any sort of meal plan or diet to ensure it’s best for your personal health. 

Starting any meal plan for the first time can also be challenging. Just remember that it isn’t about perfection, but about making consistent, positive change. And because of 3x3x3’s simplicity, it’s a great place to start.

Practical Tips for Success

  1. Meal Prep: Be sure to set some time aside every week to meal prep. This could be as simple as chopping veggies or marinating some proteins so they’re ready to go when you need them. For some fun together-time, invite the whole family to this ritual and create weekly group assignments! 
  2. Portion Control: To help visualize the 3x3x3 concept, grab a divided plate meant for this exact practice. This will help to prevent overeating and ensure you’re getting the right balance of nutrients.
  3. Stay Flexible: Life happens, and that means sometimes you’ll have to eat and run. Plan ahead for these times, and keep a list of quick and easy meal ideas that fit the 3x3x3 framework on your fridge.
  4. Eat Mindfully: Stop and take time to enjoy your meals. Eating mindfully means being in the moment with your meal, and it can help make the experience more satisfying and less about just “fueling up”.


Broccoli beef noodles in a pan

Ready to Make the Change?

We know learning about diets and eating systems, and parsing through all the various evidence of health sciences, is about as complicated and time-consuming as trying to solve a Rubik’s cube. We hope we’ve shed some light on what the 3x3x3 Meal Plan is and why it stands out from the rest. Hopefully, now, it’s a little bit easier for you to navigate choices when it comes to your health. 

Do you already follow the 3x3x3 Meal Plan? If so, we’d love to hear from you in the comments. Let us know what you love and/or hate about it.

Do you follow a different meal plan? Sound off in the comment section about it and why you think it works (or doesn’t work!).  

Are you curious about certain meal plans, and want us to do a deep dive into what they are and how they work? Let us know which ones you’re curious about, and we just might cover them in future posts. 

As always, we here at Steamy Kitchen wish the best for you. Maybe your food always be good and your health always be great. Be kind to yourself and others, and be sure to spread the love.

Meal Planning Master Mastercard Giveaway

Enter now for a chance to win Meal Planning Master Mastercard Giveaway and make meal planning easier, smarter, and more delicious.


The post What is 3x3x3 Meal Planning? Not Just Another Diet appeared first on Steamy Kitchen Recipes Giveaways.


from Steamy Kitchen Recipes Giveaways https://ift.tt/Yy4qpXr
via New Kitchen Special

The Best Mediterranean Diet Cookbook for Heart Health

You may have heard the buzz about the Mediterranean diet being hailed as one of the best in the world. Maybe you’re wondering why, or perhaps you’re just looking for the best Mediterranean diet cookbook on the market.

We’re here today to tell you all about why you should consider the Mediterranean way of eating, and why The Complete Mediterranean Cookbook by America’s Test Kitchen is a literary treasure trove of recipes that are perfect for anyone looking to delve into this incredibly heart-healthy diet.

heart healthy mediterranean diet

What is the Mediterranean Diet?

The Mediterranean diet is a way of eating inspired by the traditions of cultures living around the Mediterranean Sea, and it’s big on whole, minimally-processed foods like fresh vegetables, fruits, whole grains, legumes, nuts, and seeds, as well as healthy fats like olive oil. Because this diet is so rich in plant-based foods, it’s both nutritious and environmentally sustainable.

Here are the main focuses of the Mediterranean diet:

  1. Healthy Fats: While other diets may shy away from fats, that’s not the case with the Mediterranean diet at all! In fact, this diet encourages eating healthy fats (specifically unsaturated fats) like those found in olive oil, nuts, and fatty fish. The reason is that these fats are known for their heart-protective benefits, and it doesn’t hurt that they’re also a staple of Mediterranean cooking.
  2. Whole Grains: Whole grains can be found in whole-grain bread, brown rice, and barley. The Mediterranean diet prioritizes these over the refined grains found in things like white bread, white rice, and flour tortillas. Whole grains are loaded with fiber, which helps with digestion and stabilizes blood sugar levels.
  3. Lean Proteins: The Mediterranean diet doesn’t shy away from meats either, but it does emphasize the need for lean sources of protein like fish and poultry. There’s a big emphasis on seafood in particular, because it’s rich in omega-3 fatty acids. Red meat can be consumed on this diet, but less frequently and in smaller portions.
  4. Plant-Based Foods: Perhaps the biggest part of the Mediterranean diet comes in the form of veggies, fruits, legumes, and nuts, because they contain loads of essential vitamins, minerals, and antioxidants to benefit your overall health and prevent disease.
  5. Moderate Dairy: In the Mediterranean diet, dairy products are eaten very moderately, and when they are, it’s usually in the form of cheese and yogurt as a way to add a source of protein and calcium.
  6. Flavorful Herbs and Spices: Instead of being salt-heavy, Mediterranean dishes gravitate toward the use of herbs and spices to add flavor. It’s a great way to create flavorful foods that are also rich in nutrients.
  7. Wine in Moderation: The Mediterranean is known for its world-renowned wines, so you can’t have a Mediterranean diet without a little red wine! With an emphasis on moderation and enjoyment, specifically with meals, a little wine consumption is encouraged because of its association with improved heart health.
  8. Sweets and Red Meat in Moderation: Don’t want to give up sweets or red meat? You don’t have to on the Mediterranean diet. Just be sure to make them very occasional treats rather than daily staples of your eating habits.

With the Mediterranean diet, it’s not just about what you eat, but how you eat. Meals are to be enjoyed slowly, with family and friends as often as possible, and in a relaxed environment. This part of the Mediterranean lifestyle is believed to contribute not only to improved quality of life, but also to the diet’s health benefits, like lower risk of heart disease, optimal blood pressure, and better weight management.

complete mediterranean cookbook

Photo: Amazon

Why We Love The Complete Mediterranean Cookbook

We love this #1 best-selling cookbook for a few reasons.

In line with the Mediterranean diet, it focuses its recipes on healthy fats, whole grains, lean proteins and plant-based foods. It features over 500 kitchen-tested, easy-to-follow recipes from Turkey, Lebanon, Morocco, Egypt, and so much more. It also contains in-depth chapters on healthy ingredients like beans and veggies, and prioritizes seafood over lean meat and poultry. 

Rather than focusing on restrictive eating like so many other diets, the Mediterranean diet is all about healthy choices. Aligned with this notion, the book covers detailed info on wholesome ingredients you can find in almost any supermarket, from whole grains to spice blends, and so much more. It’s also got some amazing insight on meal planning, entertaining guests, and even a guide to building a comprehensive Mediterranean pantry!

mediterranean diet plate

Most of the healthy recipes found within this incredible book take less than 45 minutes to make, which makes it perfect for home cooks seeking busy weeknight dinner recipes.

Looking to explore new recipes or just want to stick to a Mediterranean meal plan? The Complete Mediterranean Cookbook has got you covered. It keys into the small changes you can make to achieve good health, as well as how to simply enjoy life with good food and great company. If you’re new to Mediterranean cooking, this comprehensive cookbook is the ultimate guide to building a Mediterranean-style eating plan.

mediterranean meal

Embrace the Mediterranean Lifestyle

The Complete Mediterranean Cookbook is a whole lot more than just a collection of recipes. It’s a celebration of the Mediterranean way of living and a sharing of traditional cuisine with the world. With its focus on whole foods, balanced meals, and bold flavors, this comprehensive guide gives you a practical look into how to improve the health and well-being of the entire family. 

Find your own copy on Amazon!

The Complete Mediterranean Cookbook Giveaway

Enter now and get a chance to win The Complete Mediterranean Cookbook Giveaway! This cookbook is your guide to fresh, flavorful meals.


The post The Best Mediterranean Diet Cookbook for Heart Health appeared first on Steamy Kitchen Recipes Giveaways.


from Steamy Kitchen Recipes Giveaways https://ift.tt/Y4hNg7y
via New Kitchen Special

A Practical Guide on How to Meal Prep For Two

Are you and a significant other, family member, or roommate thinking about meal meal prepping lately?

There’s something fun about meal prepping for two. It’s that sweet spot between not having to take the journey alone, and not having to make a family’s worth of meals. It might seem like a big task at first, but it’s actually a lot simpler (and more budget friendly) than you think! 

That’s why we’ve created this practical guide all about meal prepping for two. Let’s talk how to get you started.

chicken and veggies meal prep

Why Are You Meal Prepping? – The Benefits

The first step to approaching meal prep is to have a full understanding of what you’d like to get out of it. That will inform a lot of your next steps. Ask yourself and each other why you’re thinking about meal prepping. Here are some common reasons why people choose to meal prep and many of its benefits. 

To Save Time: We get it. You work all day, and the last thing you want to add to your work week is having to slave over a hot stove every night. Or maybe you love cooking dinner but don’t have a ton of time to whip up lunch. Whatever your time crunch, meal prepping is about setting yourself up for success and having time for more of what matters. And with just a bit of planning, you can have meals ready for the entire week. 

If saving time is a goal, we recommend: using a slow cooker, so you don’t have to do much active cooking, and opting for easy meal prep recipes. 

To Make Healthier Choices: Oftentimes, we opt for “fast” foods because they’re so effortless and easily accessible. Our brains weigh 2 options. “I could spend an hour over a stove or I could swing through a drive-thru or order delivery in a jiffy.” It’s obvious why the latter is so tempting. Unfortunately, quick and accessible usually means heavily processed, and a whole lot of who-knows-what being added to our foods. 

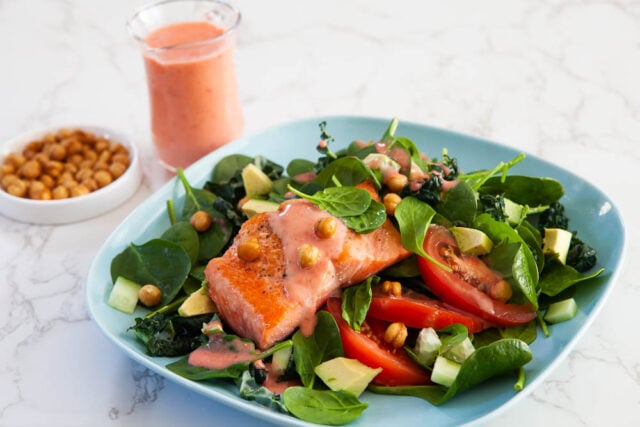
When you plan and prep all your meals, you control what’s in them. If eating clean and/or eating whole foods is a big factor for you, meal prepping is definitely a great way to achieve that. You get to choose to add in healthy veggies like bell pepper or baby spinach. You get to make the call on how much sugar is in your next meal. You get to exclude any allergens and add in specific nutrients. Meal prepping means more control over what you’re eating.

If making healthier choices is a goal, we recommend: opting for lean meats like chicken, fish, and pork, and following the very simple 3x3x3 Meal Plan formula, which just calls for equal parts protein, veggies, and carbs for each of your prepped meals. 

To Keep Meals Budget-Friendly: It’s no secret that meal prepping can mean a world of difference for your pocket. Prepping at home means less money spent on food chains, restaurants, takeout and meal delivery. It means buying specific ingredients and stretching them to last throughout the week. And no more multiple-times-a-week grocery runs, so you’ll save on gas too. With meal prep, pantry staples like black beans, sweet potatoes, and whole grains work to stretch your food budget even further.

If saving money is a goal, we recommend: taking advantage of bulk discounts, and seeking out the lowest price per quantity rather than the surface price. Don’t forget to sign up for grocery store memberships and utilize digital coupons. All of these things will save you money in the long run. 

To Reduce Food Waste: Meal prep is a great opportunity to buy a limited amount of ingredients and find creative ways to turn them into a variety of meals. Meal prepping incorporates meal planning, so you know exactly what you’ll need to buy, which means you’re less likely to overbuy or let things go bad before you can eat them. Everything you purchase has a purpose, which means less waste in general.

If reducing food waste is a goal, we recommend: utilizing the Reverse Meal Plan mentality, and shopping from your kitchen first to make sure everything gets used up.


meal prepping in containers

How To Meal Prep for Two

Okay, so you’re convinced that meal prepping is right for you. But what exactly should you make? The good news is there’s no shortage of flavorful, budget-friendly options out there. One fantastic resource we recommend is Budget Bytes because it offers plethora of easy meal prep ideas you can sort by category. Looking to prep for breakfast? Want to focus on less red meat? Already a full-fledged vegetarian? Looking for quick, no-heat options? Budget Bytes has whatever you’re looking for. 

If you’re new to meal prepping, we don’t recommend jumping in and trying to prep all of your meals for the next week. Start out by choosing one course you’d like to replace for the next week. Pick the one that’s the biggest headache. Let’s say dinners are not too much of a pain-point, but you find yourself so crunched for time midday that you’ve taken to eating frozen microwave meals filled with sodium and preservatives. If it’s a priority to get lunch in order, let’s try replacing lunches for the next 4 days.

Does that mean you have to make a different meal for each day? Of course not! Because meal prep meals typically last 4 days, we encourage you to repeat meals. You might not want to eat the same thing every day for lunch, so here’s an easy formula to mix it up: 

Meal A: Monday and Wednesday

Meal B: Tuesday and Thursday

This formula means that you just need to make 2 meals on Sunday, and since you’re cooking for 2, that means each person makes one meal for the week! (Easy, right?)

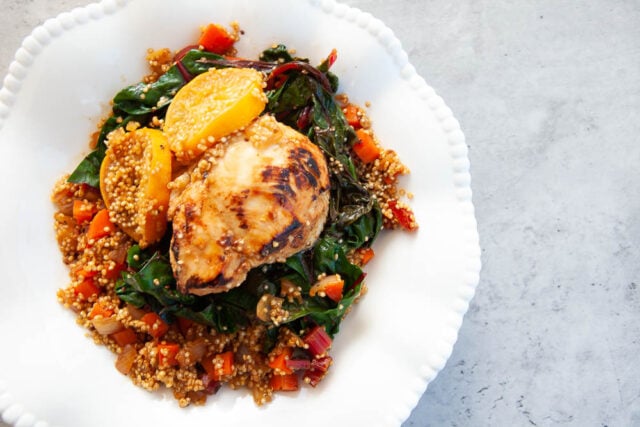
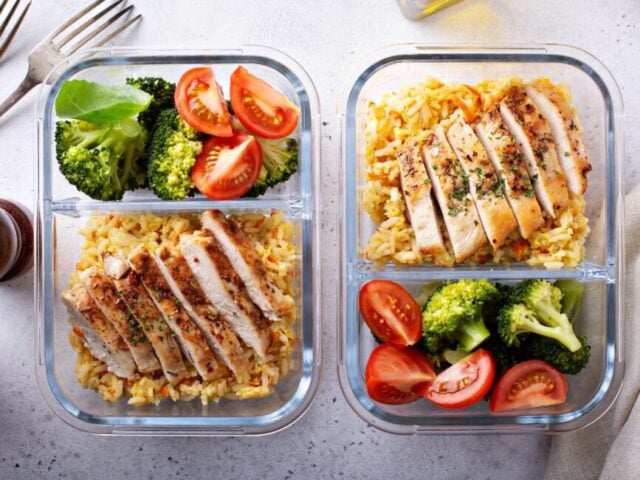
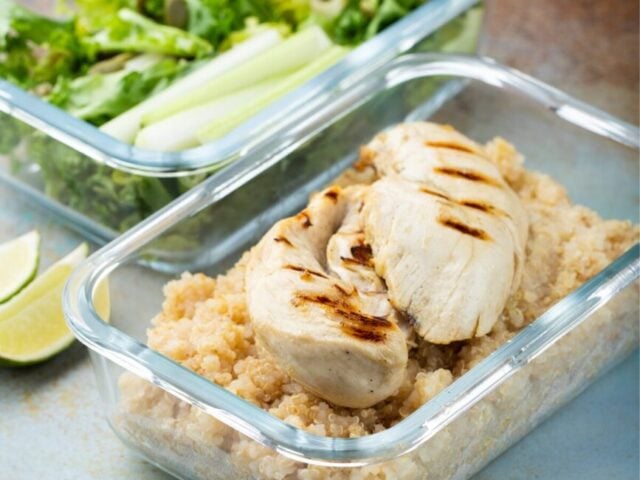
We tested this with 2 meals from Budget Bytes. It was a goal of ours to eat less red meat throughout the week, so we picked 2 chicken meals to alternate: Salsa Chicken and Herb Butter Chicken. Since each meal prep meal on Budget Bytes is 4 servings, this made it easy to cook just these 2 meals and have enough to cover 4 days worth of lunches for 2 people. 

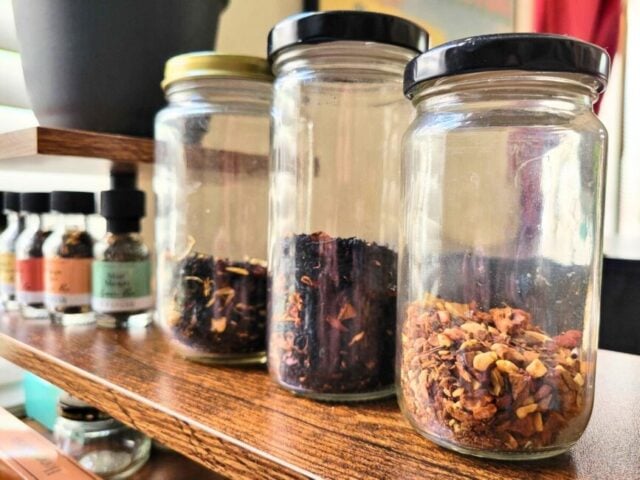
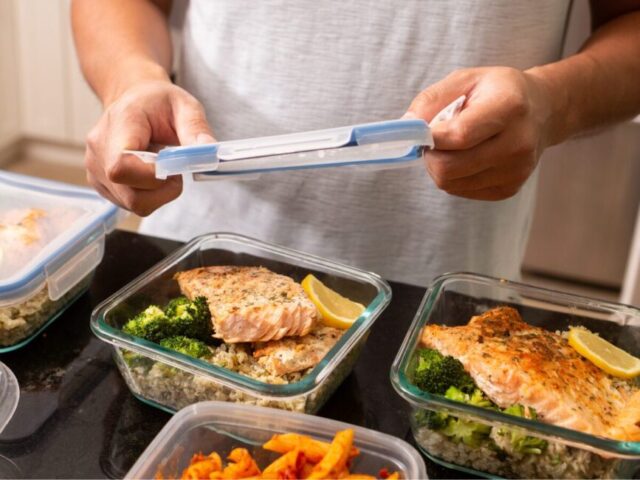
For containers, we purchased this affordable 10-pack of glass meal prep dishes with airtight lids. This allowed us 8 containers to store lunches in the fridge, and 2 to swap out daily snacks.

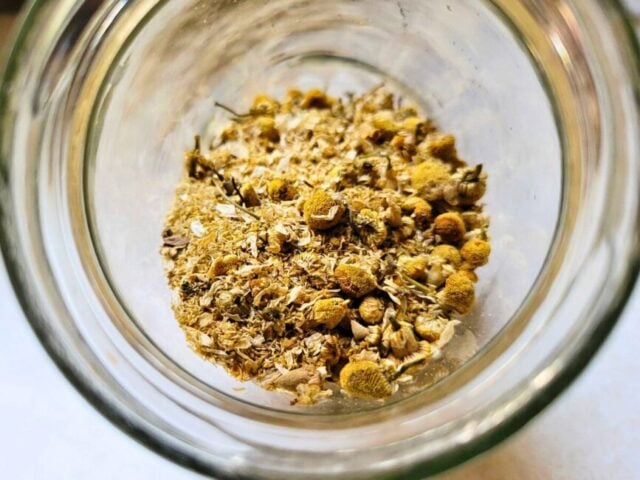
Speaking of snacks, they’re an important part of meal prepping! According to the 3x3x3 Meal Plan, eating multiple small meals (rather than 3 big meals) throughout the day is better for your health and maintaining a healthy weight. Meal prepping in designated containers also allows for great portion control and to keep healthy snacks on-hand, like veggies and hummus or fresh fruit and cottage cheese. 


meal prep

The Meal Prepping Connection

Meal prepping is more than just about saving time and money. It also a great way for couples to connect and spend time together, no matter if you’re partners, friends, or family members. With a partner in crime, preparing healthy meals turns a mundane task into an event. Here are some different ways to make meal prep fun:

Brainstorm Together: Start by sitting down and picking out what you’ll eat for the week together. Or, better yet, make it an assignment for each person to bring healthy meal prep recipes (at least one) to the couch by Saturday afternoon. This ensures there’s something each person likes and makes the act of cooking more exciting by Sunday evening. 

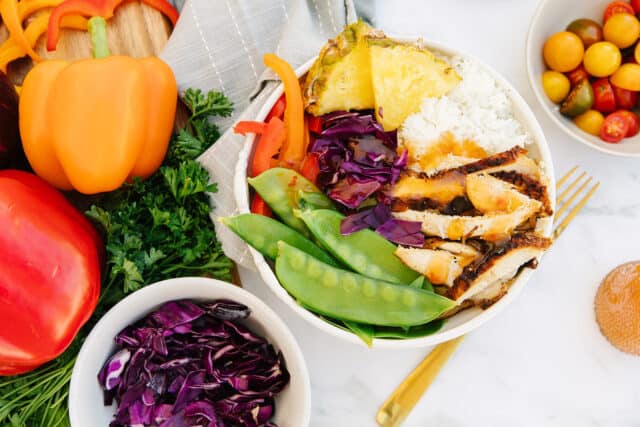
Experiment with New Foods: Make meal prep an adventure. At least once a month, step out of your comfort zone and whip up something you’ve never tried. Maybe it’s a veggie-packed meal or an exploration of cultural cuisines. This is also a great way to introduce each other to meals from your own background. There’s no bonding like discovering new things together.

Put On Your Favorite Tunes: At least one of you should play DJ for the meal prep event, and each week, you’ll switch off so there’s something for everyone to enjoy. When you’re not cooking, you may even want to create a meal prep playlist together. Music always makes things more fun.

Get to Cookin’!: You can have each person cook one meal, or agree to do what you’re best at, like one person makes sauce while the other is on stir-fry. Maybe one person is great at chopping, while the other is amazing at seasoning. Whatever the case, you get to decide the best way to prepare your big batch of delicious meals. This is also a great opportunity to learn from each other.

Document the Journey: Don’t forget to take photos of your meal prepping sessions and finished dishes. You’ll be amazed at all the different meals you’ve created together, and it also provides you a menu for future meals. Sharing your journey with friends and family may also inspire them to make meal prep a thing in their lives too!

Make Meal Prepping a Ritual: Once you make meal prep a regular part of your weekly routine, it becomes a breeze. Choose a day near the end of the week to plan your meals, compile grocery lists and shop. Prepping and cooking is great for Sunday afternoons or evenings, though any time outside of busy weeknights works. Think of it as a special time to connect, and you’ll get so much more out of meal prepping as a duo.


chicken and rice meal prep

Ready to Meal Prep?

Now that you know how to meal prep, what are some meals you’re excited to make? Will you be meal prepping for lunch or dinner? Or maybe both? Who will you be meal prepping with?

Whatever you choose, we’d love to hear about it. Be sure to leave a comment below. 

The post A Practical Guide on How to Meal Prep For Two appeared first on Steamy Kitchen Recipes Giveaways.


from Steamy Kitchen Recipes Giveaways https://ift.tt/UgvMb4Y
via New Kitchen Special