Wednesday, October 30, 2024

Rose and Maca Chocolate Bark Recipe

Do you enjoy sweet treats with a fancy flair? Or maybe you’re looking to whip up something beautifully decadent to impress your guests? Well, we have the perfect thing for you, and luckily, it’s also surprisingly easy to make! This Rose and Maca Chocolate Bark is sure to become your next go-to dessert. It features rich, dark chocolate, delicate rose petals, and an earthy hint thanks to organic maca powder. 

Not only will it satiate your sweet tooth, but its unique blend of ingredients will help to regulate your hormones and nervous system (thanks, maca!). And because of it’s beautiful presentation, it also makes a great addition to dinner parties, cozy evenings in, and even some good, old-fashioned self-indulgence. (We won’t judge!)
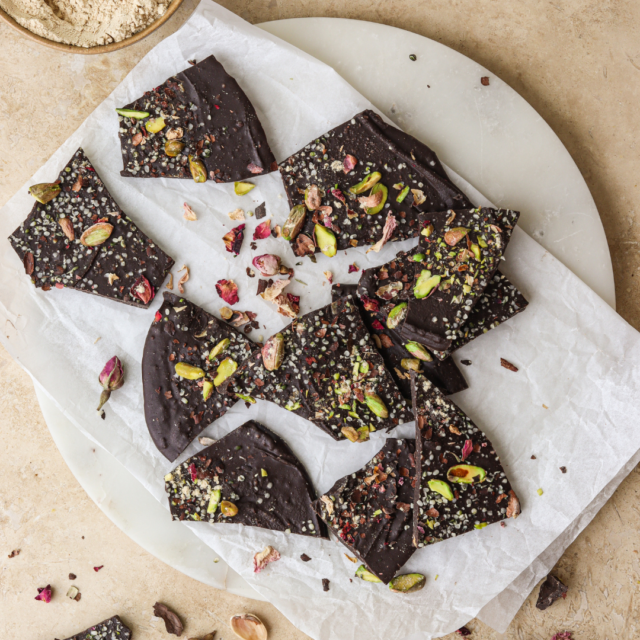
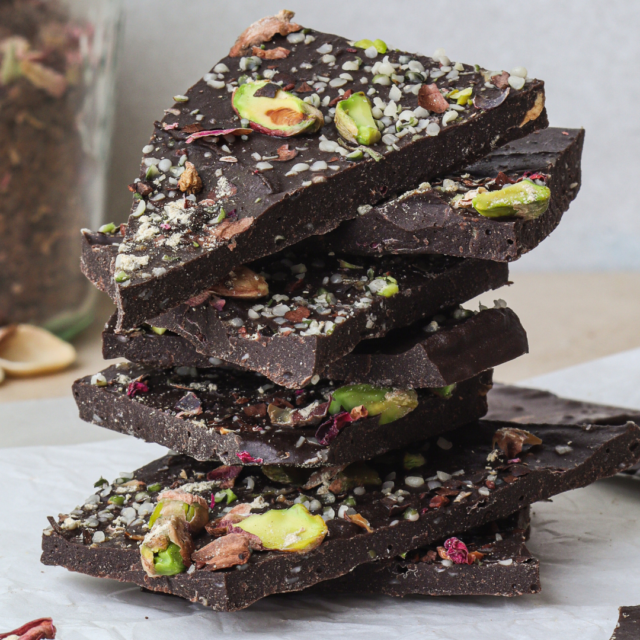
rose and maca chocolate bark on a plate

Why This Recipe Works

  • It’s Adaptogenic: Maca powder is an adaptogen that has been known to help the body manage stress and support the nervous system.
  • Antioxidant-Rich: Dark chocolate is a great source of antioxidants that provide a wealth of health benefits like enhancing your heart health, immune system, and even providing a brain boost!
  • A Floral, Earthy Flavor: Those dried rose petals add a subtle floral note, which balances the deep richness of the chocolate and the earthy-ness of maca. It’s a tasty way to connect with nature. 
  • Low Heat Gives You the Perfect Consistency: Melting the chocolate over low heat in a double boiler ensures that your chocolate ends up with a smooth, glossy texture.
  • It’s Customizable: This basic recipe can be changed and customized to your liking with different toppings like goji berries, pumpkin seeds, or cashew nuts for extra crunch and color.
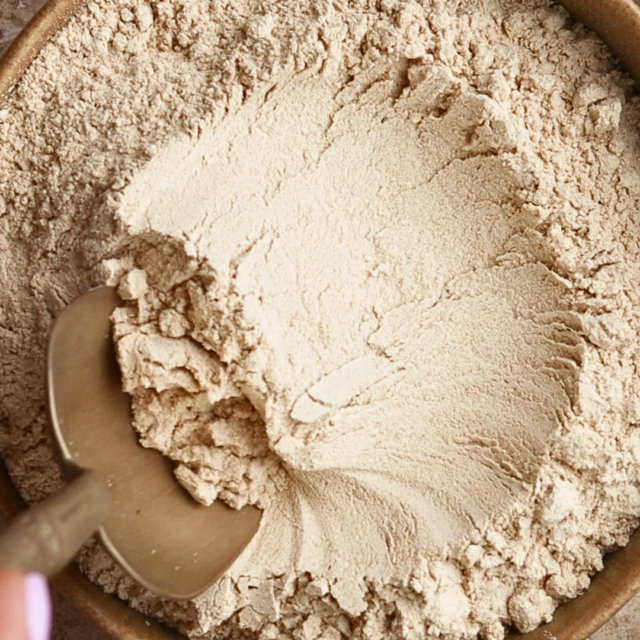
 

organic maca powder

All About Maca

Maca, also known as “Peruvian ginseng,” has been a staple of Andean diets for centuries. It’s got an earthy flavor and a good reputation for boosting vitality. Here are some other things to note about maca before you decide to add it to your recipes:

  • Potential Benefits:
    • It Supports Energy and Stamina: Many people find that maca gives them a natural energy boost without the jitteriness that often comes with caffeine.
    • It Can Balance Your Mood: Maca can help to support a balanced mood and provide mental clarity. It’s also been shown to reduce stress levels over time.
    • It’s Great for Hormone Regulation: Some research suggests that maca can help balance hormones. This can come in especially handy for those going through menopause or periods of hormonal fluctuation.
    • It Enhances Libido and Fertility: Maca has a reputation for enhancing libido (which makes it a powerful aphrodisiac), as well as improving fertility, which is something to consider if you’re planning for a family (or attempting to avoid that altogether).
  • Who Should Avoid Maca?:
    • Pregnant and Nursing Individuals: Due to its hormone-affecting properties, maca may not be ideal for people who are pregnant or breastfeeding.
    • Those with Hormone-Sensitive Conditions: People with conditions like PCOS, endometriosis, or certain cancers should consult a healthcare provider before consuming it, as maca can influence hormone levels.
    • Anyone with Thyroid Issues: Maca contains goitrogens, which may interfere with thyroid function, especially in individuals with iodine deficiencies.
  • Disclaimer: Always consult a healthcare professional before adding maca to your diet, especially if you’re managing any health conditions or have concerns.
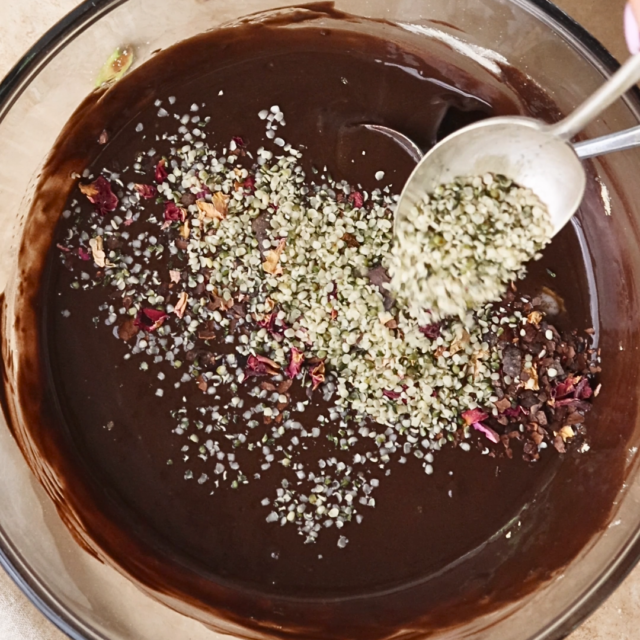
 

rose and maca chocolate bark additions

Ingredients to Make this Rose & Maca Chocolate Bark Recipe 

  • 3 cups dark chocolate chips (as long as it’s dairy-free)
  • 1 tbsp coconut oil
  • 1 tsp vanilla extract 
  • 2 tbsp maca powder
  • 3 tbsp hemp seeds 
  • ¼ cup crushed pistachios
  • ¼ cup dried rose petals
  • Himalayan sea salt


rose and maca chocolate bark stacked

How to Make Rose & Maca Chocolate Bark

Step 1: Melt the Chocolate

Set up a double boiler on your stovetop. Add the chocolate chips into the bowl and melt them over low heat, stirring occasionally. Once they’re melted, add in the coconut oil, vanilla extract, and maca powder. This will help you to avoid burning your chocolate and keep it silky smooth.

Step 2: Mix in Hemp Seeds and Rose Petals

Once the chocolate mixture is smooth, throw in half of your hemp seeds and half of your rose petals, and keep stirring gently. These ingredient will get coated in melted chocolate, and evenly impart their flavors into the mix.

Step 3: Pour and Spread the Chocolate

Line a baking sheet with parchment paper and pour the chocolate mixture onto it. Spread it out to about ½ inch thickness. Sprinkle the rest of your hemp seeds, crushed pistachios, and rose petals over the top. Then lightly dust the chocolate with Himalayan sea salt and a bit more maca powder.

Step 4: Chill and Serve

Place the baking sheet in the fridge and let the bark set for about 30 minutes. Once it’s firm, you can cut or break the chocolate into squares. Serve it at room temperature for the best texture.
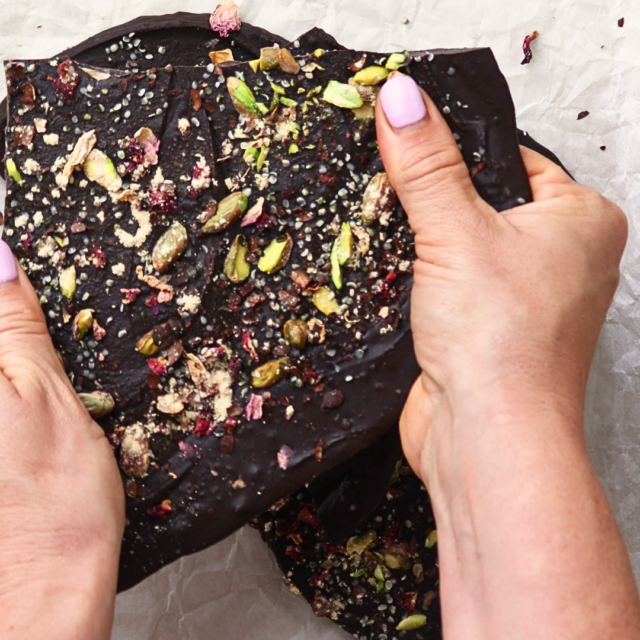
 

rose and maca chocolate bark break

Tips to Get the Perfect Chocolate Bark

  • Parchment Paper is Key: Parchment paper will make sure the bark doesn’t stick to anything, and it’s easy to peel off for easy serving.
  • Melt That Coconut Oil Slowly: Add in the coconut oil only AFTER the chocolate has fully melted for the smoothest texture.
  • Experiment with Toppings: The world (or in this case, bark) is your oyster! Feel free to add in goji berries, sunflower seeds, cashews, swap out the vanilla for almond extract, or sprinkle in some raw cacao powder if you want to go all-out.
  • Keep It Cool: Store your chocolate bark in the fridge to keep its perfect texture, especially if you’re using coconut oil, which can melt easily in warmer temperatures.
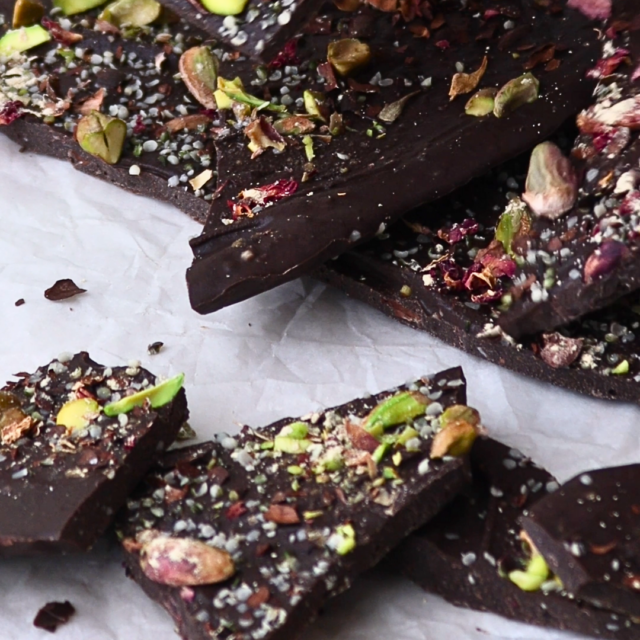
 

rose and maca chocolate bark close up

Frequently Asked Questions

Can I use other chocolate instead of dark chocolate?
Absolutely! White chocolate is a great alternative if you like a sweeter treat, though it won’t have the same antioxidant benefits as dark chocolate.

What if I don’t have a double boiler?
No problem. Use a heat-safe bowl over a pot of simmering water to gently melt the chocolate. This will prevent it from burning.

How long does the bark stay fresh?
If you store it in an airtight container in the fridge, it’ll last up to two weeks. Let it come to room temperature for a few minutes before serving for the best flavor.

Can I make this recipe with a nut-free option?
Of course! Swap out pistachios with pumpkin seeds or even hemp seeds to keep it nut-free.

Is maca chocolate bark suitable for kids?
Maca is generally safe in small amounts for most people, but it’s always good to consult with a healthcare professional if you have any concerns, especially with kids.
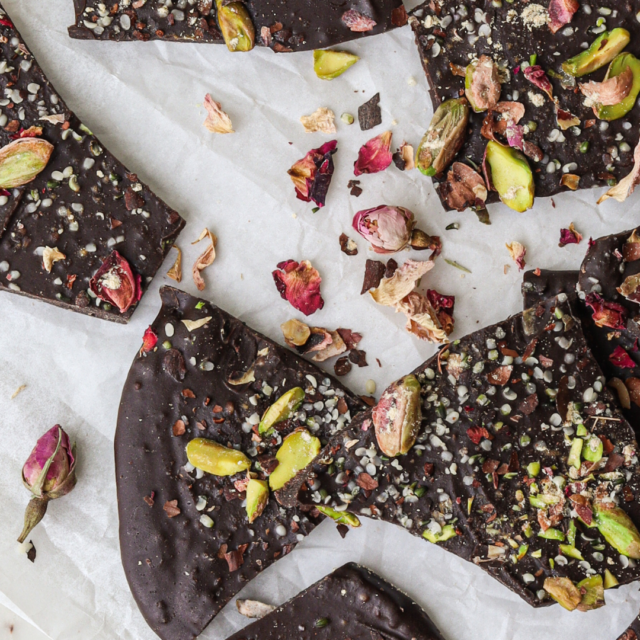
 

rose and maca chocolate bark close up

What Will You Add To Your Chocolate Bark?

For this super customizable recipe, we can’t help but wonder what you might add to your chocolate bark. Is it nuts? Shaved coconut? Hazelnuts? Something entirely different? We’d love to know! 

Comment below with your go-to additions for this delightful sweet treat!


More Ways to Use Food as Medicine


rose and maca chocolate bark stacked
Print

Rose and Maca Chocolate Bark Recipe

A sweet, but fancy treat featuring maca, a beneficial adaptogen.
Course Dessert
Cuisine American
Keyword chocolate, desserts, maca
Prep Time 5 minutes
Cook Time 5 minutes
Cooling Time 30 minutes
Total Time 40 minutes
Servings 6
Calories 590kcal

Ingredients

  • 3 cups dark chocolate chips (dairy free)
  • 1 tbsp coconut oil
  • 1 tsp vanilla extract
  • 2 tbsp Maca powder
  • 3 tbsp hemp seeds
  • ¼ cup pistachios crushed
  • ¼ cup dried rose petals
  • Himalayan Sea Salt to taste

Instructions

  • Melt the chocolate over a double boiler and mix in the coconut oil, vanilla extract, and maca powder.
  • Add in half the hemp seeds and half the rose petals. Stir it all together so that everything is coated in chocolate.
  • Line a baking sheet with parchment paper and pour the chocolate onto the sheet. Spread it out so that it is about ½ inch thick then sprinkle on the rest of the hemp seeds, pistachios, and rose petals. Give it a dusting of Himalayan sea salt and maca powder.
  • Let the bark set in the fridge for 30 minutes then cut or break into squares.

Nutrition

Calories: 590kcal | Carbohydrates: 55g | Protein: 12g | Fat: 36g | Saturated Fat: 29g | Polyunsaturated Fat: 4g | Monounsaturated Fat: 2g | Cholesterol: 1mg | Sodium: 96mg | Potassium: 677mg | Fiber: 5g | Sugar: 32g | Vitamin A: 69IU | Vitamin C: 2mg | Calcium: 302mg | Iron: 3mg

The post Rose and Maca Chocolate Bark Recipe appeared first on Steamy Kitchen Recipes Giveaways.


from Steamy Kitchen Recipes Giveaways https://ift.tt/1Q8Dk96
via New Kitchen Special
Thursday, October 24, 2024

Protected: Cuttingboard.com Teak Herringbone Cutting Board Review

Password Protected

To view this protected post, enter the password below:

The post Protected: Cuttingboard.com Teak Herringbone Cutting Board Review appeared first on Steamy Kitchen Recipes Giveaways.


from Steamy Kitchen Recipes Giveaways https://ift.tt/3lQV2e7
via New Kitchen Special

How to Smoke the Perfect Turkey in a Gas Smoker

Thanksgiving is that time of the year when you’re expected to cook a bird that’s bigger than your head, and while you might be tempted to go with the standard roasted turkey, if you’ve got a smoker, you’ve got an even better option: smoking your turkey. This form of cooking will infuse your turkey with a deep, smoky flavor that’ll make you wonder why you ever settled for the oven.

Smoking a turkey means tender, juicy meat, and it also makes your Thanksgiving prep way more interesting. AND, if you’ve got yourself a gas smoker, you don’t have to babysit a traditional smoker all day. Just fire it up, set the temp, and let the gas smoker do its thing.

Looking to impress your guests without spending all day in the kitchen? Then smoking your Thanksgiving turkey is the way to go. 

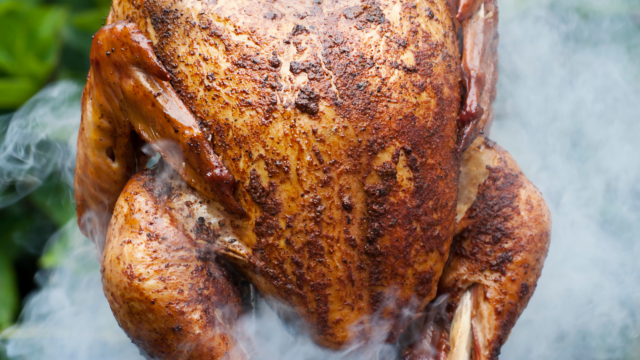
smoking a turkey

​Why Smoke Turkey for Thanksgiving?

Need some more reasons? Smoking your turkey will give it a depth that a roasted bird can only dream of. Crispy skin. Juicy meat. Rich, smoky flavor. And, as a bonus, smoking a turkey breaks down its connective tissues, resulting in a more tender bird. Also, who doesn’t love freeing up their oven for all those side dishes and pies?


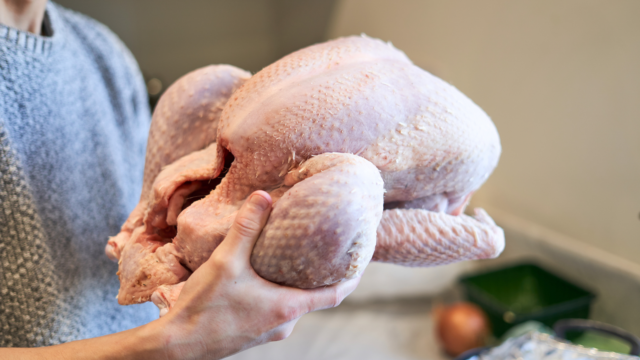
fresh turkey

Choosing the Right Turkey

Fresh vs. Frozen Turkey

Your first decision will involve whether to go with a fresh or frozen turkey. While both options can work, fresh is always the best option.

Fresh Turkey: Fresh turkeys will generally have better texture and moisture and they’ll soak up the smoky flavor more effectively. And, you won’t have to deal with the possibility that your frozen bird isn’t thawed all the way on Thanksgiving morning.

Frozen Turkey: However, frozen turkeys are more readily available and often more affordable. If your only option is a frozen turkey, just remember to give it plenty of time to thaw properly. To clarify, you should plan for at least 24 hours of thawing time for every 4 to 5 pounds of turkey. 12 pound turkey? 3 days in the fridge. Always make sure to thaw your turkey in the refrigerator and NEVER at room temperature. If you’re short on time, you can thaw your turkey in cold water (the sink is the best option for this) and change the water every 30 minutes, though this is definitely more of a pain than simply letting your turkey sit cozily in the fridge.

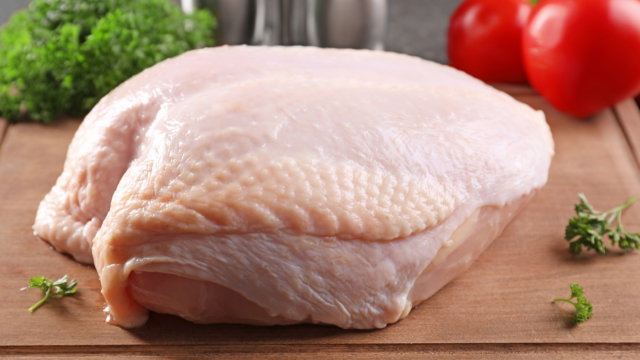
fresh turkey breast

Turkey Size and Weight

The size of the turkey will affect smoking results, so it’s important to choose wisely. The general rule of thumb: aim for a 12 to 14 pound turkey. Why? Smoking is a low-and-slow cooking process. The larger the bird, the longer it will take to cook.

If your turkey is over 15 pounds, it’s going to spend too long in the danger zone (between 40-140 degrees F). This is the zone where bacteria thrives. So, stick to a smaller bird, and if you’re feeding a crowd, consider smoking multiple smaller turkeys instead of a huge one. Smaller turkeys cook more evenly and generally have a better balance of light and dark meat. No one wants to end up with dry breast meat while they’re waiting for the thighs to hit the right temperature.

Organic, Free-Range, and Heritage Turkeys

Choosing the right type of turkey is another important part of the process. Organic, free-range, and heritage turkeys each bring their own unique perks to the table.

Organic Turkeys: Raised without antibiotics or synthetic additives, organic turkeys offer a cleaner, more natural flavor. Though, for this reason, and because they’re the healthiest option, they can be a bit more expensive. 

Free-Range Turkeys: If the lifestyle of your turkey is important to you, opt for free-range, which are allowed to roam the land, which tend to lead to more flavorful meat. Exercised turkeys mean firmer, more textured meat, which makes for a juicy, smoky turkey.

Heritage Turkeys: A favorite among grandparents, heritage turkeys are a little smaller, but they pack a lot of flavor. They also have a higher ratio of dark meat to white meat, so if that’s your thing, you’ll love them. They also tend to cook faster, which makes them perfect for smoking. 

Your best bet for sourcing turkeys are local farmers’ markets and specialty butchers. High-quality options are also available online, but be sure to order early!


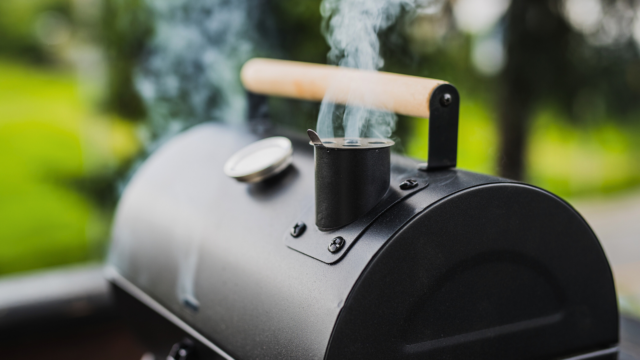
Gas Smoker

Setting Up Your Gas Smoker

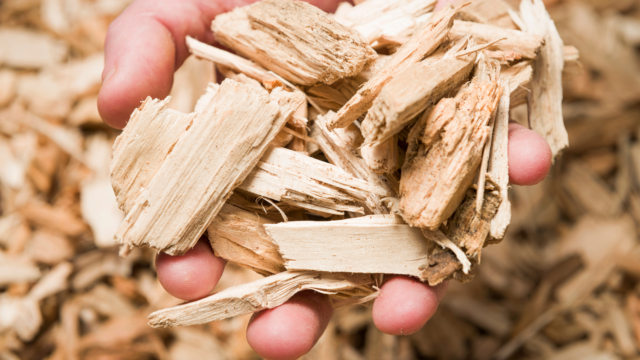
Choosing the Right Wood Chips

The kind of wood you use will affect the smoky flavor of your turkey. Want a classic BBQ flavor? Hickory is the way to go. Looking for a sweeter, milder smoke? Apple wood will complement your bird without overwhelming it. Cherry wood is another great option that can give turkey a slightly sweet, fruity flavor. 

gas smoker wood chips

Propane & Thermometer

Ensure you’ve got enough propane to last throughout the smoking process. No one wants to run out of gas halfway through! As well, because temperature is the main factor of smoking a turkey, make sure you have a thermometer on hand. Instant-read or remote are both great options.


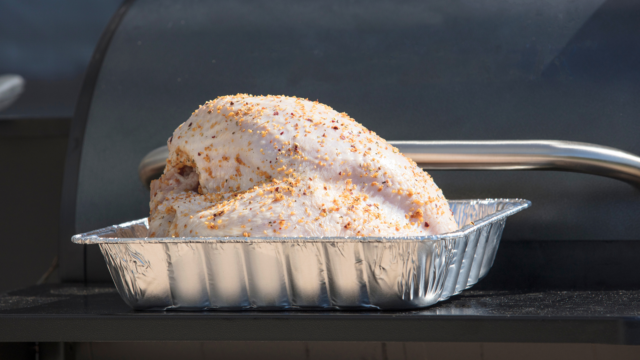
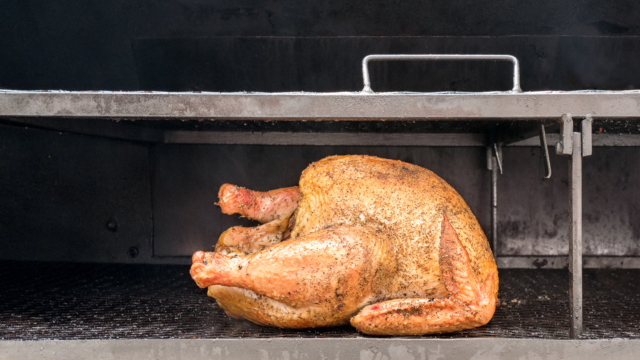
turkey on smoker

Prepping the Turkey

How Much Turkey Do You Need?

We ask it every year, and somehow still forget: How much turkey am I going to need? 

The answer? 1 to 1.5 pounds of turkey per person. Because you’ll be cooking a whole turkey with parts you won’t be eating, like bones, it’s always good to aim for the higher side of that at about 1.5 pounds per person. This ensures that everyone eats ’til full and there are still plenty of leftovers to make incredible after-Thanksgiving meals with.

Thawing and Removing The Innards

As mentioned, make sure your turkey is sufficiently thawed before you prep it, giving it at least 24 hours of thawing time in the fridge for every 4 to 5 pounds of turkey. Once it’s thawed, remove the extra bits from the inside of the bird.

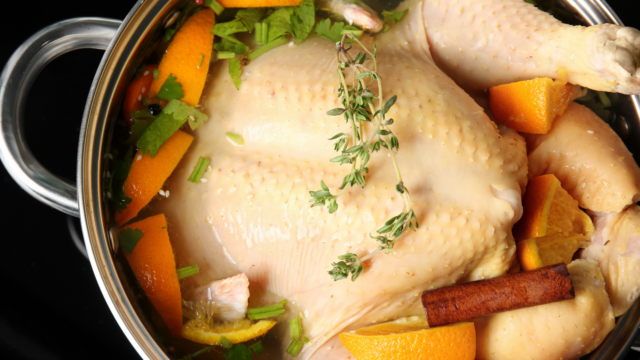
brining the turkey

Brining the Turkey

Brining is basically the secret to getting juicy, flavorful turkey, and the process involves soaking your turkey in a solution of salt, water, and sometimes other ingredients like brown sugar, garlic and fresh herbs. This step makes sure that your turkey retains its moisture throughout the long smoking process.

The amount of time you’ll need to brine will depend on the size of the turkey, but here’s a general rule: at least 1 hour per pound of turkey. Got a 12-pound turkey? You’ll want to brine it for at least 12 hours, but overnight is even better for a super flavorful turkey!

If you bought a store-bought, pre-brined turkey, there’s no need to double-brine. Your turkey’s already good to go! Just rinse the exterior with cold water. 

But if you’ve got a fresh, unbrined turkey, we highly recommend whipping up your own brine. In fact, Pioneer Woman has an amazing turkey brine recipe. You can check it out here.

A dry brine is another good option, which involves rubbing the turkey with kosher salt (and maybe a bit of sugar and spices) and then letting it sit uncovered in the fridge for a day or two. This will also help to crisp up the skin as it cooks due to it dehydrating just slightly in the fridge.

Whatever you choose, always be sure to rinse the exterior off with cold water. Then, pat it dry with a paper towel, or let it air dry in the fridge for a couple hours.

Seasoning the Turkey

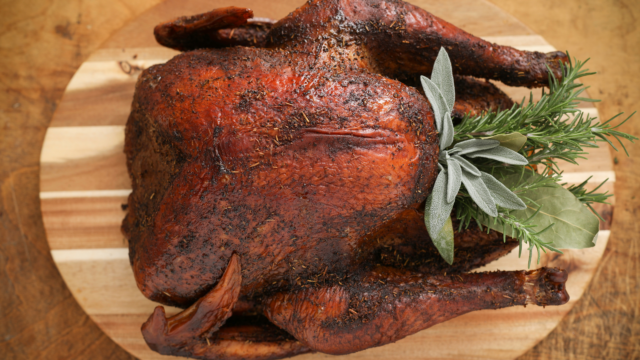
There’s an endless number of ways to season a turkey, and sometimes the best way is the simplest. We recommend a classic combo of salt, black pepper, and fresh (or fried) herbs like rosemary, thyme, and sage. This mix complements your smoked turkey without overpowering it. 

If you’re feeling adventurous, try a Cajun-style dry rub to give your turkey a kick, or a sweet rub with brown sugar to caramelize the skin. (Note: Just remember that sugar-based rubs will darken the skin. It might look burnt, but it’s just caramelized!)

Should I Stuff a Smoked Turkey?

What should you do with the inside of your turkey? Not much. Stuffing can complicate the smoking process. Your bird will take longer to reach a safe temperature, and you risk your meat becoming overcooked. If you want to zhuzh it up, just add some light aromatics like apples, onions, herbs, or citrus to the turkey cavity, but do not pack your turkey. Leaving lots of room inside will make sure that it cooks evenly. Whatever you add, make sure to toss it once it’s done cooking.

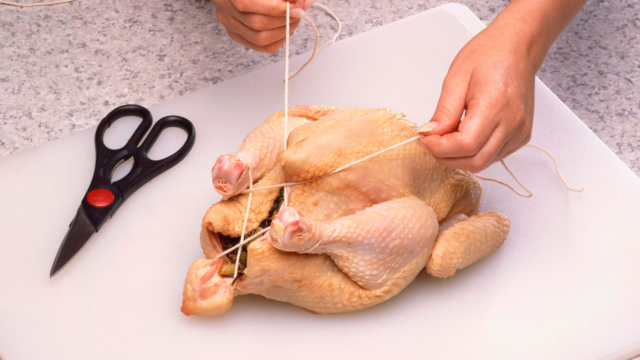
trussing the turkey

Trussing and Tucking

Trussing and tucking your turkey is as easy as 1-2-3!

Here’s a step-by-step guide:

  1. Position: Place the turkey breast side up on your prep surface. Make sure the legs are pointing toward you.
  2. Tie: Take some butcher’s twine and wrap it around the turkey’s legs, pulling them together.
  3. Tuck: Fold the wing tips behind the shoulders.

Why Truss and Tuck?
Trussing will ensure your turkey cooks evenly. Tucking the wings prevents them from getting overcooked or possible burning.

Before you put your turkey in the smoker, give it a final pat-down with paper towels to remove any excess moisture.

Fats are the Secret to Crispy Skin

If you’re aiming for an Insta-worthy crispy skin, coat the outside (lightly) of your turkey with olive oil or melted butter before you smoke it. This will crisp up the skin in the smoker, and give you a satisfying little crunch. 


turkey in smoker

How to Smoke the Turkey

Preheat the Smoker

To smoking a turkey to perfection, you have to expose it to indirect heat and keep your smoker at a consistent temp. You’ll want to aim for a steady 225 degrees F the whole ride through. And luckily for smokers, preheating is pretty straightforward. Set your smoker to 225 degrees F and let it come up to temperature. Make sure your grill is properly preheated before the bird goes in, so it starts cooking right away.

Put the Turkey on the Grill

Once preheated, place the turkey (breast side up) directly on the grates on the side with indirect heat. No roasting pan needed. Breast meat is more delicate and can dry out quickly if overexposed to the heat. Keeping your turkey breast side up keeps it juicy and tender, and if you’ve chosen to add some butter on or under the skin, this is where that prep work will start paying off in flavor.

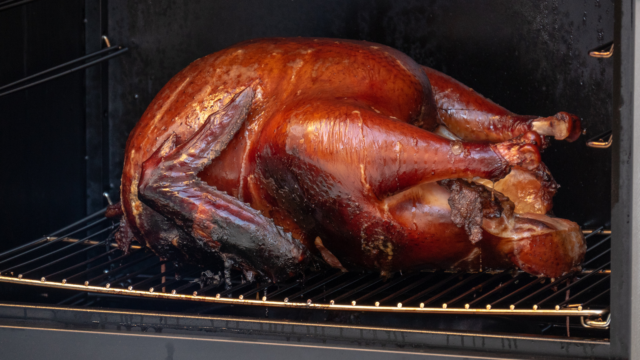
cooked turkey in smoker

Smoke the Turkey

You’ve done everything else, and now it’s time to finally smoke your turkey. Close the lid and let the smoker do its magic. You should plan on smoking the turkey for about 30 minutes per pound. Got a 12 lb turkey? You’re looking at about 6 hours of smoking time. 

The turkey is done once it reaches an internal temperature of 165 degrees F within the thickest part of the breast. This is where your instant-read thermometer comes in handy. Never guess at the temp, and pop-up timers aren’t known for their reliability. Always measure the temp yourself with your own thermometer. If you’ve got a larger turkey or a bone-in turkey breast, check a few spots to confirm the whole bird is cooked through.

Rest the Turkey

Rest the turkey for about 15 minutes to allow the juices to redistribute throughout the meat. This will ensure that every slice is as juicy as possible. If your turkey is finished a little bit ahead of schedule, wrap it in aluminum foil and then towels to keep it warm without drying it out. Though, be aware that insulating your turkey this way will soften the crispy skin, If you need to crisp it back up, stick it in the oven and set it to broil for a couple of minutes.

Eat That Turkey!

Ready to finally enjoy your labor of love? Carve it up! No matter if your Team Light Meat or Team Dark Meat (or a little bit of both), you can rest assured in the knowledge that, because you smoked it, it’s going to taste phenomenal! AND, you achieve that smoky, juicy meat, with crispy skin (if you’ve given it that final broil) almost entirely hands-off! (Your guests don’t have to know that though.) 


smoked turkey dinner

Happy Thanksgiving!

We hope you loved this guide to cooking a turkey in a gas smoker. If you enjoyed it and want another way to cook your turkey, check out our guide on How To Deep Fry A Turkey With No Oil!

What will you be serving with your turkey? Perhaps some mashed potatoes, stuffing, or cranberry sauce? Or do you go outside of the norm for sides? Do you have any favorite tips or tips for cooking your Thanksgiving turkey? Whatever you do for the holiday, we want to hear about it! Be sure to comment below and let us know how you celebrate the season. 

As always, from our Steamy family to yours, we wish you a safe and happy holiday season. May your turkey be yummy and your bellies be full!


You Might Also Enjoy…

The post How to Smoke the Perfect Turkey in a Gas Smoker appeared first on Steamy Kitchen Recipes Giveaways.


from Steamy Kitchen Recipes Giveaways https://ift.tt/nv8Riym
via New Kitchen Special

Monday, October 21, 2024

Meal Ideas For Turkey Day Leftovers

As we gear up for the Thanksgiving feast of the year, it’s time to talk about a topic near and dear to our hearts (and stomachs): holiday leftovers.

If you’ve been with us for a while, you know we are obsessed with leftovers, so we’ve compiled a list of our most prized Love Your Leftovers recipes and some great tips on all things leftovers below. 🦃🍂🍽️

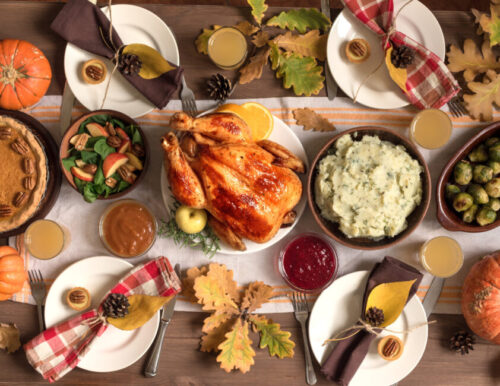
Thanksgiving day shot of turkey and holiday foods

Why You Should Love Your Leftovers

  • Less Cooking, More Relaxing: After the hustle and bustle of Thanksgiving Day cooking, who wants to spend hours in the kitchen again? Leftovers offer a reprieve from cooking stress. Simply reheat, and you’re good to go. More time to kick back, relax, and enjoy the holiday season.
  • Nostalgia in Every Bite: Leftovers come packed with memories of the previous day’s celebration. That turkey sandwich or reheated stuffing can instantly transport you back to the warmth and togetherness of Thanksgiving dinner.
  • Reduce Food Waste: Embracing your leftovers is a fantastic way to minimize food waste. Instead of letting ingredients go to waste, you can get creative and turn them into new dishes, reducing your environmental footprint in the process.
  • Economical Feasting: Stretching your Thanksgiving meal into several days’ worth of dishes is a budget-friendly move. You’ve already invested in quality ingredients, so make the most of them to get the best bang for your buck.
  • Dishes That Taste Nothing Like Thanksgiving: Leftovers challenge your culinary creativity. Experiment with different flavor combinations and cooking techniques to transform your leftovers into exciting new meals. It’s like having a mini cooking competition in your own kitchen! We have some exciting recipes to dive into below! e
  • Savor the Flavors: Some dishes, like soups and stews, actually taste better the next day as the flavors have had time to meld. Leftovers allow you to savor the full depth of these flavors.
  • A Warm Hug for the Soul: Leftovers bring comfort and familiarity to your post-Thanksgiving days. They’re like a warm, hearty hug for your soul during the chilly holiday season.


Love Your Leftovers Recipes

After the Thanksgiving feast comes the delightful challenge of what to do with all those mouthwatering leftovers, and we believe in turning those remnants into culinary wonders. Whether it’s leftover turkey, ham, stuffing, or mashed potatoes, we’ve got inventive and delicious recipes to breathe new life into your post-Thanksgiving bounty.

Turkey:

Love Your Leftovers and try this Turkey Thai Curry Bowl

Ham:

Delicious pork banh mi

Stuffing:

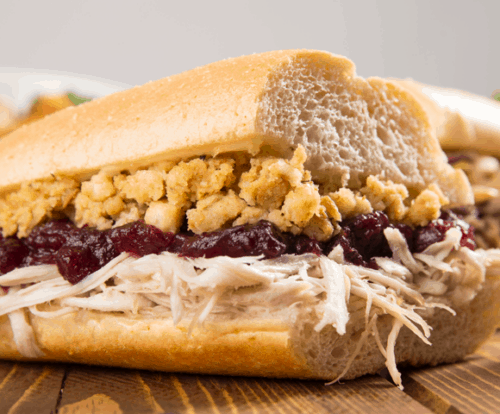
Capriotti's the bobbie sandwich recipe

Capriotti’s famous “Bobbie” sandwich

Mashed Potatoes:

leftover stuffing crunchy mozzarella balls


Tips For Reinventing Leftovers:

More grateful, less wasteful


Keeping Leftovers Fresh: Storage Tips

leftover recipes food waste

As you embark on the journey of reinventing your leftovers, it’s essential to store them properly to maintain their freshness and flavor. Here are some top storage tips to ensure your leftovers stay delicious:

  • Airtight Containers: Invest in a variety of airtight containers in different sizes. These are perfect for storing everything from turkey to mashed potatoes. Airtight containers prevent air from getting in, keeping your leftovers fresh.
  • Labeling: Don’t forget to label your containers with the date and contents. It might seem like a small detail, but it can save you from mystery leftovers weeks later.
  • Separate Components: If possible, store different components of your meal separately. For instance, keep gravy in one container, turkey in another, and stuffing in another. This makes it easier to reheat and serve them individually.
  • Use Aluminum Foil: For dishes like casseroles or baked goods, wrap them in aluminum foil before storing. It helps maintain moisture and prevents freezer burn.
  • Freezer Bags: When freezing leftovers, consider using freezer bags. Squeeze out as much air as possible before sealing them. This reduces the risk of freezer burn.
  • Divide into Portions: If you’re freezing leftovers, portion them into meal-sized servings. This way, you can thaw and reheat only what you need, reducing waste.
  • Rapid Cooling: Allow your dishes to cool to room temperature before refrigerating or freezing. Hot foods can raise the temperature in your fridge, affecting other items.
  • Refrigerate Promptly: Don’t leave leftovers at room temperature for too long. Refrigerate them within two hours to prevent bacteria growth.
  • Reheat Safely: When reheating leftovers, ensure they reach an internal temperature of 165°F (73.9°C) to kill any potential bacteria.
  • Enjoy Within a Week: Consume refrigerated leftovers within three to four days to ensure peak freshness. Frozen leftovers can be enjoyed within 2-6 months for the best quality.

With these storage tips in your culinary toolkit, you’ll be well-prepared to make the most of your Thanksgiving leftovers without compromising on taste or safety. 🍗🍲🥧


With all these delicious remnants, we’ve got the perfect opportunity to get creative in the kitchen and keep the flavors of Turkey Day alive a little longer. Whether you’re transforming that turkey into a cozy soup, whipping up some mozzarella balls as a side, or just enjoying a classic leftover sandwich, these next few days are all about savoring the holiday’s flavors in new and exciting ways.

The post Meal Ideas For Turkey Day Leftovers appeared first on Steamy Kitchen Recipes Giveaways.


from Steamy Kitchen Recipes Giveaways https://ift.tt/fHWBNbL
via New Kitchen Special

Monday, October 14, 2024

$100 Amazon Gift Card Giveaway

Ready for a shopping spree? Steamy Kitchen is giving you the chance to win a $100 Amazon gift card! Whether you need new kitchen gadgets, pantry staples, or anything else on your wishlist, this gift card could be yours.

Enter to win below.

$100 amazon gift card giveaway


ONE lucky winner will win a $100 Amazon Gift Card from us. How would you spend your extra $100? Let us know in the comments.

$100 Amazon Gift Card Giveaway

Enter to win below.


The post $100 Amazon Gift Card Giveaway appeared first on Steamy Kitchen Recipes Giveaways.


from Steamy Kitchen Recipes Giveaways https://ift.tt/MIEm7Y9
via New Kitchen Special

Thursday, October 10, 2024

Aroma’s Whatever Pot: The Best Home Hot Pot Cooker

As a long time chef, I’ve seen my fair share of pots, pans, cookers, and various appliances, and true multifunctionality is hard to come by. If you have a small kitchen, you simply don’t have the space to store or use more than a few key appliances. So you know how great it can be to find a compact cooking tool that can do a multitude of things. That’s what makes Aroma’s Whatever Pot such a valuable kitchen essential, especially if you love dishes like hot pot. 

I got my very own Whatever Pot and put it to the test by taking it on the road with me, and it did not disappoint. Let’s talk about why this little pot is so incredible. 

Whatever Pot

About Aroma Housewares Co.

Aroma Housewares is all about creating kitchen appliances and cookware that make life easier, with a focus on quality or affordability. Based in San Diego, California, their mission is to provide reliable kitchen solutions, whether you’re whipping up white rice for a quiet dinner in or hosting a shabu shabu night with friends around a hot pot. That’s why their product line covers everything from electric hot pots to slow cookers. In fact, they’ve led the rice cooker game in America for over 40 years! 

What I love about Aroma is that it feels like they’ve put thought into every detail. So many of their products feature glass lids for easy viewing, smart sensors, and even BPA-free materials, which means I don’t have to worry when it comes to health.

In an effort to remain accessible, Aroma’s cooking tools are affordable, whether you’re shopping for a dorm room or looking for the perfect electric hot pot for a communal dining experience. They offer a ton of great options at prices that just make sense.

And, what I love most about Aroma, is that they’re a brand that’s deeply involved with the community. Not only do they donate to local causes like Rachel’s Women’s Center, but they also give to global causes, like Tucklets in Kenya. It’s clear they’re a brand that cares, which I find refreshing. 

Whatever Pot Closeup

The AMC-130 Whatever Pot

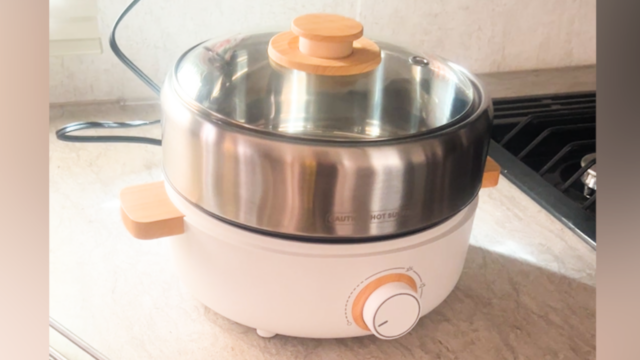
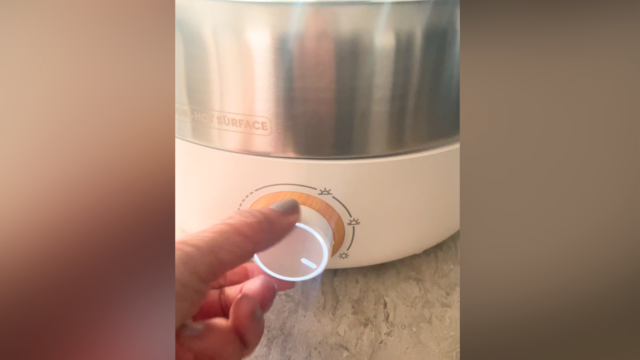
You’d be hard-pressed to find more kitchen versatility than in the AMC-130 Whatever Pot. It features an incredible dual cooking surface that works as both a grill and a pot. It’s the ultimate multi-tasker! You can make everything you need for soups, stews, and hot pots in one compact unit. It’s even got an adjustable temperature range (from 300° to 450°F) gives home cooks the ability to boil water for soups, sear veggies and meats, or simmer a hearty stew for a cloudy day. Looking to make a one-pot hot meal or a quick grilled dish? It can do both and more!

The 2.5-quart stainless steel inner pot gives you even heat distribution, which means rice cooks perfectly and soups stay at the perfect simmer. The tempered glass lid helps you keep an eye on everything and prevents splatters, which is super useful for both messy cooks and tiny kitchens. And speaking of small spaces, its size makes it a good choice for dorm rooms, tiny homes, or anyone looking to maximize kitchen real estate without having to sacrifice functionality.

If you love the vibe of hot pot restaurants, the Whatever Pot lets you bring that communal hot pot experience to your home dining table. Just toss in some napa cabbage, enoki mushrooms, and a little bit of sesame paste, and you’ve got yourself a quick and cozy meal. Or keep it super simple by swapping in the nonstick grill pan for a quick sear on meats or veggies.

The Whatever Pot also comes with safety features like stay-cool handles, and clean-up is a breeze with its dishwasher-safe parts. It’s truly perfect for a wide range of meals, from traditional Chinese hot pots to simple electric wok stir-fries to whatever TikTok cooking trends are happening this week. It’s an all-in-one stylish pot that’s can handle almost anything!

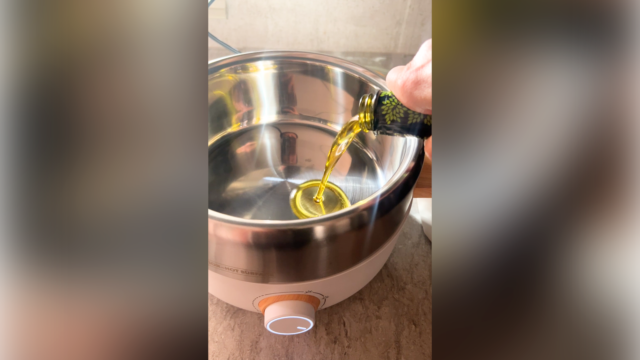
Whatever Pot Olive Oil

Some of My Favorite Things About the Whatever Pot

The Pros:

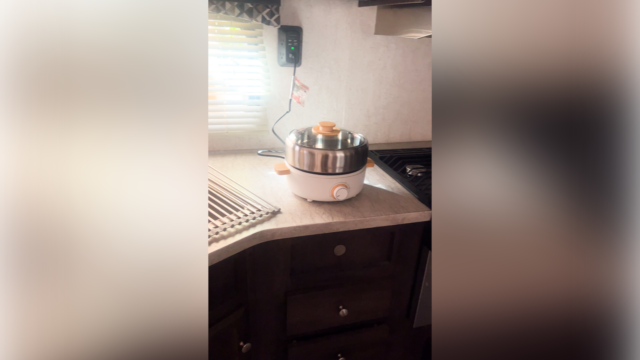
The Size & Multi-Functional Abilities: For work, my husband and I live part time in a travel trailer, and it takes an 8 hour commute to get to our place of business, which is on tribal land in a remote area. While it’s a great escape from Las Vegas city life, the nearest grocery store is a 60 minute round trip drive, and our kitchen is relatively small. So small, in fact, that I can’t fit more than a cutting board and a pot, which makes the Aroma Whatever pot the perfect appliance because it’s multifunctional and takes the place of at least 6 different appliances and pots, including a wok! 

RV Kitchen

Jaden and Alex

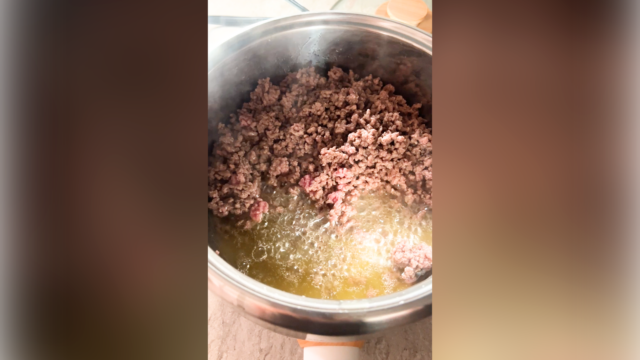
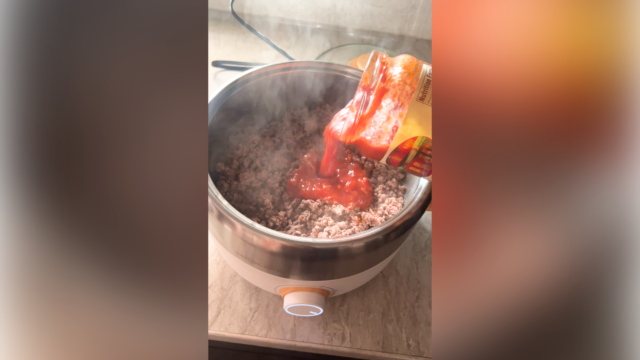
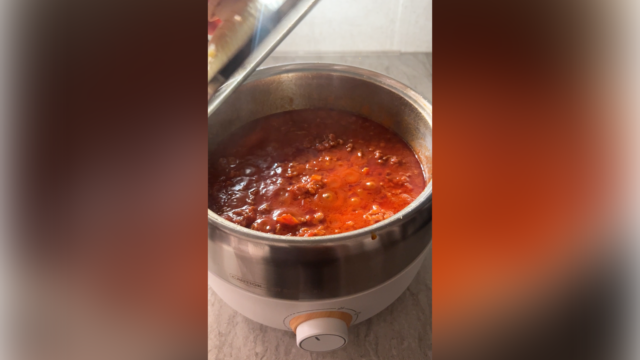
The Heat: This pot’s heating abilities are kind of amazing. It gets HOT. Up to 450°F, which is perfect for stir-frying, searing, and making my own spaghetti sauce right at home.

Whatever Pot Meat Cooking

The Shape: Some pots are too shallow or wide, and stir-frying in these means your food is going to get everywhere. But the shape and high lip of the Whatever Pot makes everything from pasta sauce to stir-fry incredibly easy and a lot less messy.

It’s Perfect For Making Hot Pot!: The Whatever Pot’s grill and pot combo make it the best appliance for whipping up hot pot! You can cook the meat, veggies, and broth all at the same time, without needing multiple pans or appliances. 

Great for Two: This pot cooks the perfect amount for two people. Dinner with the husband has never been easier!

The Cons:

The only downside I can think of is that the pot is stainless steel, which means it’s not immediately non-stick. This makes me a bit wary to cook rice in it. However, the grill portion is non-stick, so I’m glad that’s not something I have to worry about. 

Whatever Pot Spaghetti Sauce and Meat

Here’s a Tip!

Living out in nature has changed my cooking habits. We make our own meals each day and eat out a lot less (cuz there aren’t any restaurants around). And while we do our best to cook from scratch, sometimes that’s just not possible given the time and space. Sometimes you have to buy jarred pasta sauce, and that’s okay too!

Whatever Pot Spaghetti Sauce and Meat

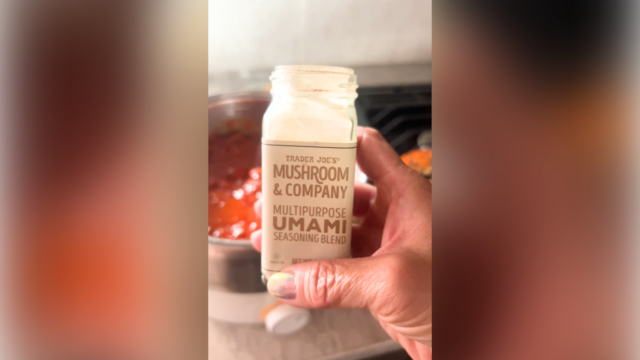
When I’m going for that “semi-homemade meal” vibe, I still like to add a little extra something for a flavor kick. My secret weapon is mushroom powder! Yep, ground dehydrated mushrooms and spices can give your store-bought sauces (and other dishes) a massive umami boost. It adds depth and layers of flavor to something that’s usually one-dimensional and provides a richness to the sauce. 

Mushroom Powder

Check Out the Whatever Pot in Action!


It’s Anything But Whatever

Whatever Pot Spaghetti Sauce

The Whatever Pot is perfect for anyone with limited kitchen space, dorm rooms, mobile kitchens like those in RVs, or any kitchen! It’s a powerful, versatile, multifunctional cooking tool that easily replaces a plethora of other appliances, and cooks multiple items simultaneously. It’s ideal for hot pot, grilling meats, sautéing veggies, and so much more. 

​Now, we want to hear from you! Are you a fan of hot pot? What would you cook in a Whatever Pot? Be sure to leave a comment letting us know!

The post Aroma’s Whatever Pot: The Best Home Hot Pot Cooker appeared first on Steamy Kitchen Recipes Giveaways.


from Steamy Kitchen Recipes Giveaways https://ift.tt/x5uFMTk
via New Kitchen Special
Monday, October 7, 2024

Fall Love PayPal $100 Gift Card Giveaway

Celebrate the cozy vibes of fall with Steamy Kitchen! We’re giving away $100 PayPal cash to ONE lucky winner. Think of all the seasonal treats and goodies you could enjoy!

Enter to win below.

fall love paypal $100 gift card giveaway

Tt’s time to celebrate the cozy season with something special! Whether you’re sipping pumpkin spice lattes, enjoying the warm hues of falling leaves, or indulging in your favorite comfort foods, we want to make this fall even more magical for you.

fall love paypal $100 gift card one winner

Enter now for your chance to win $100 PayPal and start treating yourself to everything you love about fall! How would you spend your extra $100? Let us know in the comments.

Fall Love PayPal $100 Gift Card Giveaway

Enter to win below.


The post Fall Love PayPal $100 Gift Card Giveaway appeared first on Steamy Kitchen Recipes Giveaways.


from Steamy Kitchen Recipes Giveaways https://ift.tt/kTeAXxM
via New Kitchen Special
Friday, October 4, 2024

Bath and Body Works Gift Card Instant Win

Happy Friday Steamy! Get your spinning hands ready for our Bath and Body Works Giveaway! We are giving away TEN X $10 Gift Cards to treat yourself to soaps, candles, and bath goods from Bath and Body Works.

Spin to win below.

bath and body works instant win


I love the wide selection of seasonal delicious smelling candles and love to stock up on hand soaps from Bath and Body Works.

They always have the best deals (that I have a hard time saying no to) and I can never leave the store without a whole arm full of soaps, candles, lotions and “home smelly things” (that’s what they are called right)?!

What is your favorite product from Bath & Body Works? Let us know in the comments below! 


Bath and Body Works Gift Card Instant Win

Spin to win below! 


The post Bath and Body Works Gift Card Instant Win appeared first on Steamy Kitchen Recipes Giveaways.


from Steamy Kitchen Recipes Giveaways https://ift.tt/xNtfMAh
via New Kitchen Special