Monday, June 29, 2020

Easy No Knead Bread

Easy No Knead Bread - FOOL-PROOF and only 4-ingredients! So hearty and rustic with the most amazing crust + fluffy, soft, chewy inside. Seriously, SO GOOD.
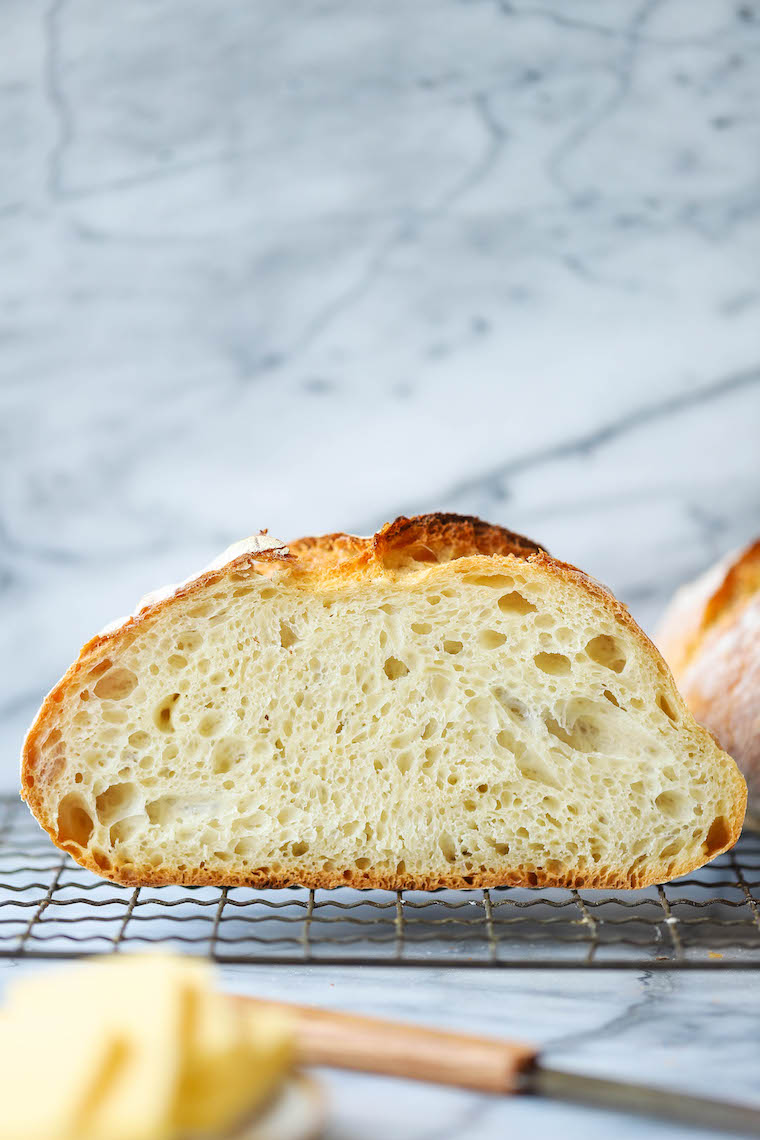
FOOL-PROOF and only 4-ingredients! So hearty and rustic with the most amazing crust + fluffy, soft, chewy inside. Seriously, SO GOOD.

Easy No Knead Bread - FOOL-PROOF and only 4-ingredients! So hearty and rustic with the most amazing crust + fluffy, soft, chewy inside. Seriously, SO GOOD.

Guys, please say hello to my COVID baby.

Yes, that’s exactly right. My bread baby. My bread baby I made every single week starting in March.

My first loaf was…well, it wasn’t the prettiest but it was still so darn good. The shaping definitely needed some work.

My second loaf was better, and then my third and fourth loaf were dropped off at neighbors and friends with a contactless drop off.
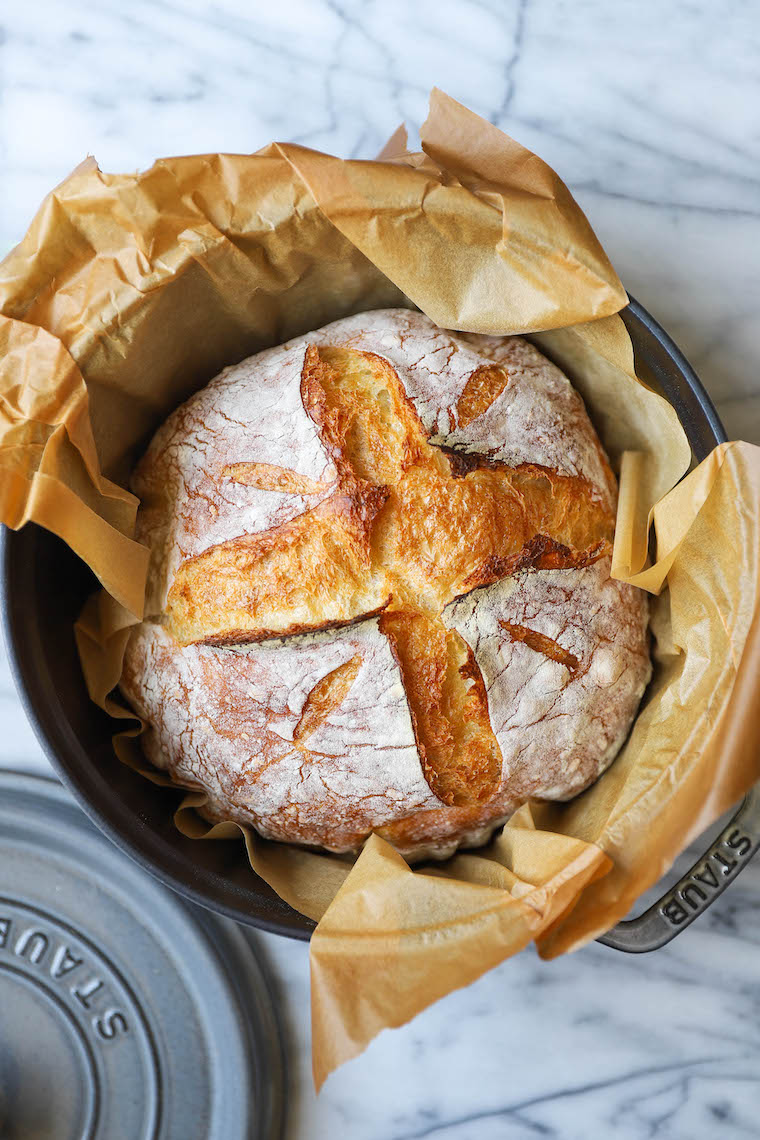
Easy No Knead Bread - FOOL-PROOF and only 4-ingredients! So hearty and rustic with the most amazing crust + fluffy, soft, chewy inside. Seriously, SO GOOD.

They all got rave reviews. Like the ravest reviews ever. And they all finished the loaves within a day.

I don’t blame them. It is just that good. And it’s unbelievably easy (except no one will believe you when you tell them that). Bread making has such a tedious, overwhelming rap to make but this no knead method requires very little hands-on time!

If you can’t find instant yeast: I have substituted active dry yeast and with an overnight rise with beautiful results!
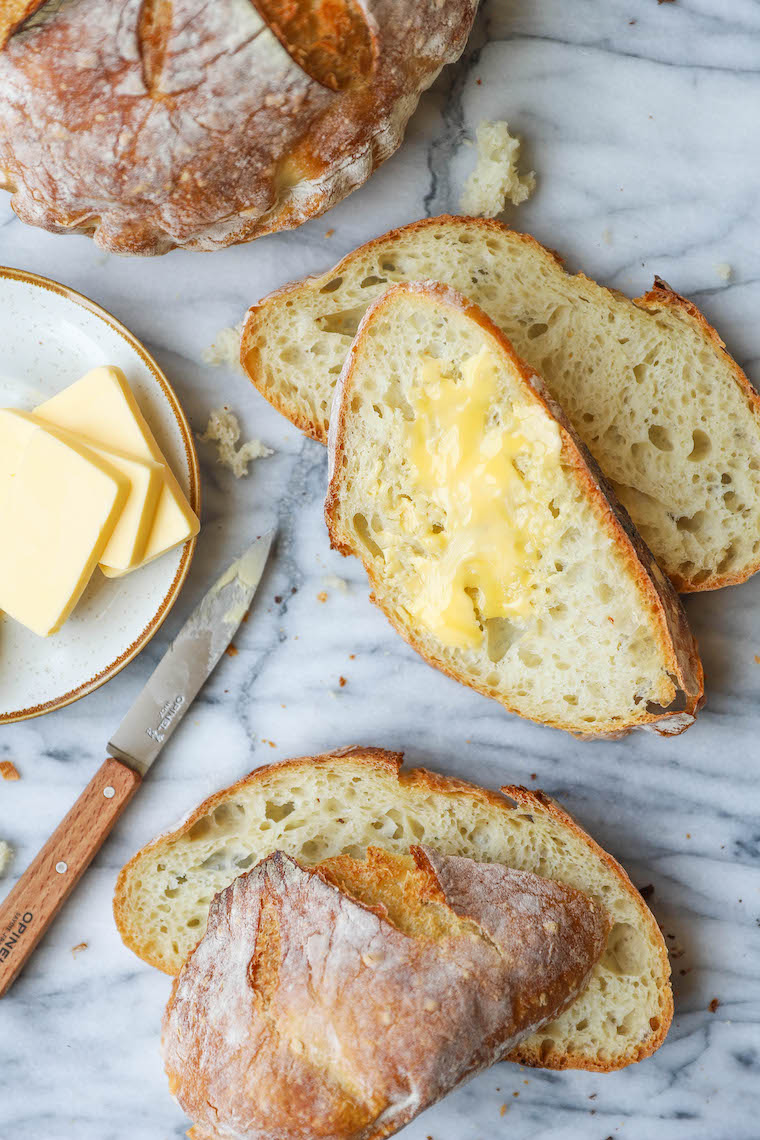
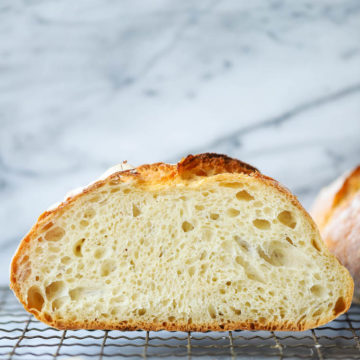
Easy No Knead Bread - FOOL-PROOF and only 4-ingredients! So hearty and rustic with the most amazing crust + fluffy, soft, chewy inside. Seriously, SO GOOD.

Easy No Knead Bread

FOOL-PROOF and only 4-ingredients! So hearty and rustic with the most amazing crust + fluffy, soft, chewy inside. Seriously, SO GOOD.

8 hours 30 minutes45 minutes

Ingredients:

  • 3 1/4 cups all-purpose flour
  • 2 teaspoons kosher salt
  • 1/4 teaspoon instant yeast
  • 1 1/2 cups warm water (100-110 degrees F)

Directions:

  1. In a large bowl, combine flour, salt and yeast. Create a well in the center; add water.
  2. Using a wooden spoon or your hand, stir until a wet, sticky dough forms, about 1-2 minutes.
  3. Cover bowl tightly with plastic wrap and let stand at a warm place until doubled in size and surface is dotted with bubbles, about 6-8 hours.
  4. Working on a lightly floured sheet of parchment paper, fold dough over itself 3-4 times, turning after each fold; gently shape dough into a round.
  5. Cover with a clean dishtowel and let stand at room temperature until dough has doubled in size, about 1 hour.
  6. Preheat oven to 450 degrees F. Place a 4-qt Dutch oven, covered, in the oven for at least 30 minutes.
  7. Remove Dutch oven from the oven; working carefully, place dough into the Dutch oven using the parchment paper as a sling.
  8. OPTIONAL: Using a sharp knife or bread lame, make a few shallow cuts on the top.
  9. Cover and place in the oven; remove the lid after 30 minutes. Continue baking until golden brown and completely cooked through, reaching an internal temperature of 210 degrees F, about 15 minutes more. Let cool 30 minutes on a wire rack
  10. Serve warm.

Notes:

Adapted from The Kitchn

Did you Make This Recipe?

Tag @damn_delicious on Instagram and hashtag it #damndelicious.

The post Easy No Knead Bread appeared first on Damn Delicious.


from Damn Delicious https://ift.tt/38kDf2I
via New Kitchen Special

July Baking Challenge

Sally's Baking Challenge logo image

July Baking Challenge

A new month and a new Sally's Baking Challenge is upon us! Today I'm sharing a preview of the July 2020 Baking Challenge as well as reviewing the June Baking Challenge (Brownie Ice Cream Sandwiches). Come see all your ice cream sandwich creations. And, for the first time, there are TWO WINNERS! It's all happening in today's new blog post.

The post July Baking Challenge appeared first on Sally's Baking Addiction.


from Sally's Baking Addiction https://ift.tt/2NT6QqF
via New Kitchen Special

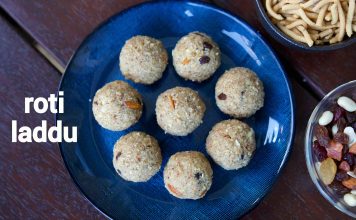
roti ke laddu recipe | basi churma chapathi ladoo | leftover roti ladoo

basi churma chapathi ladooroti ke laddu recipe | basi churma chapathi ladoo | leftover roti ladoo with step by step photo and video recipe. ladoo recipes are very common across india and are made with myriad ingredients across india. these are generally made and served during the festival occasions, but can also be made for day to day lunch and dinner. one such simple and innovative indian sweet recipe, made leftover rotis is roti ke laddu recipe or basi churma chapathi ladoo known for its crunchy texture.

The post roti ke laddu recipe | basi churma chapathi ladoo | leftover roti ladoo appeared first on Hebbar's Kitchen.


from Hebbar's Kitchen https://ift.tt/3dM0aVu
via New Kitchen Special

Bisquick Cheddar Garlic Biscuits Recipe

I constantly find myself in a position where I am expecting last-minute guests and have absolutely nothing in the house to serve as a snack. As I am desperately raiding my pantry a couple of weeks ago, I come across a box of Bisquick baking mix and I was immediately flooded with relief.

cheddar garlic biscuits

If you are unsure of what Bisquick is, it is a range of different pre-made baking mixes consisting of all the dry ingredients used for a specific bake. Usually it has flour, shortening, salt and baking powder as a base.

Now I had some sort of starting point. I was still short on time, so I had to make something that was easy. I ended up making cheddar garlic biscuits using the Bisquick mix.

 At first I was hesitant adding a bunch of ingredients that I had in my cupboard, but boy oh boy, these biscuits surprised me!

Apart from obviously being easy to make, they turned out perfect in every way! The texture was flawlessly crumbly. The crust was beautifully golden brown. The smell of garlic and cheese was wafting throughout the house. They were the most exemplary savory biscuits I have ever made.

Because you are using this versatile baking pre-mix, it is so easy to adapt the recipe to your liking. You can add almost any ingredient you like and also easily substitute or adapt the ones you don’t. For example, add some diced meat or vegetables or reduce the amount of garlic.

To make healthier biscuits are also effortless as you can just substitute the baking mix with the Bisquick gluten-free or heart-smart pre-mix.

Play around with different ingredient combinations to find the perfect recipe that works for you. They will all be tremendously easy and extraordinarily delicious.

How to make Bisquick Cheddar Garlic Biscuits

Preheat the oven to 450 degrees Fahrenheit and line a baking sheet with parchment paper.

Combine the Bisquick mix, milk, garlic powder and grated cheese in a bowl and mix until the ingredients are evenly incorporated.

Using an ice cream scoop, place nine scoops on the baking sheet. Bake them for about 10-12 minutes or until the biscuits are golden brown in color.

While the biscuits are baking, melt the butter and add the rest of the garlic powder. This makes a fragrant garlic butter that you brush onto the biscuits once they come out of the oven.

Serve as a delicious appetizer with some creamy cheese and sweet preserves.

Bisquick Cheddar Garlic Biscuits

    5 from 1 vote
    Recipe by Laura Ritterman Course: AppetizersCuisine: AmericanDifficulty: Easy
    Servings

    9

    servings
    Prep time

    8

    minutes
    Cooking time

    12

    minutes
    Calories

    190

    kcal

    These heavenly Bisquick Cheddar Garlic Biscuits biscuits are super easy to make and can be easily adapted to your liking. It is a great snack or appetizer that will have everyone talking!

    Ingredients

    • 2 cups Bisquick baking mix

    • ¾ cup milk

    • ½ teaspoon garlic powder

    • 1 cup cheddar cheese, grated

    • 2 tablespoons salted butter, melted

    Directions

    • Preheat your oven to 450 degrees Fahrenheit.
    • Place the Bisquick baking mix, milk, ¼ teaspoon garlic powder and grated cheddar cheese in a small bowl. Mix with a wooden spoon until the ingredients are well combined.
    • Line a baking sheet with parchment paper or spray it with non-stick cooking spray. Using a standard-sized ice cream scoop, scoop the dough onto the baking sheet. This mixture makes roughly 9 good-sized scoops.
    • Place the tray in the oven and bake for 10-12 minutes or until the biscuits are golden brown.
    • Meanwhile, make the garlic butter by combining the melted butter with the rest of the garlic powder. When the biscuits come out of the oven, immediately brush them with your garlic butter.
    • Serve them as-is for breakfast or as an appetizer on a cheese platter.

    Notes

    • These biscuits can be stored in the fridge for 1-2 days, but they are best served immediately. You can also freeze the biscuits before brushing them with the garlic butter. Once they are completely cooled off, place them in an air-tight container and then in the freezer. They will last for up to a month. When you are ready to use them, simply reheat them in the oven before brushing the garlic butter over them.

    Like this recipe?

    Follow us @recipefairy on Pinterest

    Tips & Tricks

    • If these biscuits are too boring for you, you can add a ton of other ingredients to change the flavor. Add your chosen ingredient/s to your batter before baking. Options include some cooked crispy bacon pieces, a variety of dried herbs or some sundried tomatoes or chopped olives. There are an infinite number of flavor possibilities and all you have to do is experiment.
    • If you want to make these biscuits extra cheesy, bake them for 8 minutes, remove from the oven, add additional grated cheese on top and grill in the oven until crispy.
    • Another clever way to make this biscuit is to use different cheeses – as long as they have the same consistency as cheddar. For instance, you can use Gouda, Parmesan or Mozzarella. If you are a cheese lover you can use molded cheese such as Gorgonzola. These biscuits will perfectly accompany any appetizer or cheese platter.
    • To make a healthier biscuit, use the Bisquick gluten-free variety baking mix or their heart-smart baking mix.
    • If you thought this biscuit is only a breakfast or lunch snack, you were wrong. You can upscale these biscuits by cutting them in half, like you would a scone, and serving them with salmon ribbons, cured meats, cheeses and preserves. You can make the most beautiful appetizers that will leave your guests swooning.

    Conclusion

    As you can see, having a box of Bisquick baking mix in the house is always a good idea. You can easily create the most delectable bakes like these cheddar garlic biscuits.

    They are crispy on the outside and have the perfect crumbly texture on the inside. They are ridiculously easy to adapt into just as delicious healthier versions or to accommodate for dietary needs.

    Do yourself a favor and make these biscuits for your guests; you won’t be disappointed.


    from Recipefairy.com https://ift.tt/2YHSD5S
    via New Kitchen Special

    7-Layer Magic Bars

    Classic 7-layer magic bars with chocolate, nuts, butterscotch, and coconut! They're the perfect make-ahead dessert for your next party.

    Continue reading "7-Layer Magic Bars" »


    from Simply Recipes https://ift.tt/2CTWFjd
    via New Kitchen Special

    KeySmart Clean Tray Giveaway

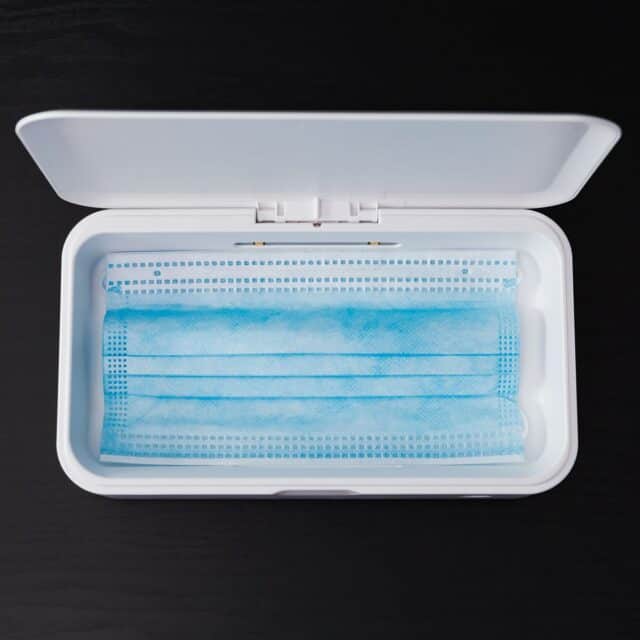
    We are excited to be giving away a KeySmart Clean Tray! The KeySmart Clean Tray is a small case that you can use to store all of the things you touch with dirty hands all day. PLUS it uses UV technology to disinfect whatever items you place inside of it in just 5 minutes.

    KeySmart CleanTray – One Tray to Clean Everything You Carry

    • KILLS 99.99% OF GERMS AND BACTERIA IN 5 MIN – 2x Faster Than Other Leading UV Cases
    • 10,000 HOUR LIFESPAN –2x Longer Than Other UV Cases 
    • FITS SMARTPHONES UP TO 7 INCHES –Plus Essentials Like your KeySmart, wallet & AirPods
    • SAFE AND ECO-FRIENDLY –No mercury, toxic chemicals or paper waste needed
    • PORTABLE & LIGHTWEIGHT – About the size of a book, weighs less than 1lb
    • AROMATHERAPY – Add essential oils to infuse your belongings

    Did you know that your phone has more germs than most toilet seats? Gross! We didn’t know that, but thank you KeySmart for informing us, especially during these times when we all need to be keeping as cleanly as possible. The small blue light lets you know when your belongings are disinfected.

    KeySmart uses UV technology to kill 99.9% of germs on surfaces the you place in the CleanTray. Disinfect your keys, phone, glasses, rings, face masks, watches, credit cards–anything that fits!

    Sanitize 24/7 with the CleanTray’s small lightweight design and 10,000 hour charge! The CleanTray can fit in your suitcase, car or purse and it only weighs half a pound. It also holds a 10,000 hour charge so you can take it with you wherever you go and not worry about plugging it in to charge.

    BONUS! The Clean Tray even allows you to use essential oils inside of it so your phone or face mask will come out smelling just as clean as it is. Use any kind of aromatherapy essential oils that you like!

    KeySmart Clean Tray Giveaway

    Enter Giveaway Below


    The post KeySmart Clean Tray Giveaway appeared first on Steamy Kitchen Recipes Giveaways.


    from Steamy Kitchen Recipes Giveaways https://ift.tt/3gcXJge
    via New Kitchen Special

    Perfect Grilled Steak (Steakhouse Quality)

    How to grill the perfect steak for your next summer cookout. This has a simple 3-ingredient rub with rosemary, salt, and pepper, but it’s all... Read More

    The post Perfect Grilled Steak (Steakhouse Quality) appeared first on NatashasKitchen.com.


    from NatashasKitchen.com https://ift.tt/2BRH6I6
    via New Kitchen Special