Monday, April 8, 2024

The Best Chinese Recipes to Cook in the Air Fryer

Do you catch yourself dreaming about foods from your favorite local (or not so local) Chinese restaurant? What if you could make some of those delicious dishes right from home?

“But that involves deep frying stuff and it’s a big ‘ol messy process!” you’re thinking. Screw the deep fryer! (Not literally. Don’t do that.)

If you’ve got an air fryer, you’ve got an easier AND healthier way to make your favorite Chinese dishes at home! Whether your favorite main course is sesame chicken or Chinese eggplant, we’re giving you a list of the best Chinese air fryer recipes. So break out your brown rice, green onions and sesame oil and get ready to whip up an easy dinner tonight!


Chinese Spring Rolls

by Wei of Red House Spice

Air Fryer Spring Rolls

Photo: Red House Spice

Golden, crispy spring rolls filled with a juicy mix of veggies and meats (whether you love cooked chicken, pork, or beef), minus the oily guilt. Sound too good to be true? Well, Wei’s got you covered! This easy recipe is the best way to make spring rolls without the pre-cooking hassle. AND she’s got tips for you on how to keep those rolls more crispy than greasy. These are literally the best alternative to Chinese restaurant spring rolls. Check out the recipe here.


Char Siu (Chinese BBQ Pork)

by Christie of Christie At Home

Air Fryer BBQ Pork

Photo: Christie At Home

Mmmm… Char Siu. That sweet, sticky, slightly charred slice of heaven. Christie takes this Chinese classic and flips it on its head by using the air fryer to achieve the perfect balance of juicy and tender. And at the end of your cook time, you’ll have decadent pork with a perfect char. Serve this with fluffy white rice and your fave veggies to impress the whole family! Check out the recipe right here.


Crispy Garlic Tofu in 20 Minutes

by Tiffy of Tiffy Cooks

Crispy air fryer tofu

Photo: Tiffy Cooks

If you think tofu is boring, Tiffy’s about to change your mind. We’re talking crispy edges, tender insides, and a spicy garlic sauce that may make you lick the damn plate clean. And the best part? It only takes 20 minutes to make this plant-based meal. Say goodbye to deep-frying and hello to this crispy delight (smothered in a savory sauce that… did we mention? You can put on almost anything!) right over here.


Sesame Chicken

by Robin of All Ways Delicious

Air fryer sesame chicken

Photo: All Ways Delicious

You’re going to love this air fryer chicken recipe! Imagine biting into perfectly crispy chicken pieces dripping in a gingery and savory sesame sauce, all topped off with a sprinkle of toasted sesame seeds. All this from just a couple of humble boneless chicken thighs and some basic ingredients. Ready for this mouth-watering air fryer sesame chicken recipe? Find it here.


Chinese Eggplant

by Chihyu of I Heart Umami

Air fryer Chinese eggplant

Photo: I Heart Umami

We’re wrapping up this list by air frying Chihyu’s Chinese eggplant. Crispy on the outside, tender on the inside, and coated in a sweet and tangy garlic sauce. It’s a side dish that is guaranteed to steal the show. Looking for the star of the dinner table? Click here for the recipe.


Frequently Asked Questions

What’s the best way to get that crispy texture with air fryer Chinese recipes?
Avoid overcrowding your air fryer basket. Cook everything a single layer and use a light spritz of cooking spray for the best results. For some extra crunch, a dusting of potato starch works wonders on foods like chicken or tofu before air frying.

Can I cook from frozen in the air fryer?
Absolutely! Got some frozen Chinese dishes like dumplings or egg rolls? You may need to adjust cooking times slightly longer than fresh or thawed foods, but with an air fryer, there’s no real need to defrost! Just place them in the air fryer basket and prepare to enjoy.

What’s the ideal cooking time and temperature for air frying Chinese cuisine?
It can vary depending on the dish and your type of air fryer, but typically, a medium-high heat setting (around 350-400 degrees F) works well for most recipes. Always refer to your specific recipe card!

How do I make my air fryer Chinese dishes flavorful?
Don’t skimp on the aromatic spices and seasonings! Fresh ginger, garlic, soy sauce, hoisin sauce, and five-spice powder are some key ingredients when you want that authentic Chinese flavor. Also, a tangy sauce or marinade will elevate almost any dish.

Is air frying a healthier alternative to deep frying?
Yes, air frying is a MUCH healthier option compared to deep frying. It requires a lot less oil, which reduces your overall calorie and fat intake without sacrificing flavor.

Can I use parchment paper in my air fryer when cooking Chinese recipes?
Yes. Parchment paper can handle air fryer heats up to 428°F. It’s great for making cleanup easier and to prevent sticking, especially when you’re cooking with sticky or saucy dishes. Just be sure not to place it in there alone (like during preheating). Add parchment paper at the same time as your ingredients for the most even cooking.


I Don’t Know About You, But I’m Hungry Now! 

We hope you enjoyed this short list of the best Chinese air fryer recipes. It’s kind of amazing what this little machine can achieve, and now with these recipes, you may never need to order Chinese takeout again! (Just kidding. Support your local Chinese restaurants.)

Which of these recipes is your favorite? Is there a recipe that we didn’t include on this list that you think should be on it? Is there a Chinese dish that you wish there was an air fryer recipe for? Either way, we’d love to hear about it!

​Enjoy your air frying adventures, and until next time, stay cookin’!

Cosori Air Fryer Giveaway

Are you interested in having your own Air Fryer and cook some of the best Chinese Recipes listed? Enter to win this amazing Cosori Air Fryer now.


The post The Best Chinese Recipes to Cook in the Air Fryer appeared first on Steamy Kitchen Recipes Giveaways.


from Steamy Kitchen Recipes Giveaways https://ift.tt/MbrtIGE
via New Kitchen Special

5 Great Microwave Meals + Our Microwave Veggie Cheat Sheet!

If you know anything about Steamy, you know that we LOVE microwave cooking. Why all the love? Because it’s practically your kitchen’s magic wand. Busy day? No problem! Just zap your food, and BOOM! Dinner’s ready! What’s also great about microwave cooking is that, because of its shorter heating timeframe, it can preserve more nutrients than pan frying for many dishes.

The problem with microwaves is the way we think of them. Microwaves have become synonymous with soggy, sad meals, but the truth is: it’s all in the technique! With a bit of know-how, you can master the art of making mind-blowing microwave dishes, including amazing sides and delicious desserts.

Here are a few Steamy Kitchen microwave meals that no one will believe you didn’t spend hours on. 


5 Great Microwave Meals

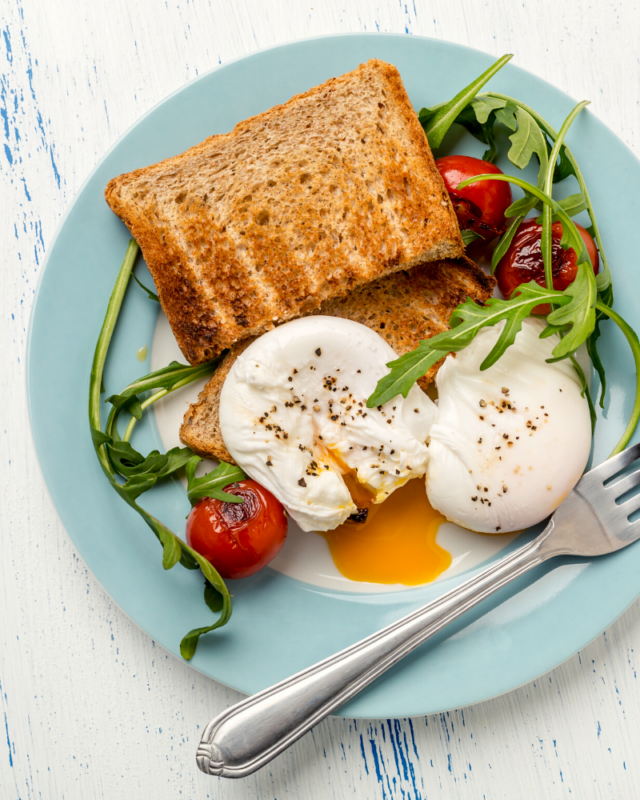
Breakfast: Poached Eggs

Rushing through the morning with little time to eat? No worries! With this microwave recipe, you can have eggs benedict-quality eggs in under five minutes!

Get the recipe here!

two poached eggs with a salad on a blue plate.


Lunch: Quesadillas

Love ultra cheesy quesadillas, but don’t love dealing with a greasy mess? We got you covered. Learn how to make this stuffed quesadilla in the microwave in just a couple of minutes.

Get the recipe here!

Tray of quesadillas on a small sheet pan with salsa.


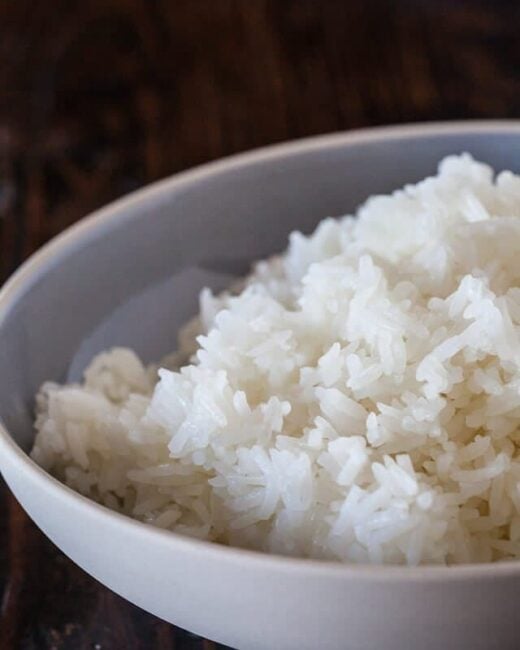
Side: Perfect, Fluffy Rice

Cheaper and way more convenient than using a rice cooker, this microwave recipe will get you perfectly cooked, fluffy rice in no time!

Get the recipe here!

how to make perfect rice in the microwave


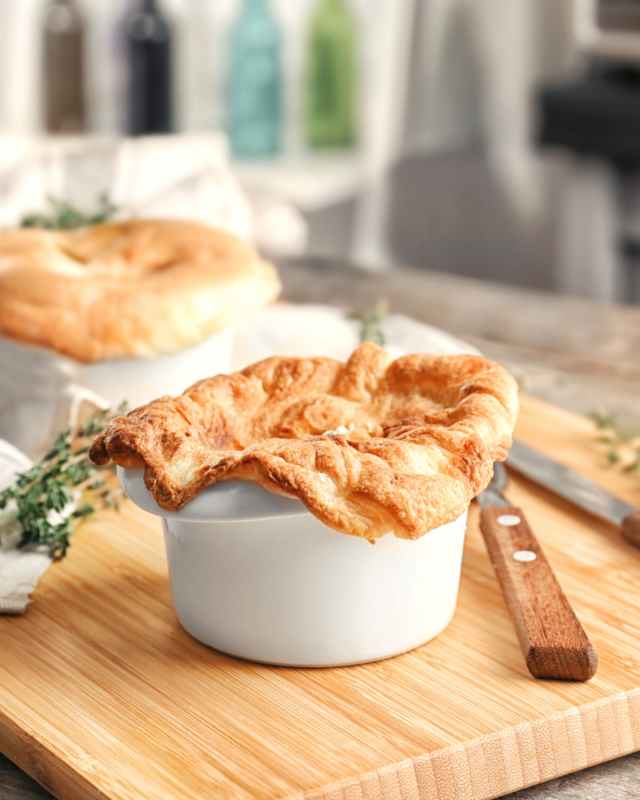
Dinner: Easy Chicken Pot Pie

Who has time to make chicken pot pie from scratch? Skip the involved process and make this easy peasy chicken pot pie right in your microwave!

Get the recipe here!

Chicken pot pie in a white ramekin.


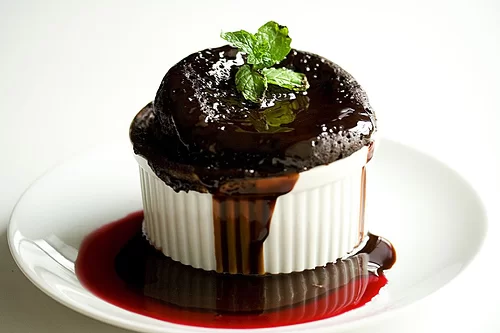
Dessert: Chocolate Cake

Who says you need an hour or more to make an indulgent dessert? Forget the stove, and make this decadent chocolate cake in your microwave in minutes!

Get the recipe here!

Secret ingredient chocolate cake


Want More Microwave Meal Recipes?

If you’re looking for our full list of microwave meals, look no further. Click here for the full list. 


Ready for the Ultimate Microwave Cheat Sheet?

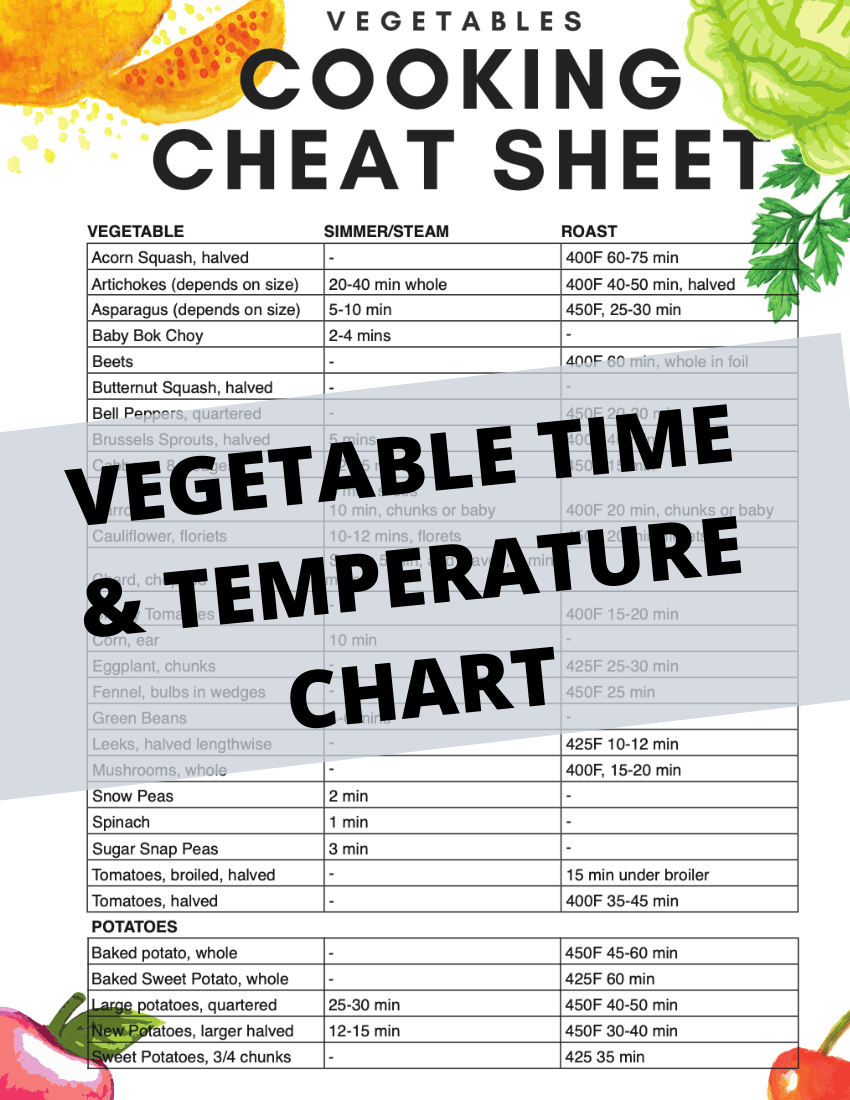
If you want to know how to many a number of veggie sides and dishes in the microwave, we have the perfect thing for you! It’s our Microwave Veggie Cheat Sheet! Never again will you have to worry about not having enough time to make lunch or dinner. This cheat sheet will have your guests thinking you slaved away over the stove all day.

Enter the giveaway below where you will be able to find the Microwave Cheat Sheet in the bonus entries! 

The post 5 Great Microwave Meals + Our Microwave Veggie Cheat Sheet! appeared first on Steamy Kitchen Recipes Giveaways.


from Steamy Kitchen Recipes Giveaways https://ift.tt/LVQjWe0
via New Kitchen Special
Thursday, April 4, 2024

How Long Can Coffee Last in the Fridge Before it Goes Bad?

Coffee drinkers know the drill. You pour yourself a cup of joe only to realize you’ve brewed enough to caffeinate a small army. Where do you stash the leftovers? In the fridge, of course! So the real question becomes: how long is that java going to stay good for? Let’s find out together!

What to do with leftover coffee and coffee grounds

The Short Answer?

How long can your brewed coffee can last in the fridge? Typically, brewed black coffee can last for up to a week when stored in the fridge. But! It’s imperative to note that the taste will begin to deteriorate after a couple of days. For those who love cold-brew coffee, good news! You have a bit longer—up to 2 weeks, in fact. Of course, there’s a world of factors that play into this timeline, so let’s jump right into what affects the shelf life of coffee and the best way to keep that fresh pot fresh.


Factors that Affect the Shelf Life of Coffee 

Here’s some info on what can affect good coffee’s longevity, post coffee pot:

  • The Brewing Process: How you brew your coffee can affect its taste as it ages. Did you use a regular coffee maker? A French press? Another brewing method? Each technique extracts flavors and oils from the coffee grounds differently. For instance, any hot water brewing method will extract more oils from the coffee beans, resulting in a fuller-bodied brew with a bolder flavor. On the other hand, cold brew coffee extracts fewer oils compared to hot water, so it’s less prone to flavor degradation. And, if you’ve made your cold brew coffee from concentrate, that’s the best way to ensure your coffee lasts its longest and preserve its rich flavor. 
  • Air & Light: When it comes to coffee degradation, your two worst enemies are oxygen, which causes your coffee to taste stale, and light, which can also cause chemical reactions that change the flavor profile. That’s why we recommend this next tip…
  • Proper Storage: Store your brewed coffee in a clean, air-tight container and put it in a dark place, away from direct sunlight and heat sources. It’s an easy way to preserve its flavor and aroma for a longer period of time.
  • Additives: Did you add milk to your coffee before you put it in the fridge? What about sugar? These additives can significantly reduce the shelf life of your brew, as they both provide a food source for bacteria and yeast. The best option is to keep it black as long as possible to extend the life of your coffee.

How to Tell if Your Coffee is Bad

Coffee doesn’t always go bad in the same way as most other food items. So, how do you know when your coffee is no longer thriving? Trust your senses. Drinking stale or rancid coffee isn’t just a flavor buzzkill—it can also mess with your stomach, and nobody wants that. Here’s what to watch for:

  • Aroma and Taste: To tell if your coffee has spoiled, the first thing to look out for is a significant change in taste or aroma. Freshly brewed coffee will have a rich, aromatic scent. If your cup of joe has a foul or off-putting odor, that’s a clear sign that it’s likely rancid. In the same vein, if the taste of your brew is sour, bitter, or otherwise unpalatable, it’s time to bid that brew adieu.
  • Consistency: If you notice ANY changes in consistency, such as slimy or gritty textures, that’s a HUGE red flag. Obviously, if you see visual cues like mold growth or unusual discoloration, that’s a clear indicator to promptly discard that brew.  


How to Maximize the Shelf-Life of Coffee

  • Storage: Use airtight containers to keep your brewed coffee from air, moisture, and light, especially when you’re storing it in the fridge, to slow down its oxidation process.
  • No Additives: Avoid adding milk, cream, or sweeteners to your coffee until JUST before you drink it to prevent expedited spoilage and to maintain its freshness.
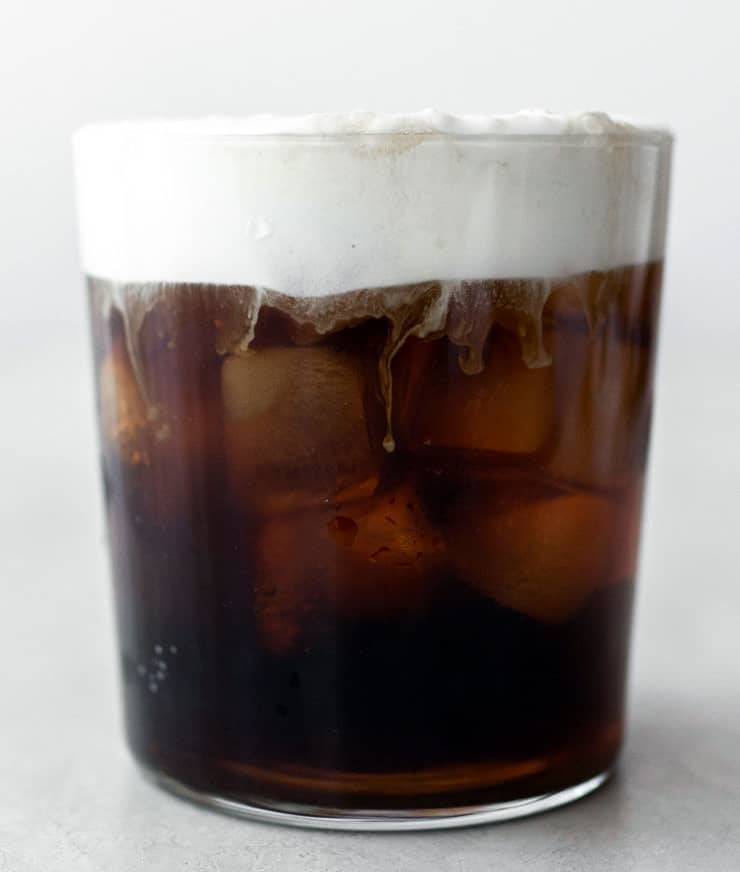
  • Freezing: If you find yourself with excess brewed coffee, you may consider freezing it. There is some debate on whether or not this is the good idea, as freezing can rob your coffee of its best flavor. However, some people prefer freezing when they’re trying preserve their coffee for a long time. If you do opt for this method of preserving coffee, you can keep brewed coffee in the freezer for up to 2 weeks. When it’s time to thaw your frozen coffee, just transfer it to the fridge overnight. If you’re just looking for a no-waste option, put your leftover coffee into an ice cube tray, and then use those coffee cubes to keep your cold brew cold. That way, you won’t have to worry about regular cubes watering it down!
  • Labeling: Don’t forget to label your containers with the date of brewing. This simple step allows you to track freshness and ensure you’re enjoying your coffee at its peak.


Creative Ways to Repurpose Your Coffee

Hate wasting coffee? Me too! Here are some tips for making sure that beautiful brew doesn’t go to waste:

Coffee Syrups and Sauces: Did you know that you can use brewed coffee as a base for syrups and sauces? Just simmer brewed coffee with sugar and spices like vanilla extract and nutmeg to create a unique syrup that you can add to breakfast foods like pancakes or waffles. Or heck, use your homemade syrups to elevate your next morning cup of coffee. Even better: drizzle it over ice cream, or onto baked desserts like cakes and cookies.

Natural Dyes: Looking to repurpose coffee in a non-edible way? If you’re the crafty type, coffee can be used as a natural dye for fabrics or paper, which offers you an eco-friendly alternative to using synthetic dyes. The rich brown hues of coffee create earthy tones, so this technique is perfect for achieving a vintage or rustic look. Simply soak your fabric in a concentrated coffee solution, allow it to dry, and rinse with cold water to set the color! 

Gardening Benefits: If you’re a coffee lover, there’s no doubt you’ve got plenty of leftover coffee grounds. Did you know that these are also great for plant lovers? Coffee grounds are rich in nitrogen, potassium, and other minerals, so they make for an excellent natural fertilizer for plants. Simply sprinkle coffee grounds around your plants or mix them into the soil to enrich its nutrients. Coffee grounds also help improve soil drainage and aeration, which promotes healthy plant growth.

Coffee Ice Cubes: Freezing leftover brewed coffee into ice cubes is a clever way to prevent waste and prolong your iced coffee experience. Instead of using regular ice cubes that can water your drink down, pop in some coffee ice cubes! They can be used iced coffee, blended drinks, or even cocktails for a delicious twist.

How to Store Cold Brew Coffee 

People everywhere love cold brew coffee for its smooth, rich flavor. And if you want it to last, you have to know how to properly store it to keep its freshness and flavor alive. Here are some tips on how to store your cold brew coffee in the fridge:

Use a Sealed Container: Keep your cold brew coffee in a sealed, airtight container to prevent it from absorbing odors from other foods while in the fridge. A glass container with a tight-sealing lid is perfect for storing cold brew and maintaining its aroma and flavor.

Store it in the Fridge: The cold temperature of your fridge will help slow down the degradation of the coffee’s flavor. Know that if you choose to store it in the freezer, that can alter its taste and texture. The fridge will keep your coffee chilled without compromising its quality.

Use Within a Week: While cold brew can last longer than hot brewed coffee, it’s best to drink it within a week, as the the flavor may start to deteriorate after this point, and the coffee may develop off-flavors. Don’t forget to label your container with the brew date so you can keep track of its freshness.

Shake Before Serving: Before serving your cold brew, always remember to give it a good shake to mix any settled coffee grounds. This will also help distribute the coffee’s flavors evenly.

Enjoy Cold or Hot: Cold brew coffee can be enjoyed cold (over ice) or hot by gently heating it on the stove or in the microwave. Its concentrated flavor makes it a versatile drink, so don’t be afraid to experiment with different serving styles to find your preferred way of enjoying cold brew.

Consider Dilution: Since cold brew is typically stronger than hot brewed coffee, you can melt ice cubes in it to dial in your desired strength. Dilute your coffee with more ice if it’s too strong, and less if it’s just right.

How to Store Coffee Beans 

How you store your coffee beans can mean the difference between good coffee and stale coffee. Here are some tips to help you store your coffee beans:

Use an Airtight Container: Be sure to store your coffee beans in an airtight container to protect them from air exposure, which can cause them to oxidize and lose flavor. A container with a one-way valve is the best option, as it allows carbon dioxide to escape without letting any air in.

Keep Them Cool: Store your coffee beans in a cool, dark place and away from heat sources and sunlight, but avoid storing them in the fridge or freezer. The humidity inside your fridge can cause mold growth. Also coffee is porous and can easily absorb other fridge odors. That being said…

Avoid Moisture: Moisture is the enemy of coffee beans, as it can cause them to become stale and moldy. Keep your beans away in a dry place, like your pantry.

Buy in Small Batches: If you want to make sure your coffee beans are fresh, it’s best to buy them in small batches and use them up within a week or two.

Grind Just Before Brewing: For the freshest cup of coffee you can get, grind your beans just before brewing. Grinding exposes more of the beans’ surface area to air, which can result in a quicker flavor loss. Invest in a good quality burr grinder and grind your beans right before brewing for the best results.

Store Away from Strong Odors: Coffee beans can absorb odors from their surrounding environment, so be sure to store them away from strong-smelling foods or items. Keeping them in a separate cupboard or container from other foods might be your best bet.

FAQs:

How long can I keep brewed coffee at room temperature?

Brewed coffee should not be left at room temperature for more than a couple of hours to avoid the risk of bacterial growth. If you don’t plan on drinking your brewed coffee in the moment, it’s best to store it in the refrigerator.

What kind of container should I use for brewed coffee?

A sealed container, like an airtight glass mason jar or a thermal carafe, is great for storing brewed coffee. These containers will help to preserve your coffee’s freshness and prevents it from absorbing fridge odors.

How long does day-old coffee stay fresh in the refrigerator?

Day-old coffee can usually remain fresh in the refrigerator for up to 24 hours. Any longer, and its flavor may start to degrade.

Can coffee connoisseurs usually tell if brewed coffee has been stored improperly?

Avid coffee drinkers are VERY preferential when it comes to their coffee, and as a result, are very keen to anything that isn’t fresh. The general rule imparted by most coffee connoisseurs? “Don’t mess with my coffee!” 


And that’s the Brew!

We hope that we answered all your coffee questions and helped you to better understand how to store your brew so that it’s (almost) just as good as when it’s fresh from the pot! 

We know every coffee lover’s got a specific way of doing things, so we want to hear from you! What do you do to keep your coffee fresh? What are your favorite coffee additions? What’s your favorite way to use leftover coffee? Do you prefer cold brew or hot brew? What’s your favorite brewing method? Have you ever baked with coffee or made a syrup? Share with us all your favorite things coffee! We always love to hear your take. Leave us a comment. 

We here at Steamy Kitchen hope your coffee is always fresh and hot (unless you like it cold), and that your day is filled with magic. Happy sipping!

The post How Long Can Coffee Last in the Fridge Before it Goes Bad? appeared first on Steamy Kitchen Recipes Giveaways.


from Steamy Kitchen Recipes Giveaways https://ift.tt/qZy2CYe
via New Kitchen Special
Monday, April 1, 2024

The Best Guide on How To Clean a Flat Top Griddle

Got a griddle, but not sure of the best way to clean it? Welcome to the ultimate guide on how to clean any carbon steel flat top grill, including Blackstone and Camp Chef griddles! We’re turning your grubby griddle into a gleaming gem, so clean you’ll want to show it off. When it comes to griddles, the right cleaning method makes all the difference. Whatever you’re dealing with—stuck-on remnants, excess grease, or even those mysterious bits of food that look like they might be permanently affixed—we’re tackling it all. 

For those of you venturing into the world of outdoor griddles for the first time, fear not. It might seem intimidating, but cleaning your griddle is easier than you think. From the surface of the grill to the grease trap and everything in between, we’ve got all the tips and tricks to guide you through the process. If you’re ready for a sparkling clean flat top grill that’s prepped for flipping pancakes on a Sunday morning or searing steaks under the stars, buckle up, grab your bench scraper, and let’s get that griddle goin’. 

First up?

Round Up Your Cleaning Arsenal

Let’s talk gear. You wouldn’t climb a mountain without the right equipment, right? Likewise, you don’t want to tackle griddle cleaning without your trusty tools. And to be honest, you don’t need much. Here’s what you’ll need:

  • Paper Towels: For cleaning, naturally.
  • Bench Scraper or Flat Metal Spatula: Which moonlight as griddle cleaners. NOTE: ALWAYS make sure that the entire edge of these scrapers meet your grill, never just the corner of these scrapers, as this can damage your griddle! Always sweep in a motion perpendicular to how you’re holding your scraper, not parallel to it. (If you’re holding it horizontally, sweep vertically, and vice versa.)
  • High Smoke Point Oil: Such as vegetable, canola, soybean, sunflower, coconut, or avocado for seasoning your grill.

It’s crucial to note that you should not use soap on your grill surface because it will strip it of its seasoning, which you will need to keep it nonstick.


Types of Griddles & Special Care Considerations

Not all griddles are created equal. Though this guide is specifically for carbon steel griddles, let’s talk about different griddle materials for a second. Each has its own quirks, and each material has its own special considerations. Let’s explore the three main types of griddles.

Carbon Steel Griddles

Carbon steel griddles are basically the lightweight champion of griddles, but they’re also the most popular choice. They heat up quickly, retain heat like a dream, and can handle almost any dish you throw at them. Whether you’re looking to achieve a delicate char on fish, make a mean grilled cheese, or smash burgers to perfection, their non-stick surface evolves with every use thanks to the magic of seasoning.

Special Care Considerations:

  • Hand Wash Only: Treat this griddle with love. You’ll need to hand wash it after each use and dry it thoroughly to prevent any rust.
  • Seasoning is Key: Whether it comes pre-seasoned or you start from scratch, you’re going to need to maintain that seasoning layer to keep it non-stick and make it last.

Cast Iron Griddles

Cast iron griddles are the heavyweights of the griddle world—quite literally, actually. They’re really great at getting hot and staying hot, which makes them ideal for searing meats and cooking large quantities of food with ease. Their heat retention is unmatched, so you’re guaranteed to get even cooking across the entire surface.

Special Care Considerations:

  • Cleaning and Drying: Just like carbon steel, cast iron needs to be cleaned and dried immediately after use to avoid rust.
  • Seasoning: The seasoning process for cast iron differs somewhat from carbon steel, but it’s just as important to keep your surface of the flat top grill non-stick.

Non-Stick Griddles

For those who hate cleanup, the non-stick griddle is your best friend. It’s also the breakfast lover’s griddle. You can flip pancakes and frying eggs, and your food will always slide off the surface effortlessly, so there is almost no scraping needed.

Special Care Considerations:

  • Avoid Metal Utensils: To keep the non-stick surface scratch-free, steer clear of metal tools. Opt for silicone or wooden utensils instead.
  • Hand Wash Only: The dishwasher is a no-go zone for your non-stick griddle. Hand wash it to preserve both the coating and the integrity of the metal base.


Things to Know Before You Start Cleaning Your Carbon Steel Griddle

Keeping your griddle is about more than just elbow grease. You gotta be a little clever in how you approach cooking altogether. Here are some pre-cleaning tips to keeping that griddle surface so fresh and so clean clean.

Clean Your Griddle as You Go

You know that moment while cooking, when the surface starts to look a bit like a crime scene? That’s your cue. Grab your bench scraper and show that stuck-on foods who’s boss! Then slide all that gunk right into the grease tray. This little trick is a game-changer, especially when it comes to those sugary sauces that love to cling onto your griddle like a koala to a tree.

Early Burner Retirement

Now, this might sound a bit strange to you, but turn off the burners just before you’re done cooking. Why, you ask? Your griddle holds enough residual warmth to nudge your food across the finish line, and turning it off at the 90% mark keeps all that extra juice / grease / food bits from turning into a charred relic of a meal once loved. This trick also keeps the flat surface clean-up friendly. Trust me. Your elbows will thank you.


The Step-by-Step Griddle Cleaning Process

Roll up your sleeves. It’s time for the MAIN EVENT! Here’s your go-to guide for keeping your flat top grill in beautiful condition.

Step 1: Get Your Scrape On (While You Cook)

Like we mentioned, start the cleaning process while you’re cooking. Stubbornly clingy food debris. Meet bench scraper. (*tiny screams* ahhhh… nooooo!) Into the grease trough with you! This step will save you SO much time and effort later. Also, don’t forget to turn off that grill a little early!

Step 2: Get Your Scrape On (After You’re Done Cooking)

You’re done cooking, you’ve plated your food, and the grill is still hot. It’s time again to grab your trusty bench scraper (some people also prefer a flat metal spatula) and essentially repeat step 1. Scrape those bits right into the grease trap.

Step 3: Wipe On. Wipe Off.

The stage is cleared and now it’s time for a wipe down. Grab some paper towels and gently wipe the entire cooking surface (Mr. Miyagi style optional), carefully, as the surface is still hot. Make sure to get all the nooks and crannies of the sidewalls and the grease trough area. This not only dries off your grill (because rust is the last thing we want), but it also spreads a thin layer of residual cooking oil, which preps it for its final act…

Step 4: The Seasoning Finale

Your flat top grill might be clean, but we’re not done yet! While it’s still hot, drizzle a bit of your favorite seasoning oil (I like avocado oil for its high smoke point and mild flavor) across the griddle surface. Gently rub it in with a paper towel, and cover the entire surface with a very thin layer of oil. When that’s done, fire up your burners to medium and let that oil embrace the heat for about 10 minutes. This is a crucial step as it will keep your grill non-stick and protect it ’til your next cooking endeavor.

Uh-oh: You Let The Grill Cool

Let’s say you skipped the post-dinner cleanup and woke up to a messy griddle. While this is not great for your grill, no judgment here. Simply set your griddle heat to low to loosen the stuck-on food and start back on step 2. Easy peasy lemon squeezy.


Why Season Your Griddle?

You can think of seasoning your griddle as building a friendship. (🎶People, let me tell you ’bout my besssst friennnd.🎶) It takes a bit of effort upfront, but it’s all worth it in the end. When you tend to your griddle by seasoning it, your griddle will be kind to you (and your food). 

  • Why Season?: Seasoning creates a protective layer on the surface of your griddle. This layer defends your griddle against rust and creates a nonstick surface for cooking pancakes, eggs, and more without them sticking like gum on a shoe.
  • The Best Oils for the Job: High smoke point oils are what you want. Think canola oil or vegetable oil. I like avocado oil best. These oils can take the heat without breaking a sweat, which makes them perfect for creating a non-stick patina.
  • The Seasoning Process: Whether it’s your first time with a new Blackstone griddle or you’re giving your old friend a deep clean, the process is the same. Clean the surface, cover the entire surface with a thin layer of your chosen oil, and heat it up to low., covering the entire surface. Let the oil smoke, then cool down your griddle. If it’s your first time using the griddle, repeat this process a few times.


FAQs

Can I use stainless steel wool or scouring pads on my griddle?

Nope! This will remove all the layers of seasoning you’ve worked so hard to apply.

Can I use soap to clean my griddle?

Nope again! Never use soap to clean you griddle as it will also remove the seasoning.

Can I use olive oil for seasoning?

Because the smoke point for olive oil is lower, I wouldn’t recommend it for seasoning your griddle. For a season that lasts, stick with the high smoke point oils.

How often should I season my new griddle?

Season your new griddle before its first use to create your initial non-stick surface. After that, a quick re-season after each time you cook will keep your griddle in prime condition.

What’s the first thing I should cook on my new griddle?

If you’re just starting out try something simple and forgiving, like pancakes.This is an easy way to get acquainted with your griddle’s heat distribution. Plus, who doesn’t love a good pancake?

How do I store my griddle to keep it in good shape?

First, make sure your griddle is clean, seasoned, and completely dry. Then store it in a dry place to prevent rust.


Now You Can Get to Griddlin’!

Not so intimidating, right? We hope you learned a lot from this guide, and that it made you feel capable and confident in your griddle cleaning endeavors!

Let us know some of your favorite things to cook on your griddle in the comments below!


Presto Electric Griddle Giveaway

Want to have your own griddle? Enter now and get a chance to win this amazing Presto Electric Griddle Giveaway!


The post The Best Guide on How To Clean a Flat Top Griddle appeared first on Steamy Kitchen Recipes Giveaways.


from Steamy Kitchen Recipes Giveaways https://ift.tt/WI7j3Bt
via New Kitchen Special
Friday, March 29, 2024

Salmon Blini Board Recipe

Ever tried blinis? I love that word actually. It makes me want to pronounce it “buh-li-ni”. Kinda like if bologna had an “i” in the middle. But then you look at it, and it’s as simple as can be: blini. Like it’s an app or a digital assistant. (“Blini, tell me what the weather is going to be like tomorrow.”)

If you’re not sure what a blini is, it’s basically a tiny Eastern European pancake. Top it with a few garnishes (or just butter) and you’ve got yourself a traditional Russian dish. (If the name doesn’t make even MORE sense to you at this point, just imagine someone saying “blini” in a Russian accent. Beautiful, right?) Stick ’em on a board just like you would charcuterie, and you have a fancy, fun little crowd-pleaser.

We recently tried the Kaluga Fusion Sturgeon from Great Taste and did a whole review on it. You can check it out here. I didn’t break down in great detail how the blinis were made in that post, so we’re doing that today! Ready to make your own beautiful blini board?

Why You Need To Make This Blini Board

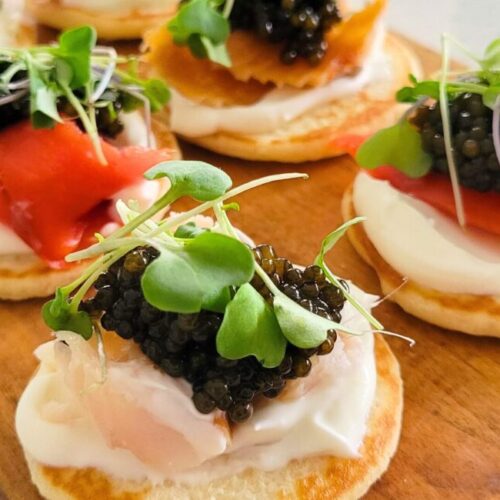
Kaluga Sturgeon Caviar on a Salmon blini spread

  • Couldn’t Be Easier: These are super easy peasy (though quite fancy!) little appetizers or finger foods. You can whip them up in about 5 minutes.
  • They Command a Crowd: They’re great for parties and gatherings.
  • There’s No Cooking Involved: You buy all the ingredients ready to go from the grocery store. 
  • They’re Wildly Versatile: Don’t like salmon? Use another fish. Don’t like caviar? Use a different garnish. Customize to your (or your party guests’) liking!
  • They’re so much fun to eat!


Ingredients to Make Your Salmon Blini Board

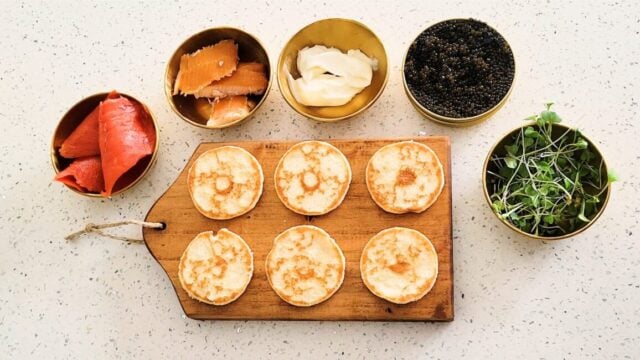
Ingredients for a blini spread

  • Blinis (obviously)
  • Creme fraiche
  • Smoked salmon (or your favorite ready-to-eat packaged fish)
  • Caviar
  • Microgreens (or green garnish of your choosing)


How to Make this Salmon Blini Board – Step By Step

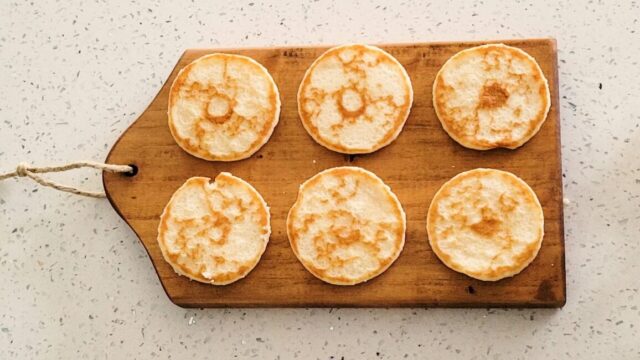
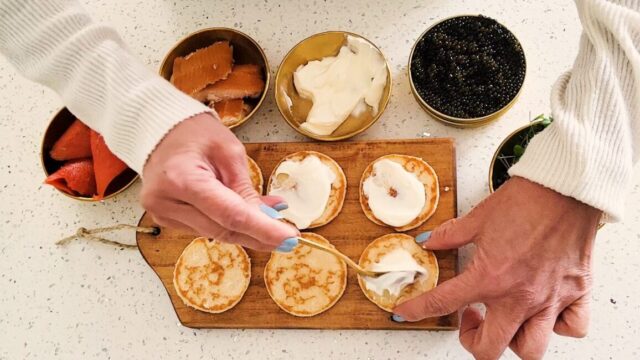
Open your package of blinis and spread them out onto a board. I’ve used a small one for this small serving, but if you’re feeding a crown, you’ll obviously need a bigger board or a few boards!

Blinis on a board

Smear a good amount of creme fraiche on each blini.

Spoon on some creme fraiche

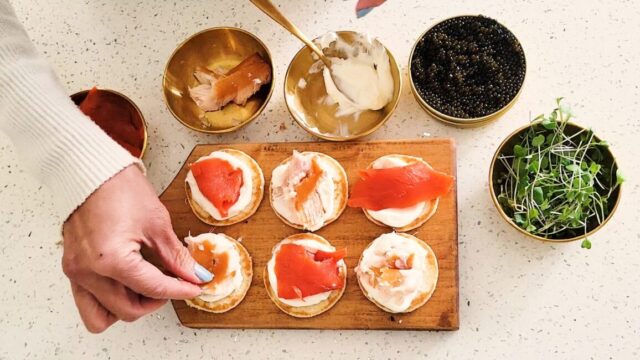
Top that creme fraiche with some ready-to-eat smoked salmon. I staggered my spread with smoked rainbow trout as well.

Garnish with your choice of fish

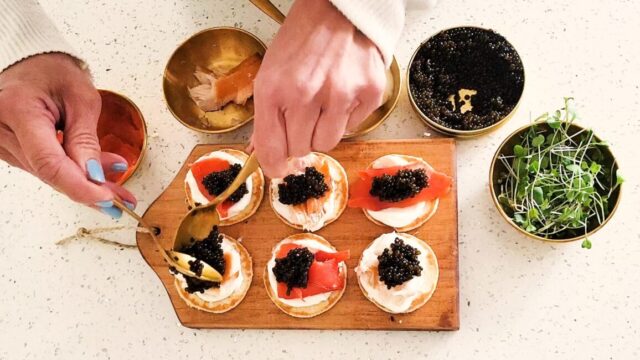
Spoon some caviar on top of each piece of fish. Don’t do what I did here and use a metal spoon (it’s all I had at the moment). Use a wooden, plastic, or mother of pearl spoon with your caviar so the metal doesn’t react with your caviar and ruin the taste.

Add some caviar to your blini spread

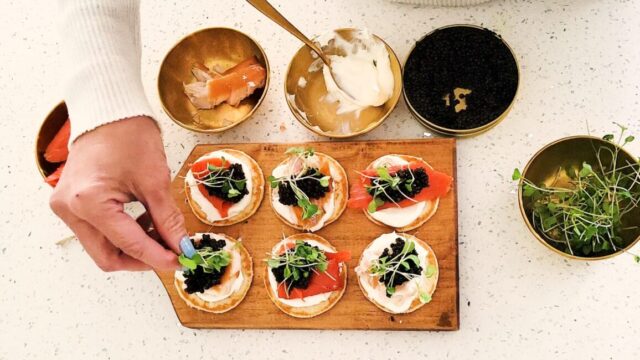
Now, top that caviar with microgreens. Mine ended up being a little too stemmy, so I suggest finding some microgreens or a different garnish that’s more leafy. (Cilantro would work nicely!) Feel free to mix it up with a number of different fish (or tofu!) and garnishes for some variety!

Garnish with some microgreens

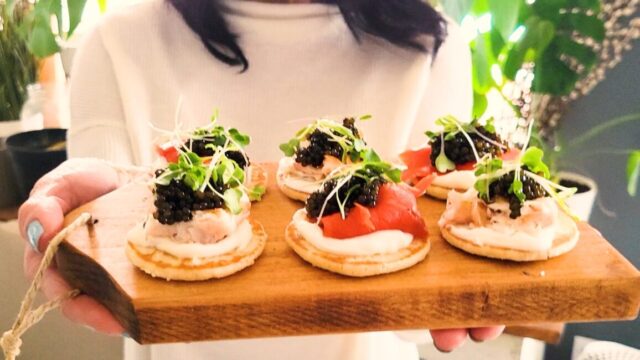
Last step: Enjoy!

Jaden holding a blini spread on a cutting board


FAQs

Do my blinis have to be savory?

Not at all! If you want to make some savory blinis, top that creme fraiche with fruit instead of fish and add a drizzle of honey or even chocolate sauce. Don’t like creme fraiche? Try nutella! Mix and match til you find what you like!

What else can I put on a blini?

Other additions to blinis include butter, jam, sour cream, minced meat, prosciutto, cheeses (like brie!), boiled eggs, mushrooms, roast beef, eggplant, lemon juice, olive oil, seaweed, balsamic vinegar, yogurt, caramel, cream cheese, garlic butter, nuts, cranberry sauce, and so much more! The world is literally your oyster when it comes to making blinis!

Can I make my own blinis? Or do I have to buy them at a store?

You can easily make your own blinis just by making super small pancakes with pancake mix or any pancake recipe! If you do want to buy them, they’re available at Whole Foods or even Amazon. 

Can I warm my blinis? 

Yes, blinis are best served toasty or a little warmed (before you place the toppings on, obviously.)

Jaden and the blini spread

Check out Some Other Great Crowd-Pleasers:


Kaluga Sturgeon Caviar on a Salmon blini spread
Print

Salmon Blini Board Recipe

Smoked fish and creme fraiche on a tiny pancake, garnished with caviar and microgreens.
Course Appetizer, Snack
Cuisine American, Russian
Keyword appetizer, blini, caviar
Prep Time 5 minutes
Total Time 5 minutes
Servings 1 person
Calories 565kcal

Ingredients

  • 6 blinis
  • 6 tbsp creme fraiche
  • package smoked salmon of your favorite smoked fish
  • 6 tbsp caviar
  • microgreens for garnish

Instructions

  • Lay 6 blinis on a board.
  • Spoon some creme fraiche onto each blini.
  • Add a small piece of smoked salmon to each blini. (Curl for a fancy look!)
  • Top each piece of fish with a spoonful of caviar.
  • Garnish the caviar with microgreens.

Nutrition

Serving: 6pieces | Calories: 565kcal | Carbohydrates: 19g | Protein: 40g | Fat: 38g | Saturated Fat: 15g | Polyunsaturated Fat: 10g | Monounsaturated Fat: 7g | Trans Fat: 0.2g | Cholesterol: 580mg | Sodium: 2210mg | Potassium: 312mg | Fiber: 0.4g | Sugar: 4g | Vitamin A: 927IU | Calcium: 299mg | Iron: 13mg

The post Salmon Blini Board Recipe appeared first on Steamy Kitchen Recipes Giveaways.


from Steamy Kitchen Recipes Giveaways https://ift.tt/0TFARu2
via New Kitchen Special
Thursday, March 28, 2024

The Ultimate Spring Cleaning for Your Home & Your Mind

Spring is here! What kind of vibes do you get around this time of year? What does spring look like in your mind? Egg hunts? Bees everywhere? Seasonal allergies? (Yeah, me too.) Spring is a time of renewal, and for me, it comes with a random urge to revamp and refresh, and that starts with making room for new things in my life.

Obviously, in the simplest way, this can mean spring cleaning (or as I like to call it, spring purging), but it’s also about what you’re letting go within you. Old ways. Limiting beliefs. Toxic relationships. Bad habits. Negative self-talk. The list can go on and on.

It’s the perfect time of year to reassess what you want in your life, both materially and energetically. So today, we’re focusing on looking at what you surround yourself with, both inside and outside of your head, with fresh eyes and considering what you can let go to make room for better things, be they opportunities, perspectives, peace, or simply… space.

Before we move forward, I want to offer you a challenge: Think of this year’s spring cleaning as a ritual for personal growth, and see what good things flow to you for the rest of this year. Sound doable? Great! Let’s hop to it!

Welcome to springtime!

The Origins of Spring Cleaning

Where the heck did spring cleaning come from? Did someone just wake up one day and think, “Yep, it’s time to scrub the floor”? Not exactly. The origins of spring cleaning have actually been traced back to several cultures.

For example, the Iranian tradition of “khooneh tekouni” (which means “shaking the house”). Nowruz, or the Persian New Year, falls on the first day of spring and in preparation for this event, many Iranians spotlessly clean and polish their homes to welcome the new year.

In the ancient Jewish practice, homes were thoroughly cleansed before Passover, to the point where not even a single crumb of leavened bread is to remain. And in the Chinese Lunar New Year tradition, you should sweep out the old year’s dust to make space for luck and fortune in the new year. So, as you can see, spring cleaning is a long-held tradition linked to many cultures around the world. 

The Benefits of Spring Cleaning

A state of zen

Okay, so we’ve established that spring cleaning is ancient and pretty universal. But what’s in it for you? Turns out, a lot.

On a physical level, spending your time in a clean, organized space can actually reduce stress and fatigue. Ever noticed how a cluttered room can make you feel overwhelmed? Science says that’s legit. Clearing out clutter can help decrease cortisol levels and make you feel calmer and more in control.

Then, of course, there’s the allergy relief aspect. While April showers bring May sneezing fits, regular cleaning keeps allergens like dust mites, pet dander, and pollen at bay. If for no other reason, do it for your sinuses!

Decluttering is a little like detoxing your surroundings, which can give you a serious mental boost. When you create a sanctuary for yourself, you make room to unwind and recharge. AND, tidying up (especially when you’ve been putting it off for a while) can give you a sense of achievement and light up that reward center of your brain.

What’s more… have you ever had a meditative experience around the act of organizing? For me, I can sometimes get to a place of focus and zen while cleaning. It makes sense, because it’s a physical activity that can help quiet the mind, and give you the space to reflect and, who knows? Maybe you’ll even hatch some brilliant ideas while you’re cleaning!

Outer Spring Cleaning: Room-by-Room Renewal

Closet spring cleaning

Alright, it’s high time we grab our cleaning gloves and put on our most pumped-up playlist. Are you ready to transform your spaces to reflect the best version of you? Great! Here are some focus areas:

The Closet

Start with your closet. Feels personal, right? Each piece of clothing seems to tell a story. A concert here. A first date there. You definitely have something from high school in there too, right? But, let’s face it, when was the last time you wore that sequined top? Exactly. If your closet is bursting at the seams, it’s time to ask yourself the Kondo question: Does this spark joy? No, let’s go even further: Does this piece reflect who I am today? If it feels like a regret waiting to happen to part with it, but you haven’t worn it in FOREVER, consider at least folding it nicely and storing it somewhere else. (I keep one of those fabric Ikea zipper box bags under my bed for things like this.)

For that which you feel okay parting with, donate it. Give that shirt or dress the chance to play a role in someone else’s story. Besides, now you’ve made room for pieces that match your current vibe and values! Remember, your wardrobe is like your personal brand, so let’s make sure it’s saying what you want it to.

The Kitchen

The heart of your home is often a museum of past culinary phases. (C’mon, you know it’s true.) That fondue set gathering dust? It might just be time to bid it a fond(ue) farewell. Also look out for expired spices and any gadgets you never use. (I’m looking at you, avocado slicer.) What remains should inspire you to cook meals that nourish both your body and mind. When in doubt, donate it. 

The Living Room

The living room is where life happens. It’s where we lounge, laugh, and host guests. And if the living room feels cluttered, there’s a good chance your mind does too. This is where we make memories and connections, so by decluttering and thoughtfully arranging your living room, you’re setting the energy you want to reside in and the energy you want to attract. Keep only what serves a purpose, whether it’s for comfort or conversation. This doesn’t mean your space should look like a showroom. It should look like, well, YOU. The interior of your mind should be the interior of your home, in the best way possible.

The Home Office

For many of us, the home office is where ambitions become reality, which is kinda hard to do when you’re drowning in a sea of papers and tangled cords. This isn’t just about finding your desk under all that chaos (though, yes, it kind of is). It’s also about clearing a path for your thoughts and ideas. Respecting your thoughts and ideas. Showing them that you welcome them. That there’s space for them. And, a streamlined workspace can lead to a more focused mind, which is a good thing. Besides, wouldn’t it be nice to actually use your desk for work instead of storage?

The Garage

Thought it might be easy to, let’s not forget the garage, the place where hobbies and holiday decorations go to hibernate. But what if we reimagined it? What if we could transform it into another living space? A space that actually serves your current interests. Whether you want to set up a workshop, a home gym, or just be able to park your car in there (revolutionary, right?!), reclaim that valuable space for whatever ignites your passion.


Inner Spring Clean: Decluttering Heart, Mind, and Soul

Spring Flowers

Okay. We’ve tackled the physical spaces. (Didn’t that feel great?) But let’s not stop there. The real magic happens when we start decluttering on the inside. It’s time for the inner spring clean, where we sort through our emotional closet, dust off those mental shelves, and clear our spiritual windows of debris. It’s time to get real about letting go. Ready?

The Heart

The heart is the collector of memories and emotions. It’s what prompts us to hold onto old love letters, grudges, and everything in between. But just like an overstuffed drawer, it’s time to sift through what’s worth keeping. Consider the act of forgiving (yourself and others), letting go of past hurts, and making peace with relationships that have run their course. And this doesn’t mean forgetting. It means choosing not to let old pain clutter your capacity for new love and joy. Keep the lessons, ditch the bitterness, and see just how much lighter you feel.

The Mind

Our minds are a lot like browsers with too many tabs open: thoughts, worries, plans, a random song lyric looping on endless repeat. (Well, that’s my brain, at least.) It’s exhausting. Mental decluttering means closing some of those tabs and giving your mind some room to breathe. You can achieve this through mindfulness, meditation, journaling, limiting your screen time, or just sitting with your thoughts for a few moments each day, without judgment. Also, consider your self-talk. If the way you talk to yourself is something you’d never in a million years say to someone you care about, then why say it to yourself? Try to recognize which thoughts serve you and which ones are just noise, and ditch the noise to make room for clarity and creativity.

The Spirit

Spiritual clutter consists of old beliefs, values, self-expectations, and societal pressures we carry around—sometimes without even realizing it. Ask yourself: What beliefs are guiding me? Do they still resonate with me, or are they just someone else’s ideas I picked up along the way? What expectations do I have of myself? Are they valid, or am I just trying to prove myself to someone from my past? Who’s voice is in my head? If it’s not yours, you might want to consider if what they have to say is still applicable to your life or if you can let it go. Think of this activity as an invitation to let go of what no longer aligns with your true self and explore what does.

This spring, dare to shed the stories you tell yourself and the roles you adhere to that no longer fit your life, and make room for a better, truer you.

Feelin’ Refreshed Yet?

I hope this spring cleaning guide has helped you to reconsider what you want in your life, both inside and out. And if not, that it at least helps you achieve a clean home!

I’d love to hear from you! What will you be letting go of this year? What will you be inviting in? Tell us in the comments.

I wish you the very best and a beautiful and renewed spring season!

The post The Ultimate Spring Cleaning for Your Home & Your Mind appeared first on Steamy Kitchen Recipes Giveaways.


from Steamy Kitchen Recipes Giveaways https://ift.tt/567jzfO
via New Kitchen Special
Wednesday, March 27, 2024

Steamy’s Top 10 Fresh Spring Favorite Recipes

Welcome to spring! The birds are chirpin’. The bees are buzzin’. And seasonal allergies are abundant! 😅 But aside from that, spring is a time of growth and renewal. It’s also a great time to whip up some new recipes! That’s why we’ve put together this list of some of our best spring recipes. From spring rolls (obviously, you gotta have those in there) to salmon salad, here are 10 great meals to usher you into springtime.   

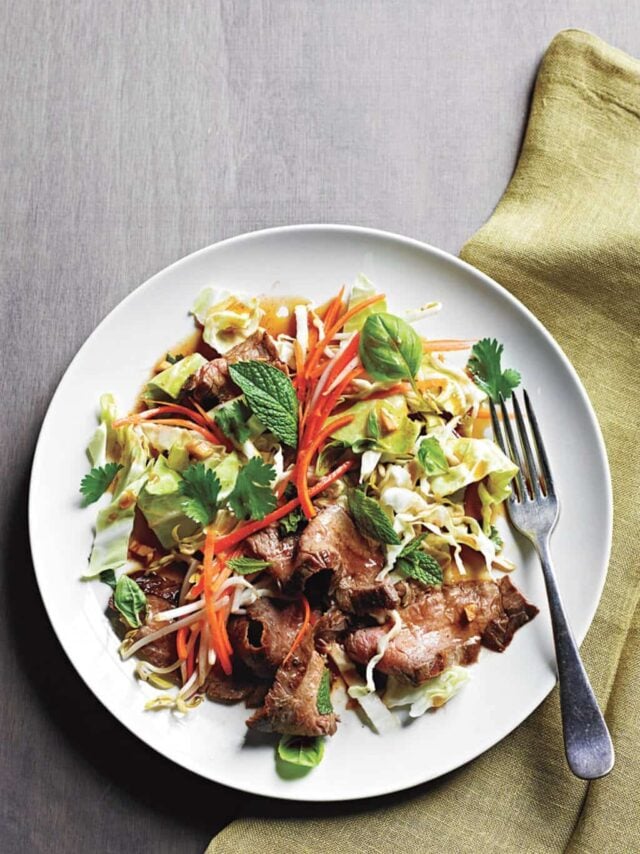
Thai Steak Salad

Thai Steak Salad Recipe

We’re starting this list off by mixing fresh spring herbs with thinly sliced, perfectly seared steak tops. This Thai salad features crunchy cabbage, fresh bean sprouts and fragrant basil and mint. And it only takes 20 minutes to make! 

Click here for the full recipe.   


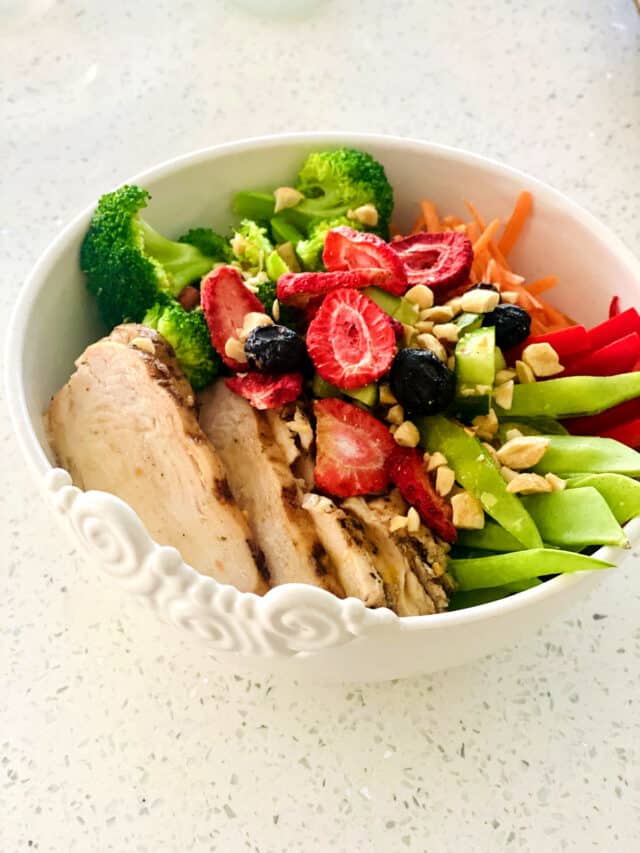
Grilled Chicken Buddha Bowl with Sweet & Tangy Mango Sauce and Roasted Peanuts

Grilled Chicken Buddha Bowl Recipe 2

What’s great about this spring recipe is that it repurposes your leftovers! Got some extra grilled chicken? Got a bag of broccoli? What about last night’s stir-fry or salad scraps? Throw ’em all in there! Then top off with freeze-dried strawberries and blueberries (fresh berries work too!). Finish off with mango preserves, mango jam, chutney, or even canned mango, and you have yourself a healthy and delicious springtime Buddha Bowl!

Click here for the full recipe. 


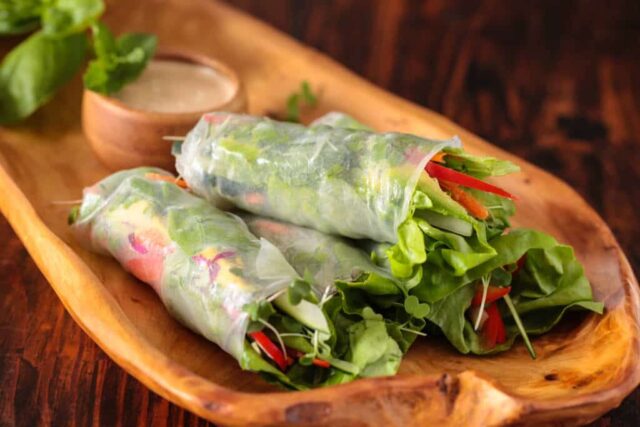
Vietnamese Spring Rolls with Orange-Almond Sauce

spring rolls with orange almond sauce recipe

You can’t have spring without spring rolls! These are perfect for when you want something light, fresh and crisp, as a snack or as a whole meal. It also makes for a great springtime finger food for gatherings. And the Orange Almond Sauce is a big hit all around. It’s creamy, light and made with almond butter and fresh citrus juices. You’re gonna love it!

Click here for the full recipe.   


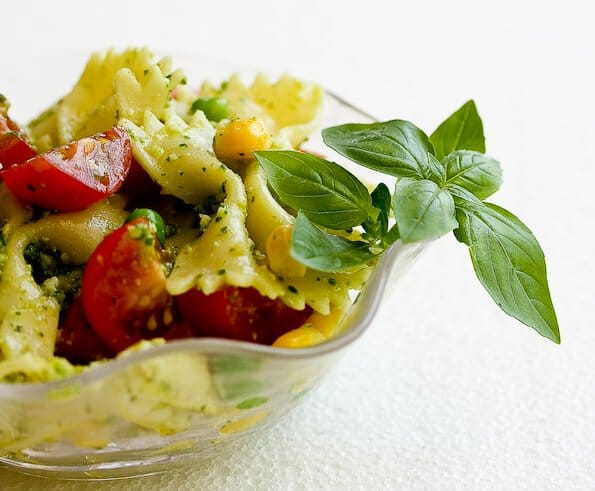
Peanut Pesto and Peas Pasta Salad

Peanut Pesto and Peas Pasta Salad

This quick and easy pasta salad is guaranteed to become your springtime go-to. All you have to do to make the pesto is throw basil, peanuts, garlic, salt and a bit of olive oil (to lubricate and get things moving) into a food processor. Then just boil some pasta, chop up some tomato, add throw in some peas and corn. And it’s easily customized. In fact, we encourage you to explore this recipe with other pasta shapes and veggies!

Click here for the full recipe.   


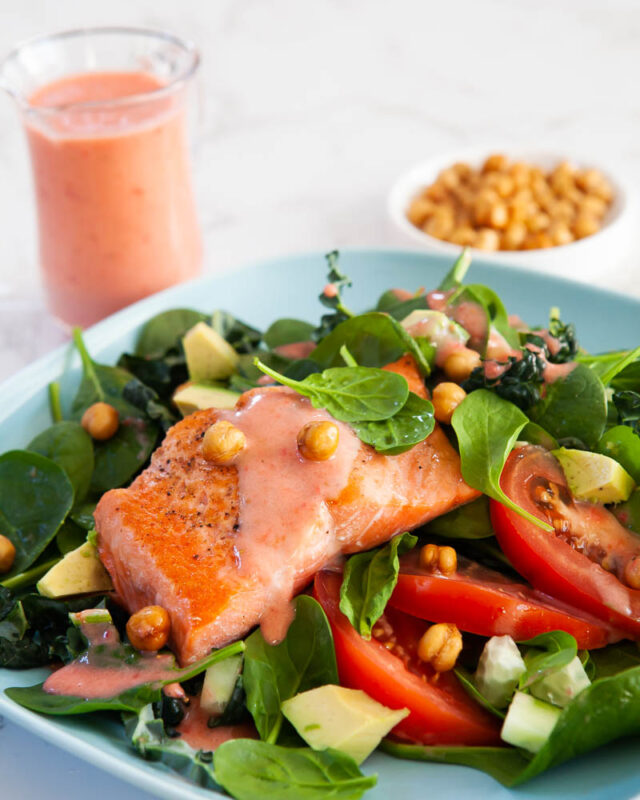
Seared Salmon Salad with Baked Crispy Chickpeas & Fresh Strawberry Vinaigrette

salmon salad plate lunch meal chickpeas dressing

Here’s another spring recipe we encourage you to play with! Our salmon salad was featured on The List as an addition to the very popular MIND Diet, which aims to improve brain function. (Talk about keeping things fresh!) And you can use a base of any dark, leafy salad greens, like arugula, kale or baby spinach and just add in your favorite salad vegetables. The crunchy chickpeas and decadent fresh strawberry vinaigrette really tie this whole salad together!

Click here for the full recipe.   


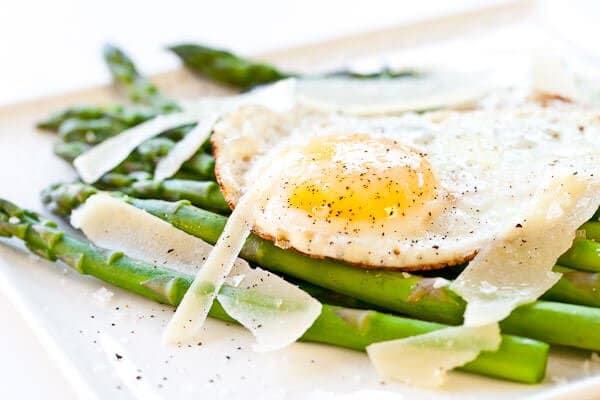
Asparagus with Fried Egg and Parmesan Cheese

Asparagus with Fried Egg and Parmesan Cheese Recipe

What’s spring without the eggs? This asparagus with fried egg recipe makes for a great side dish for dinner or even brunch. If you cook your egg just right, the golden yolk will pour out when you break it, and slowly coats the asparagus spears to immerse your whole plate in eggy goodness!

Click here for the full recipe.   


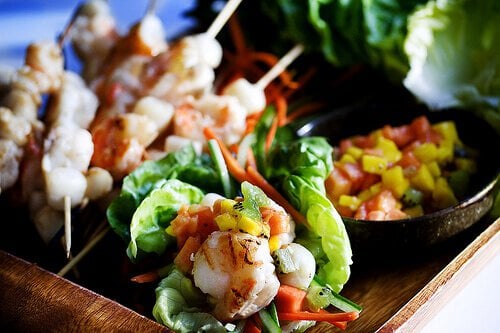
Grilled Shrimp Lettuce Cups with Tropical Fruit Salsa

shrimp in lettuce

If you’re looking for crisp, fresh and healthy, look no further. You can think of these grilled shrimp lettuce cups as spring tacos! And if you don’t like shrimp, no worries! You can substitute with large, dry-packed scallops, chicken strips or thin-sliced sirloin. In fact, most of this recipe is flexible and can be customized to your liking. Use whatever fruit you like or whatever’s on sale. Pineapple? Blueberries? Do it! Don’t have carrots or cucumbers? Serve with matchstick-cut zucchini, radishes or cooked edamame pods. Go crazy and make this recipe exceptionally yours!

Click here for the full recipe.   


Shrimp Fried “Rice” with Sesame Seeds

Shrimp Fried Rice with Sesame Seeds Recipe

We’re going so egg-centric (🤭) this spring that we’re making shrimp fried rice without the rice! In fact, we’ve sidestepped the grain entirely and replaced it with a delectable mix of scrambled eggs enriched with coconut milk and hemp seeds to mimic that classic rice texture. And trust me, you won’t know the difference! Paired with succulent shrimp and garnished with sesame seeds, this dish is a delicious, low-carb reinvention of the beloved classic.

Click here for the full recipe.   


Chanterelle, Bacon and Plum Salad with Blue Cheese

Chanterelle, Bacon and Plum Salad with Blue Cheese

Sweet caramelized plums. Barely sauteed fresh chanterelles. Crumbly blue cheese. Crisp savory bacon. This is spring in a bowl! Also wildly customizable, you can use any type of stone fruit for this recipe, such as peaches or nectarines.

Click here for the full recipe.   


Strawberry Almond Cream Tart

Strawberry Almond Cream Tart

Last, but certainly not least, we are ending this spring-tastic list with an amazing dessert! This strawberry tart features fresh strawberries slivered almonds, a graham cracker crust, and a light cream-cheese filling. Truly fresh and truly indulgent!

Click here for the full recipe.   


What a Way to Welcome Spring!

We hope you loved this list! Let us know which of these you end up making and which turns out to be your springtime favorite. We love to hear it. We hope this season is filled with peace, love, and renewal in your life. Happy springtime!


Other Springtime Recipe Roundups

The post Steamy’s Top 10 Fresh Spring Favorite Recipes appeared first on Steamy Kitchen Recipes Giveaways.


from Steamy Kitchen Recipes Giveaways https://ift.tt/KXxh2JH
via New Kitchen Special