Wednesday, June 12, 2024

How To Create More Joy In Your Life

What’s the first thing that comes to your mind when you hear the word “joy”? Is it a memory? A feeling? A visual of yourself in a certain place or around certain people? What does joy mean to you? 

Let’s take a moment to breathe and contemplate how to get more joy into our lives. 

What is Joy to You? 

Though joy might have a standard definition, we all have our own understanding of what joy is. Each of us has a unique viewpoint into what actually brings joy into our life. 

For some it might be being around family and friends. For others, joy is solitude in nature or with animals, the feeling we get when cooking a delicious meal, or gardening in our yards. Joy can be stimulated by multiple things in our lives and tapped into through many different means. 

What’s important to note is that joy is available to you at any point in time, only by shifting into an activity or mindset that evokes a state of joy. 

But joy is more than just “available” to us. It some regard, the state of joy is a natural state of being. You can see this most evidently in babies, toddlers, and children in general. 

We are born into the world with so much inner joy. We laugh and smile at a funny face, can find joy in the simplicity of a box, a bug outside, a smile from our mom.. the list goes on and on. 

However, as our environment greatly impacts us, as we grow and learn to harness our joy, that natural state of being is dimmed. We lose the core joy that is innate to all humans after we experience trauma, hardship, and the overall influence from our outer world. (Not to mention that each of our brains are wired to experience and access joy differently.)

The good news is that we are able to harness and infuse joy back into our state of being by bringing consciousness back into our days and choosing joy, peace and healing. 


Why Joy is Important

Studies show that people who live in a state of joy tend to have less health problems, a lower risk of depression, and longer lives.

By regulating our joyful state of being and prioritizing it, we elevate our entire health, body, mind and spirit. Joy can also help us become more resistant to whatever life throws at us.

I believe there’s a distinct difference between joy and happiness. Happiness is situational, and a fleeting emotion, whereas joy is more of an inner state of being. So the more we can master joy, the more often we can experience happiness, peace and calmness, even when the waters of our life are rocky.

Though we have little control over circumstances beyond our immediate selves, we have lots of control over how we allow experiences to affect our state of being.

 

What does joy mean to you?

Defining Joy For Ourselves

Because joy is so unique to each person, it’s important to explore this emotional state for yourself. Here are some great questions to ask yourself to discover your joy: 

  • What activities do I naturally gravitate to?
  • What genuinely brings me happiness?
  • When do I feel most myself and at peace?
  • What triggers me to be OUT of joy? What causes me stress, anger, or sadness? 

It’s important to explore both what creates joy for you, and what causes the opposite effect, so that you have a good awareness about the things that may throw you out of balance. Let’s face it, life is not perfect, but the better we can understand ourselves in the lows, the better we can understand how to set boundaries around those activities and situations, and stay more present in our positive state. 

 

Tips for Setting Boundaries and Prioritizing Joy

As I mentioned, our joy can be greatly impacted by our outer world IF we let it. And a HUGE part of navigating that is understanding how to set your own unique boundaries and prioritizations, so you can return to joy even when life isn’t always smooth sailing. 

Here are some of our favorite tips for prioritizing joy: 

1. Understand your Stressors 

Having a thorough understanding of things that bring on stress, complications, and negative emotions will help you prepare to be more aware of their effects on you. By understanding your stressors, you can create an awareness and an action plan to reduce your exposure or improve your reaction when they occur. Start by taking notes when things come up that throw you off your joy game to increase your awareness of these outer influences / actions / situations and better understand how to manage them. 

2. Take A Life Audit

Look into your relationships, career, job, living situation, activites, nutrition, and where you spend your time. Tune into your joy-o-meter in each category and take an audit to see where you can bring more joy into your life, and where your joy is being drained! 

3. Set Boundaries

What does this mean? Boundaries are limits that we set with ourselves and communicate with those around us on what we allow into our lives. Essentially these are mini promises that you can set for yourself to prioritize your peace. After understanding your stressors, begin to identify what you can say no to, change, adapt, or allow into your reality. After establishing a clear understanding of your boundaries, you can begin to communicate them with those in your life with love and peace. 

Remember that boundaries are not ultimatums. They are not expressed as demands like “You must do this.” We can’t control what other people do. We can only control what we choose to be a part of. 

4. Stay True to your Boundaries

If you’re not used to setting boundaries, sometimes it will feel foreign and even selfish, but it’s actually just the opposite! The more you stay true to what you need, the more your cup will be full, and the more you will be able to contribute to those around you.

Setting boundaries and staying true to them will help you develop more self-trust, free up your time and energy, prioritize your peace and joy, and increase your overall happiness by only allowing what you desire into your days. 


Daily Practice for More Joy

Now it’s time to take action and make your own joy list that you can return to on the days you’re not feeling so great. Put this list up where you can see it every day, and when you need to stimulate more joy, you’ll know exactly what to do! 

Want to take it a step further to add more joy to your life? Be sure to take a look at that list and pick one thing that you feel called to do each day, then add this into your morning or night routine. 

Here’s my own joy list:

My Joy List


Share Your List With Us!

What brings you joy? We want to hear about it! Share some of the items on your joy list with us in the comments below!

The post How To Create More Joy In Your Life appeared first on Steamy Kitchen Recipes Giveaways.


from Steamy Kitchen Recipes Giveaways https://ift.tt/SoI9QpM
via New Kitchen Special

Tuesday, June 11, 2024

The Best Healthy Low Carb Bowl Recipes for the Summer

During the hot summer madness, the last thing a lot of want is something heavy and greasy that might weigh us down further. That’s why low carb bowls are some of the most perfect summertime meals. They’re all about getting freshness without compromising on flavor, while still keeping us energized throughout the summer.

From zesty seafood to hearty zoodles, we’ve thrown our best low-carb Steamy Kitchen bowl recipes together for those health-conscious individuals and anyone looking to ditch heavy foods for the season. 

But first, let’s dive into why low carb works for the summer.

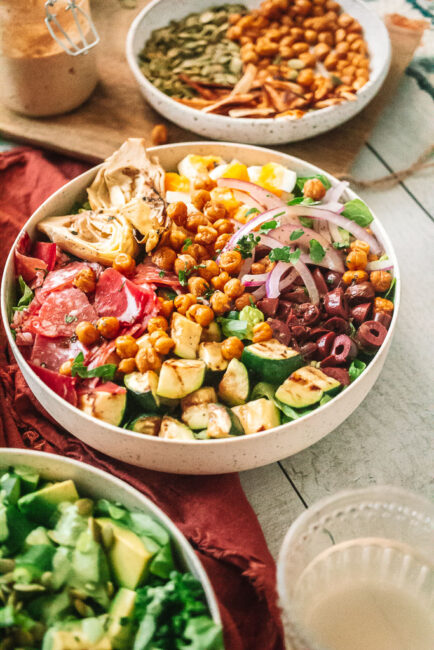
Italian Chopped Salad In white bowl with red tablecloth

Why Opt for Low Carb in the Summer?

To Keep It Light and Fresh

When it’s hot, our bodies crave light, hydrating foods, so swapping out dense, carb-heavy grains like white rice and brown rice with fresher alternatives like cauliflower rice or zucchini noodles can help us feel a lot less heavy and a lot more nourished.

For Energy Without the Slump

Carbohydrate-rich foods can cause a rapid spike in blood sugar levels, and then a just-as-fast decline. This is the most likely cause for those mid-afternoon slumps we experience. But low carb meals offer us a steadier energy, one that helps us keep up our stamina throughout the day.

Health-Conscious Nutrition

Because summer is a popular time to frequent the beach, many people seek to lose weight in order to feel more comfortable in swimsuits. Low carb diets support weight loss, though it’s important to remember that every body, regardless of shape or size, is a beach body.

To Increase Your Produce Intake

Summer is a season filled with fresh produce, which means it’s the perfect time to enjoy fruits and veggies that are low in carbs and high in essential nutrients and healthy fats. Think vibrant salads tossed with olive oil, lemon juice, and herbs or fresh salsas made with tomatoes, red onion, and cilantro!

To Cool Down

Did you know that foods that are high in healthy fats and proteins can actually help you regulate your body’s internal temperature and keep you cooler? It’s true! That’s why it’s a great time to opt for dishes like creamy avocado bowls and seafood salads.

Now that you know why low-carb works for the summer, let’s talk about some of our favorite bowl meals that replace carb-heavy ingredients with fresh veggies, delicious proteins, and yummy seasonings.

5 Low Carb Bowls

Whether you’re on a keto diet or just looking go lighter, these bowls are perfect for the summer season!

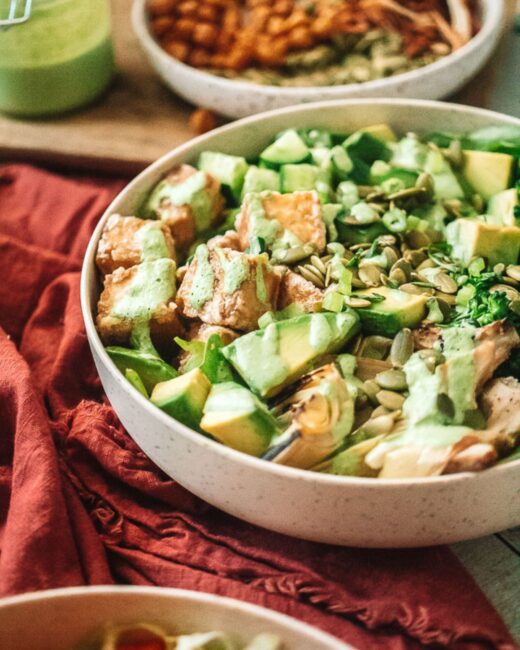
Green Goddess Tofu Bowl

green goddess tofu bowl recipe

Our Green Goddess Tofu Bowl is an amazing mix of herby flavors and creamy textures. It features tofu cubes, crunchy broccoli, and diced avocados. And the creamy Green Goddess Dressing that goes on top will make your whole season! Greek yogurt and a blend of fresh herbs like cilantro and basil make this dish bowl feel like a cool breeze on a warm day. It just screams, “Fresh!” and makes an easy peasy weeknight dinner.

Find the recipe here. 

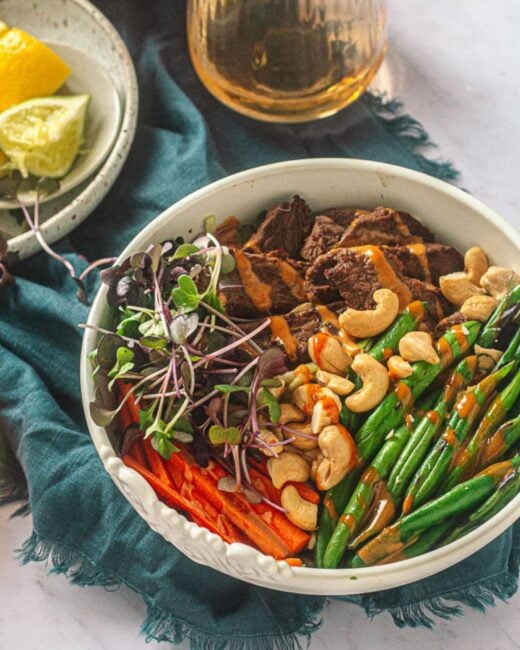
Peanut Beef Satay Zoodle Bowl

peanut beef satay zoodle bowl with peanut sauce recipe

Forget heavy noodles. Summertime is the best time for this Peanut Beef Satay Zoodle Bowl! Enjoy thinly sliced flank steak marinated in a lightly spicy and deliciously savory peanut sauce with crunchy zoodles and julienned carrots. Top it all off with microgreens and cashews for extra texture, and this delicious bowl might just become the best part of your summer season.

Find the recipe here. 

Shrimp Fried “Rice” with Sesame Seeds

Shrimp Fried Rice with Sesame Seeds Recipe2

Want to enjoy the heartiness of fried rice without the carb-heavy overload? This bowl replaces the usual rice with fluffy egg, and trust me, you won’t miss the rice! It also features succulent shrimp with vibrant peas and carrots, as well as sesame seeds for a little nutty crunch. Less carbs AND a protein boost? This is sure to become your favorite thing to eat this summer!

Find the recipe here. 

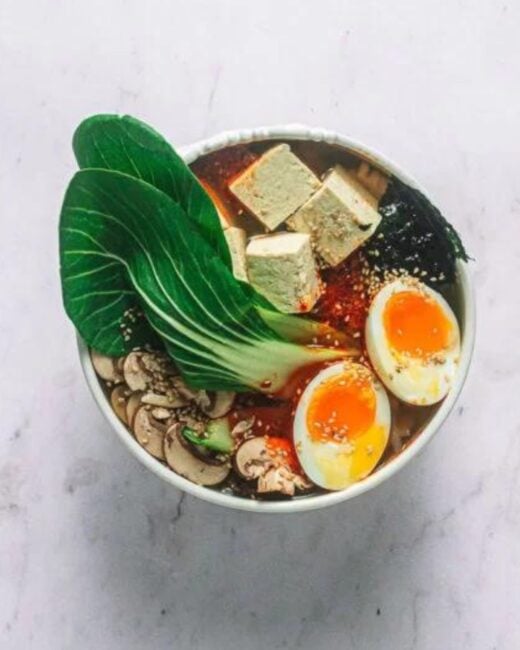
30 Minute Tofu and Veggie Ramen with Sesame Seeds and Chili Oil

30 minute tofu and veggie ramen recipe

If you love the comfort of a bowl of ramen but not the heaviness, this Tofu and Veggie Ramen is everything you’re looking for. It’s packed with shiitake mushrooms, bok choy, big chunks of tofu, and a little chili oil to give it a kick. Top it off with sesame seeds for a little crunch and you’re done! AND, this easy recipe is ready in just 30 minutes!

Find the recipe here. 

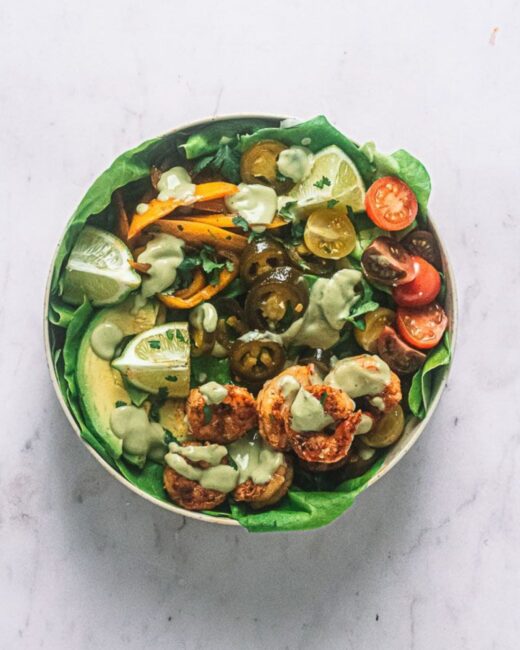
Chipotle Lime Shrimp Bowl With Cilantro Jalapeño Yogurt Sauce

chipotle lime shrimp bowl with cilantro jalapeño yogurt sauce recipe

Looking for a healthy meal with a little more sabor? Our Cilantro Lime Shrimp Bowl is a zesty and vibrant dish that includes marinated shrimp, sautéed bell peppers, fresh cherry tomatoes, and a base of your choice of greens. It all comes together under a drizzle of tangy homemade Cilantro Jalapeño Yogurt Sauce that refreshes your palate. Perfect for a low-carb lunch or dinner!

Find the recipe here. 

FAQs

What are some go-to ingredients for a low carb diet?

Cauliflower rice, zoodles, fresh veggies like spinach and bell peppers, proteins like chicken breasts or ground beef, and healthy fats from additions like avocado and olive oil. Swapping out your high-carb list of ingredients with these options will help you stay happier, healthier, and cooler in the summertime!

Can I use ground turkey instead of beef in low-carb bowl recipes?

Definitely! Ground turkey is a lean protein that works well in low-carb recipes, like a taco salad to a keto burrito bowl. Just be sure to flavor it with taco seasoning or garlic powder for extra zest.

What’s the best way to store leftover low carb bowls?

If you have leftovers, stored your low carb bowls in an airtight container and refrigerate. You’ll want to enjoy your low-carb dinner or lunch within the next day or 2.

How do I make sure my low carb bowls are flavorful?

Don’t shy away from using various spices and fresh herbs! Lemon zest, black pepper, onion powder, and fresh mint can take simple dishes to the next level without adding extra carbs. Another good option is adding a dollop of creamy tzatziki sauce or sour cream to enliven your bowl!

​Stay Cool Out There!

We hope this guide helped you not only understand the appeal of a summertime low-carb diet, but also equipped you with the knowledge of how to make amazing bowls with a few simply grocery store ingredients. Keeping it light when it’s hot is one thing, but doing away with complicated recipes and just opting for an easy dinner or lunch can really conserve your limited summertime energy for more important things! 

​Do you have a favorite easy meal that you like to enjoy in the summer? We’d love to hear about it! Shoot us a comment below and let’s share our summertime favorites! And don’t forget to stay cool and hydrated out there!

The post The Best Healthy Low Carb Bowl Recipes for the Summer appeared first on Steamy Kitchen Recipes Giveaways.


from Steamy Kitchen Recipes Giveaways https://ift.tt/touBs7m
via New Kitchen Special

Monday, June 10, 2024

The Best Guide on How To Clean a Blackstone Griddle

Whether you’re the recent proud owner of a Blackstone griddle or you’re just looking to maintain the one you’ve got in the best way, this guide is for you! While cleaning your griddle might seem like an intimidating task, it’s actually fairly easy, and to be honest, kind of fun! And you don’t have to do it alone. We’re here to guide you through a straightforward totally effective cleaning routine to help you keep your griddle non-stick and ready for your next barbecue bash.

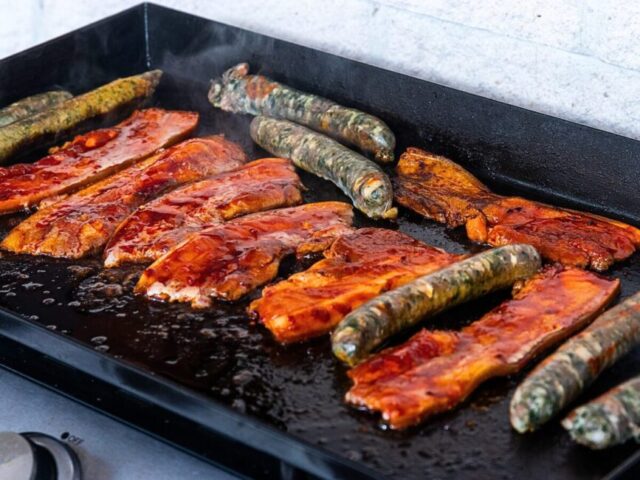
Sausage and bacon on a griddle

Step-by-Step Guide to Cleaning Your Blackstone Griddle

Cleaning a Blackstone griddle is about more than just maintaining its sleek look. It’s also about preserving its nonstick surface. Here’s how to do it right:

What You’ll Need:

  • Metal scraper 
  • Metal spatula 
  • Spray bottles 
  • Water
  • Heavy duty paper towels (or a rag if that’s more your vibe)
  • High smoke point cooking oil

Step 1: Scrape It Like You Mean It

Right after you’re done cooking (after you’ve turned it off but while the griddle is still hot), grab your metal spatula and push all the remaining food debris on your griddle top toward the grease tray. 

Step 2: The Steam Clean

Now, it’s time to make things steamy. (Would you expect anything less from Steamy Kitchen?) Fill a spray bottle with hot water (warm water works too, but hot is more dramatic) and spritz it across the griddle surface. The resulting steam that arises will help loosen any stubborn food residues clinging to your flat top grill. Then, take your metal scraper out and give that flat cooking surface a good scrape. You might be surprised at how much gunk build-up you see come off!

Step 3: Wipe Off

After the steam session, some rogue grease and moisture might still remain. This is where your trusty heavy-duty paper towels come into play. Wipe down the entire cooking surface to mop up the excess grease and water. You want to make sure your grill is dry so you don’t ruin the non-stick surface.

Step 4: Season Like a Pro

This last step is super important! Pour or spray a thin layer of cooking oil over the entire surface. (Canola oil or any high smoke point oil works well.) Then, use a clean paper towel or microfiber cloth to spread the a thin layer of oil all over the surface.


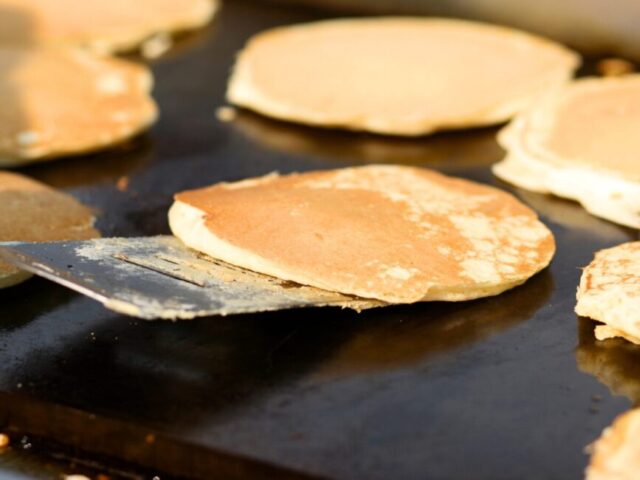
Making pancakes on a griddle

Why Season Your Blackstone Griddle?

Here’s why seasoning your Blackstone griddle is crucial:

It Creates a Non-Stick Surface

The main purpose of seasoning your griddle is to create and maintain a non-stick cooking surface. When you apply oil to your griddle at a high heat, you essentially ensure that the oil bonds to the metal and forms a protective layer. This layer improves with each use, eventually giving you a super non-stick surface over time.

It Protects Against Rust

Outdoor griddles are susceptible to the elements. Seasoning protects your griddle from moisture, which can cause your griddle to rust. By seasoning regularly, you’re protecting your investment from oxidizing.

It Enhances Flavor

Blackstone griddles are a lot like a big cast iron skillet, and a properly seasoned one develops a cooking surface that adds depth and flavor to your food.

It Makes Your Griddle Last Longer

Regular seasoning extends the life of your griddle by preventing deterioration and wear and keeping it in tip-top shape.


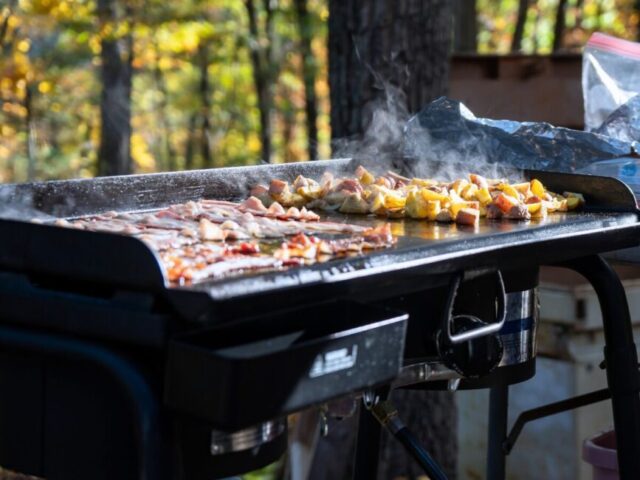
Meats on your flat top grill

FAQs

How should I season my new Blackstone griddle for the first time?

If you’re about to get your first use out of your new Blackstone griddle, you definitely want to season it beforehand! First, make sure the griddle is clean, then heat it to a high temperature. Once it reaches temp, apply a few tablespoons of high smoke point oil like canola oil or vegetable oil. Then, use a paper towel or a clean cloth to (carefully, it’s hot!) spread the oil evenly across the entire metal surface of the griddle. We recommend allowing the oil to dry, then repeat the process 3-4 more times to create a good seasoning layer.

How often should I re-season my griddle?

You should re-season your griddle after each use. (This is especially true if you’ve used soapy water for cleaning, as this can strip the seasoning layer.)

Can I use olive oil to season my Blackstone griddle?

While olive oil can be used for cooking, it’s not ideal for seasoning. This is due to olive oil’s low smoke point. The lower the smoke point, the less it will polymerize to the surface of your griddle the way you need it to. Virgin or Extra Virgin olive oil has an even lower smoke point than regular olive oil, so be sure to avoid seasoning with those as well. You’ll want to aim for oils with a higher smoke point to create a durable non-stick surface without the risk of the oil breaking down under high heat. We recommend avocado oil or grapeseed oil. 

What should I do if I see rust spots on my griddle?

If you see rust on your griddle, address it immediately. Use a metal scraper or a Blackstone scouring pad to remove the rust, then cleaning and dry it like normal, making sure it’s very dry. Once you’re done, re-season the entire cooking surface to restore the non-stick layer and protect it against future rust.

Is there a specific cleaning kit for Blackstone griddles?

Yep! Blackstone offers a cleaning kit that includes 1 griddle scraper, 2 handles, 3 cleaning bricks, and 4 scouring pads. It’s a great way to take care of your griddle with tools specifically designed for the job.


Grilling on the griddle

Ready, Set, Grill!

Now you have everything you need to keep your Blackstone griddle in pristine condition! Whether you’re grilling up burgers, making the perfect pancake, or sizzling up some veggies, when you take care of your griddle, it will take care of you. 

Do you have any tips or tricks to keeping your griddle in great shape? What about favorite griddle recipes? If so, we’d love to hear all about them! Leave us a comment and let’s share our griddle tips and tricks so we can all enjoy some good eats!

The post The Best Guide on How To Clean a Blackstone Griddle appeared first on Steamy Kitchen Recipes Giveaways.


from Steamy Kitchen Recipes Giveaways https://ift.tt/nNwebBx
via New Kitchen Special

Wednesday, June 5, 2024

The Best & Easiest Way to Clean a Glass Casserole Dish

You know the drill. You make an amazing casserole that the whole family loves, and then you’re stuck with a glass casserole dish that looks like it’s hosted a mud-wrestling match. I know none of us look forward to the cleaning part, but it’s not as difficult as you might think. With just a few clever cleaning tips and a little elbow grease, you can get those pesky stains and stuck-on food off in no time.

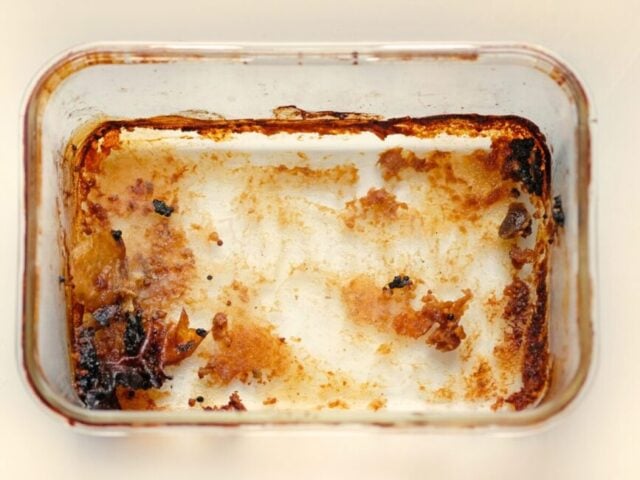
A dirty glass casserole dish

The Battle Plan

First things first: we need to arm ourselves with the essentials. 

You will need:

  • a trusty spatula (plastic is your best bet to prevent scratching your dish)
  • a scrubby sponge
  • baking soda
  • dish soap
  • hot water

Step 1: Spatula to the Rescue

Your spatula is here to set you up for success. Start by scraping off as much of the food in the dish as you can. If it makes it easier, give your dish a rinse throughout this process to help you loosen that stuck-on food.

Step 2: The Baking Soda Solution

Next, you’re going to channel your inner chemist and sprinkle a good amount of baking soda along the bottom of the dish. Baking soda is great for cleaning a lot of things, especially baked-on grease and stubborn stains.

Step 3: Make It Soapy

Now add a few squirts of your favorite dish soap to the mix and fill the dish with piping-hot water (be careful not to burn yourself!) and let it sit. You can leave it for 15 minutes or let it soak overnight for the more stubborn stains. The longer it soaks, the easier your job will be.

Step 4: Round Two with the Spatula

After your dish is done soaking, you’ll notice that those stubborn bits will have loosened up. Now’s not the time to be shy. Get in there with your spatula and show them who’s boss! Then give it a good rinse.

Step 5: The Encore

If you still have some stubborn spots, give it another round of the baking soda treatment and let sit for 15 minutes, then scrub with your scrubby sponge.

Step 6: Dry and Shine

Once you’re satisfied with the cleanliness of your casserole dish, give your dish a final rinse and let it dry. Voilà! You’re ready to store it away until next time.


Why Baking Soda?

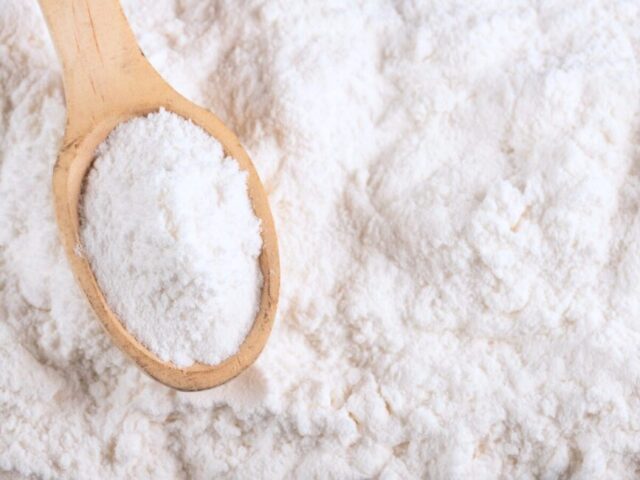
Baking soda and a wooden spoon

What makes baking soda the go-to for cleaning glassware? It’s all about the science.

Gentle Abrasion

Baking soda is mildly abrasive, enough to make it perfect for attacking stubborn stains and baked-on grease without scratching your glass bakeware.

Chemical Reaction

Also known as sodium bicarbonate, baking soda reacts to both acids and bases to break down food molecules. When you mix it with water, it becomes a mildly alkaline solution, which is great at cutting through grease. This chemical reaction further helps it dissolve and loosen any food buildup.

Deodorizing Properties

Not only is baking soda great at cleaning, but it also deodorizes, which is especially useful if you’ve cooked something pungent. Let’s face it, no one wants old food smells to linger and affect the taste of future meals.

Safe and Non-Toxic

If you’re like me, you probably try to be aware of the chemicals you bring into your home (especially those you use on the surfaces you eat off of). What I love about baking soda is that it’s a safe, non-toxic choice as far as cleansers go, leaving you with less to worry about.


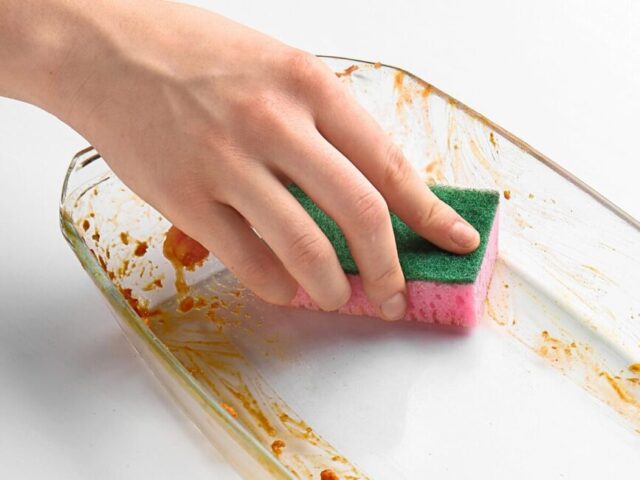
Cleaning a glass casserole dish

FAQs

Can I use oven cleaner on my glass casserole dish?

While oven cleaner might be tempting to use, it’s usually too harsh for glass cookware. Stick with gentle cleansers like baking soda and hot soapy water to avoid damaging the glass.

What’s the best way to remove burnt-on food from glass pans?

Your best option is a long soak in hot soapy water followed by a good scrub with a non-abrasive sponge. Whenever that doesn’t cut it, you’ll want to bring in the baking soda and water and let it sit before scrubbing.

I’ve heard of tricks like using an unused dryer sheet or a Mr. Clean Magic Eraser to get rid of stuck-on grease. Do these work?

While some people swear by these cleaning methods, I find them to require more elbow grease than the baking soda cleaning solution, and dryer sheets contain a LOT of terrible chemicals (so much so that I’ve actually done away with them entirely for laundry uses, and switched to wool balls!) The Kitchn actually has a great breakdown and ranking of each casserole dish cleaning method, including using Bar Keepers Friend, to get off cooked-on food residue. Read all about it here.

Can I use steel wool or abrasive sponges on my glass dishes?

Avoid using anything too gritty on glass, like steel wool or abrasive sponges. These can leave scuff marks and deep scratches, and make your dishes more susceptible to breaking. Always choose a soft, scrubby sponge or a nylon sponge when working with glassware.

Is it safe to clean my glass bakeware with vinegar?

Definitely! White vinegar is another great choice for removing yellow grease stains and other residue without having to use harsh chemicals. Just mix equal parts of vinegar and water, and soak the dish for a bit before scrubbing.

How can I prevent food from sticking to my glass casserole dish next time?

A light coating of cooking spray before you add your ingredients can help prevent food from sticking, as well as cleaning your dish RIGHT after serving. (Leaving food overnight can make it more difficult to scrape off any sticky residue in the morning.)


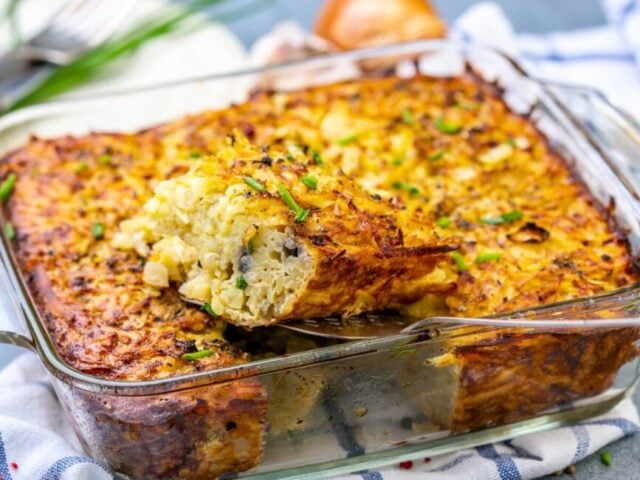
Glass Casserole Bake

You’re A Casserole Dish Captain!

I hope this guide helps you have a lot less cleaning time, and a lot more relaxation time. Now you can have epic bake-offs in your kitchen without worrying about the dirty dish aftermath. Next time you pull out your glass baking dish or Pyrex casserole pan for family gatherings, you’ll know exactly how to get the best results with the least effort. 

Do you have any tips or tricks on cleaning your casserole dishes? If so, we’d love to hear about it! Be sure to drop a comment below!

The post The Best & Easiest Way to Clean a Glass Casserole Dish appeared first on Steamy Kitchen Recipes Giveaways.


from Steamy Kitchen Recipes Giveaways https://ift.tt/WTqGCr7
via New Kitchen Special
Tuesday, June 4, 2024

5 Things I Wish I Knew Before I Started Steamy Kitchen

2 years ago, I did an interview for Medium called From Avocation To Vocation; How I Turned My Hobby Into A Career. I still think about it to this day because it allowed me to reflect on where I am now versus where I was when I started Steamy Kitchen, and there are so many things I know now that I wish I knew then. 

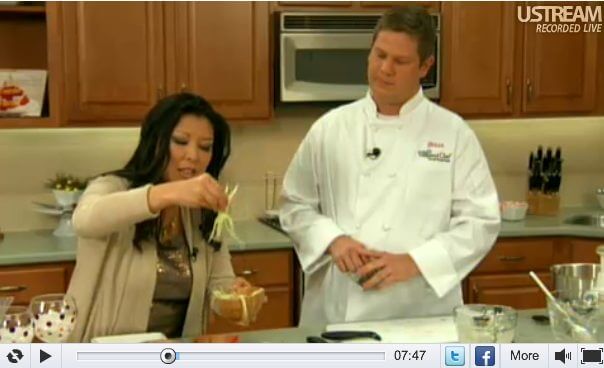
Jaden on TV

I thought I would share some of those things with you. Maybe you’re seeking to turn your hobby into a career, or maybe you could just use some life lessons to motivate you or shift your perspective. In any case, here are 5 things I wish I knew before I started my business.


1) Make Decisions Based on Your Commitments, Not How You Feel 

Jaden working on her book

I learned this particular life lesson from billionaire real estate genius, Ryan Serhant. Feelings are unpredictable. Someone else’s bad day (or even crappy weather!) can sway your emotions. So why make decisions based on your current emotional state, which can change like the wind?

Instead, make decisions based on the promises and commitments that you make to yourself and others. Your word is who you are. It’s all that you have when you strip everything else away. That doesn’t mean you can’t change your mind or say no, but that you should only aim to make obligations and choices that are in alignment with you, and then follow through. 


2) Body First, Mind Follows

Jaden on Pampered Chef

I got good at TV by showing up, messing up, and showing up again.

You can research forever, but you have to take action in order to make progress. Confidence and experience doesn’t come from success. It comes from failing time and time again, getting back up, adjusting course and moving forward. Learning from experience and failure creates confidence, so don’t be afraid to get it wrong.

When kids first learn to ride a bike, they don’t read book after book on “how to ride a bike.” They ride, fall off, and then their parents encourage them to hop back on and pedal. After a number of wobbles and spills, their body gets used to coordinating and balancing on wheels. They create muscle memory and soon become confident.

The same is true of business. Put on your superhero cape, your big boy pants and get your body moving. Take action. Do the work. With enough time in, your mind will catch up.    


3) Be Brave, Do It Afraid

Jaden with a Burmese Python

Just me holding a snake, trying not to freak out.

This is similar to #2, but it’s such an important lesson that it’s worth diving into. “Be brave, do it afraid” is my friend Brandon’s life motto. Brandon is a former Cirque du Soleil performer, professional juggler, and record-holding diver who can hold his breath for over 20 minutes underwater (while performing!)

His father taught him that the fear will always be there. But take action anyway. Freedom, results and possibilities lie just on the other side. 

There’s pain (and fear) in action, but there’s also pain in NO action. (You miss every shot you don’t take.) You might as well take the choice that results in growth, instead of succumbing to fear and allowing it to immobilize you. 


4) Have a Force Field 

Riley & Jaden

Sometimes my dog is my force field.

This is something I practice regularly.

Be protective of who you let in and what takes up space in your brain. Don’t let the wrong people take up precious real estate in your body, heart and mind. Guard it fiercely!   

Close your eyes and imagine a powerful, invisible force field that surrounds you. Only let in the people, thoughts and things that bring good intentions, positive energy and joy. Everything and everyone else stays outside. You can still interact with them (if you wish), but they can never be allowed to enter and occupy your space.


5) Hook Up Your Tomorrow Self 

Jaden making food

Feeding my future self by prepping healthy meals.

One of my mentors, Jen Gottlieb from Super Connector Media, once told me, “I only work for one person. That person is me, 10 years from now.” What a profound piece of advice! 

Be in service of your future self. What can you do TODAY to hook up your future self?

For example, if my commitment is to go to the gym every morning, what can I do TONIGHT to make it incredibly easy for my tomorrow self to fulfill that promise? I’d probably lay out my gym clothes (sometimes I even sleep with them on!) and go to bed early. You look out for your friends and family. It’s time to start looking out for future you!


I Hope This Helps You

Jaden with buddha bowl

I hope these little tidbits of advice help you in your own life advancements!

Are there things you wish you knew before you started your career or took a significant path in life? Share those lessons in the comments, and maybe we can all help each other out. 

The post 5 Things I Wish I Knew Before I Started Steamy Kitchen appeared first on Steamy Kitchen Recipes Giveaways.


from Steamy Kitchen Recipes Giveaways https://ift.tt/Z1so4Ob
via New Kitchen Special

Monday, June 3, 2024

Are Keurig Coffee Pods Recyclable? How to Recycle K-Cups

Maybe you have a Keurig machine, use one at work, or are considering buying one, but you have one main concern: how much waste do single-serve coffee pods add to the world? And what’s the best way to dispose of them? These are great questions, and ones that you’re awesome for asking. So, worry not, environmentally-savvy coffee lovers. We’re here to answer the ultimate burning question today: are Keurig pods recyclable? 

The answer? Yes, they are, but with a few side notes. Let’s get into it, shall we?

Keurig Pods and Recycling

Good news! Keurig pods are indeed recyclable, but with a few asterisks. Most coffee pods follow a similar design: plastic, paper filter, aluminum lid. While all of these materials can are recyclable, it’s not quite as simple as just tossing them into the recycling bin and calling it a day.

Breaking Down the Keurig Pods

Keurig Pods parts

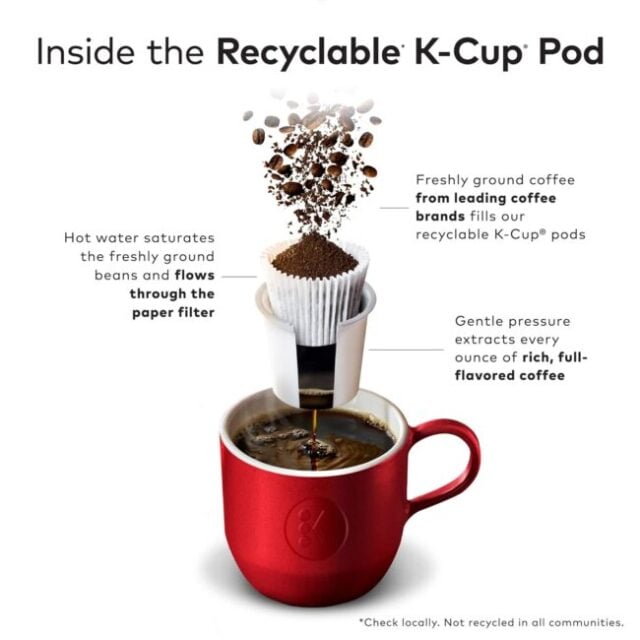
  1. Plastic Cup: Keurig pods are made of #5 (polypropylene) plastic, which Keurig chose because it is an easily recyclable material in a large majority of communities. But, not all Material Recycling Facilities accept these cups, so it’s good to check in with your local facility to make sure they can handle them before you pop them in the recycle bin.
  2. Coffee Grinds: Coffee grinds are organic and can be composted. Got a backyard compost bin? Give your garden a caffeine boost! If you don’t have a compost bin, you can discard them into the trash.
  3. Paper Cup: Keurig’s recyclable pods have a paper filter cup that is also biodegradable, so you can choose to compost or recycle it!
  4. Aluminum Lid: The aluminum top can be recycled, but be sure to separate it from the pod. It cannot be recycled while it’s soiled, so also be sure to clean off any coffee grounds before you add it to your recycling bin.

A Simple Way to Recycle K-Cups

Here’s how to recycle your Keurig pods:

  1. Peel: Remove the aluminum lid from the top of the pod.
  2. Empty: Scoop out the coffee grinds and either compost them or throw them into the trash.
  3. Recycle: Toss the plastic cup into the recycling bin (but only if your local service accepts it).

Alternatives for the Eco-Conscious Coffee Lover

Just because something is recyclable doesn’t mean it’s good for the environment. While Keurig Green Mountain and similar brands have made a lot of changes to create more sustainable product options, the truth is that single-use coffee pods do contribute to a large amount of waste.

To combat this, there are other sustainable options available:

  • Reusable Coffee Pods: Yes, Keurig does make reusable K-Cups that can be filled with your own coffee grounds, which means you can drastically cut down on waste! 
  • Compostable Coffee Pods: Get yourself some pods that are made entirely of compostable materials. While not suitable for a backyard compost bin, they can be commercially composted, and they’re more eco-friendly.
  • The Pour-Over Method / French Press: If the thought of potentially contributing to more waste in the world plagues your brain, you can simplify your coffee-making process by BEING the coffee maker and using the pour-over method. Just manually pour hot water over your choice of coffee grounds, no machine needed. Alternatively, French presses are great for submerging your coffee beans or coarsely ground coffee (and any other additions) in hot water and then filtering out just the water after its infusion. 
  • The K-Cycle® Recycling & Composting Program: In order to keep K-Cups out of landfills, Keurig has created a recycling program that gives them second life! If you sign up for this service, Keurig will send you a recycling bin just for your K-Cups! Once you fill it up and send it back, Keurig will recycle those cups into new K-Cups, cutting down significantly on new materials, and drastically reducing your environmental footprint.

So, to answer your question, while Keurig pods can be recycled, it does requires a little effort and knowledge in order to do so, and it’s not completely waste-free, BUT there are more sustainable options available to your so you can keep the eco-guilt at bay!


Keurig pods and a coffee cup

FAQ:

Are all Keurig K-Cups recyclable?

Technically, they are. Keurig K-Cups are made with plastic, aluminum, and organic materials, which are all recyclable materials. But, the key is to separate these components before putting them in the blue bin and to make sure you’re local community is able to process coffee pods, as they are too small for the screening process for some facilities.

What are some of the best options for reducing coffee pod waste?

Check out Keurig’s reusable coffee pods, which you can fill with your own ground coffee. You can also seek out compostable coffee pods, which can be composted through a commercial composting service.

How do I prepare a Keurig pod for recycling?

It’s super easy! Just peel off the foil lid, empty out any remaining coffee grounds (compost them if you can), and then rinse out the plastic cup.

Can I recycle the foil lid of a Keurig pod?

Yes, the aluminum foil lid is recyclable. Just make sure to peel it off completely and rinse any remaining coffee residue off of it before placing it in your recycling bin.

Are there any reusable pod models?

Yep! Keurig also makes reusable pods from stainless steel and other durable materials that can be filled with your favorite ground coffee and used multiple times. This is a super convenient and eco-friendly alternative to single-use pods.

What are some creative ways to give old K-Cups a second life?

Get crafty! Clean out your plastic pods and use them as seed starters for your garden! You can also use them as small storage containers, or get REALLY creative and make them into Christmas ornaments. The possibilities are literally endless.


Keurig Machine

Brew Responsibly

So yes, you CAN enjoy your cup of coffee while lowering your carbon footprint by embracing recyclable coffee pods and exploring creative ways to repurpose your old K-Cups to maintain a healthier planet. What are some of your favorite ways to enjoy your coffee while lessening your environmental impact? Do you have a creative way of recycling coffee pods? We’d love to hear all about it in the comments!

The post Are Keurig Coffee Pods Recyclable? How to Recycle K-Cups appeared first on Steamy Kitchen Recipes Giveaways.


from Steamy Kitchen Recipes Giveaways https://ift.tt/HAPubGc
via New Kitchen Special

My Favorite Steamy Kitchen Memories from Over the Years

As Steamy Kitchen approaches nearly 2 decades of being around, it’s crazy to think that I’ve been doing this almost as long as blogging has been a thing. And even moreso, that some of you have been following my journey since the early stages of Steamy! (Whenever you joined on, know that I appreciate you.)

And when I think back, I have literally thousands of memories that stand out in my mind. Beautiful moments. Incredible accomplishments. Amazing people. The list goes on and on. 

To celebrate Steamy being legally an adult (but still not old enough to drink), I thought it would be fun to take a look back and reflect on some of my favorite moments along the way. Let’s dive into some beloved Steamy throwbacks.


When We Were New At Everything

Jaden with a camera

When Steamy first started, I wasn’t quite as digitally-savvy as I am these days. I had to teach myself how to blog, how to self-publish cookbooks, how to get good on camera, and of course, how to photograph food! It was a LOT of learning, but I made it happen! Here’s my initial setup before I realized that natural light is the best light you can get for food photography.


When We Were Growing Our Own Food

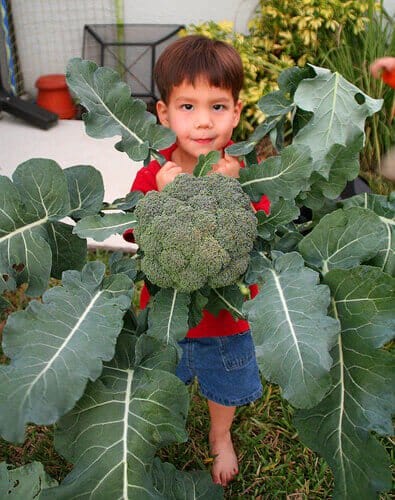
Nathan with broccoli

If you’ve been around long enough, you might remember when Steamy had its own hydroponic garden and chickens who laid fresh eggs! Here are some photos of my kids with some of the best parts of our sustainable lifestyle. 


When We Used to Throw Parties With Ree & Elise

Jaden, Ree, and Elise

In the early days of blogging, Ree of The Pioneer Woman, Elise of Simply Recipes, and I used to get together at functions and events, and though we couldn’t be more different personality-wise, we were like the Charlie’s Angels of food blogging. Eventually we realized we all had a desire to host huge parties, so that’s what we decided to do! And they were always a great time!

It’s amazing to think of how much we’ve each grown since.


When Steamy Wrote a Book!

One of Steamy’s BIGGEST milestones was writing the Steamy Kitchen Cookbook. That was such an amazing experience! Here I am at my very first ever book signing, and prepping to do a segment for The Today Show.


When We Got To Hang with Jewel & David Tutera

In 2011, Hallmark asked singer Jewel, wedding guru David Tutera and me to hang out for the day and share some holiday ideas at Jewel’s ranch in Texas, and I still pinch myself whenever I remember this. Did that REALLY HAPPEN?? Yes! It did! 


When Steamy Got Its Own Bowls

Our signature Buddha Bowl got its start in 2020 with the help of artist Aneela Dias-D’Sousa, who sculpted each amazing bowl by hand! These beautiful bowls have been one of my top favorite parts of our brand, and they get used almost daily at my house.


What Are Your Favorite Steamy Kitchen Memories?

What about you? Do you have any favorite moments in Steamy Kitchen history? If so, we’d love to hear all about them! Be sure to leave a comment below. And, as always, thank you so much for being a part of this journey with me. I couldn’t have done it without your love and support. 


The post My Favorite Steamy Kitchen Memories from Over the Years appeared first on Steamy Kitchen Recipes Giveaways.


from Steamy Kitchen Recipes Giveaways https://ift.tt/i5YaWwc
via New Kitchen Special